前言
氣泡元件在實務中非常常見,無論網頁還是 App 裡到處可見:
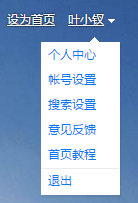
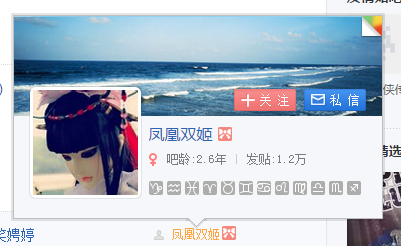
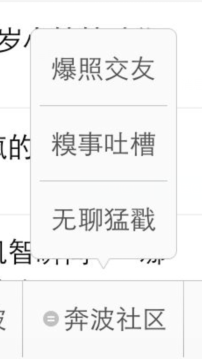
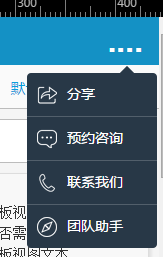
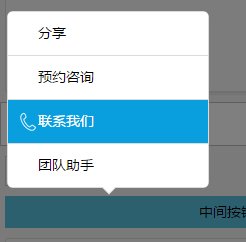
這裡說的氣泡元件指的是列表型氣泡,以下就 DOM 結構、CSS 實作、JS 封裝三部分做個討論,最後補幾個細節說明。(作者本身 CSS 也是初學,歡迎指正。)
元件分類
就本質而言,氣泡屬於「彈出層」類元件,因此具備這些特性:
① 佈局脫離文檔流
② 可以有遮罩,並可設定點擊遮罩是否關閉
③ 可選特性包括瀏覽器回退鍵關閉、顯示與隱藏動畫
它比較特別的地方則是:
① 不居中定位
② 有一個箭頭標識,可以設在上方或下方
③ 因為箭頭是相對某個元素而言(通常是某個按鈕),所以必須有一個 triggerEl
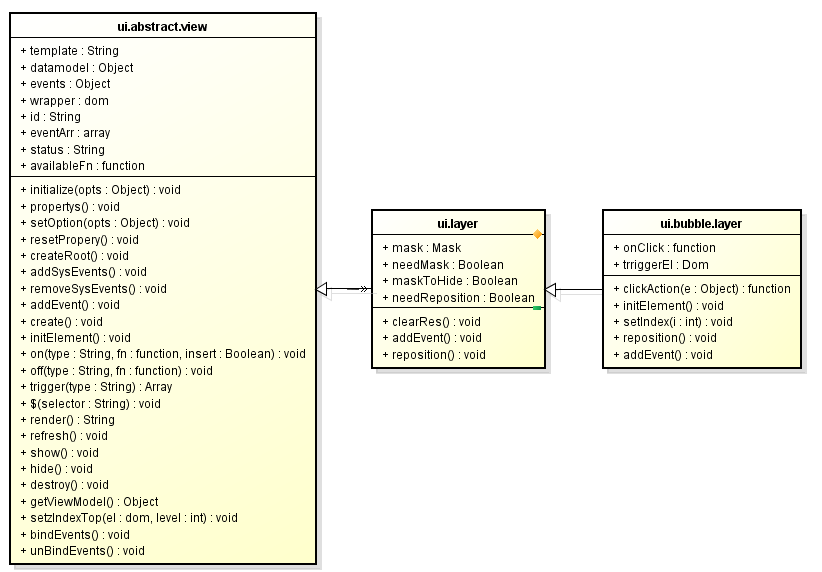
由此看來,我們的元件命名為 BubbleLayer,並且應該繼承自一個通用的 Layer。
而 Layer 最少會有這些通用能力:建立(create)、顯示(show)、隱藏(hide)、銷毀(destroy)。但這幾項並不是 Layer 獨有的,而是所有元件共通的行為,所以 Layer 之上還該有一個 AbstractView 抽象元件。繼承關係大致如下:
DOM 層面:最簡單的實作
單看 DOM,一個簡單的 ul 就能勝任:
<ul class="cui-bubble-layer" style="position: absolute; top: 110px; left: 220px;">
<li data-index="0" data-flag="c">價格:¥35</li>
<li data-index="1" data-flag="c">評分:80</li>
<li data-index="2" data-flag="c">級別:5</li>
</ul>
再補上相關 CSS:
.cui-bubble-layer {
    background: #f2f2f2;
    border: #bcbcbc 1px solid;
    border-radius: 3px
}
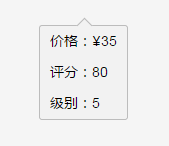
效果如下:

完整的靜態版本:
<!doctype html>
<html>
<head>
<meta charset="utf-8" />
<title>Blade Demo</title>
<meta name="viewport" content="width=device-width,initial-scale=1.0, minimum-scale=1.0, maximum-scale=1.0, user-scalable=no">
<meta content="telephone=no" name="format-detection" />
<style type="text/css">
body, button, input, select, textarea { font: 400 14px/1.5 Arial, "Lucida Grande", Verdana, "Microsoft YaHei", hei; }
body, div, dl, dt, dd, ul, ol, li, h1, h2, h3, h4, h5, h6, pre, code, form, fieldset, legend, input, textarea, p, blockquote, th, td, hr, button, article, aside, details, figcaption, figure, footer, header, hgroup, menu, nav, section { margin: 0; padding: 0; }
body { background: #f5f5f5; }
ul, ol { list-style: none; }
.cui-bubble-layer { background: #f2f2f2; border: #bcbcbc 1px solid; border-radius: 3px; }
</style>
</head>
<body>
<ul class="cui-bubble-layer" style="position: absolute; top: 110px; left: 220px;">
<li data-index="0" data-flag="c">價格:¥35</li>
<li data-index="1" data-flag="c">評分:80</li>
<li data-index="2" data-flag="c">級別:5</li>
</ul>
</body>
</html>
接著用偽類做出箭頭,稍微調一下樣式就基本成形了:
.cui-bubble-layer:before {
    position: absolute; content: "";
    width: 10px; height: 10px;
    -webkit-transform: rotate(45deg);
    background: #f2f2f2;
    border-top: #bcbcbc 1px solid;
    border-left: #bcbcbc 1px solid;
    top: -6px; left: 50%; margin-left: -5px; z-index: 1;
}
原理是設一個絕對定位的方形,只給其中兩個邊加上框線,再旋轉 45 度,就變成一個小三角。
不足與擴展方向
上面作為基本實作沒問題,但實際場景會暴露兩個不足:
① ul 外層需要一個包裹層,用 up 或 down 的 class 來決定箭頭朝上還是朝下。
② 這裡不能用偽類。因為小三角並不一定固定在中間,它具有滑動特性——位置需要由 JS 控制,所以它必須是一個真實標籤。
於是結構應該調整成這樣:
<section class="cui-bubble-layer up-or-down-class">
<i class="cui-icon-triangle"></i>
<ul>
<li data-index="0" data-flag="c">價格:¥35</li>
<li data-index="1" data-flag="c">評分:80</li>
<li data-index="2" data-flag="c">級別:5</li>
</ul>
</section>
根元素決定 up 或 down,i 標籤據此選擇方向,並且可以被 JS 操作位置。
但真實情況還要更複雜一點:這個元件需要一個位於 ul 之上的容器,這樣容器裡裝的就不一定是 ul,換成別的結構也行。其次,在手機上可視項目在 4S 這種小螢幕上不會超過 5 個,往往只有 4 個,所以容器上應該加上 overflow 之類的可捲動屬性。
回歸元件本體:最終結構
考慮到它繼承自 Layer,可以形成這樣的結構:
<section class="cui-pop cui-bubble-layer">
<i class="cui-pop-triangle"></i>
<div class="cui-pop-head">
</div>
<div class="cui-pop-body">
<ul>
<li data-index="0" data-flag="c">價格:¥35</li>
<li data-index="1" data-flag="c">評分:80</li>
<li data-index="2" data-flag="c">級別:5</li>
</ul>
</div>
<div class="cui-pop-footer">
</div>
</section>
這其實也可以作為整個彈出層類的基本骨架,上面能做的擴展很多。而單就氣泡元件而言,結構是:
<section class="cui-pop cui-bubble-layer">
<i class="cui-pop-triangle"></i>
<div class="cui-pop-body">
<ul>
<li data-index="0" data-flag="c">價格:¥35</li>
<li data-index="1" data-flag="c">評分:80</li>
<li data-index="2" data-flag="c">級別:5</li>
</ul>
</div>
</section>
JS 層面的實作
這裡沿用 blade 的繼承機制,細節可參考作者關於前端 MVC 與分層的說明。
模板
這部分主題是重構,所以重點在 CSS。先產生模板:
<section class="cui-pop <%=wrapperClass %> <%if(dir == 'up'){ %> <%=upClass %> <% } else { %> <%=downClass %> <% } %>">
<i class="cui-pop-triangle"></i>
<div class="cui-pop-body">
<ul class="cui-pop-list <%=itemStyleClass %>">
<% for(var i = 0, len = data.length; i < len; i++) { %>
<% var itemData = data[i]; %>
<li data-index="<%=i%>" data-flag="c" class="<% if(index == i){ %><%=curClass %><%} %>" >
<%if(typeof itemFn == 'function') { %><%=itemFn.call(itemData) %> <% } else { %><%=itemData.name%><%} %>
<% } %>
</ul>
</div>
</section>
這裡留了幾個定制點:wrapperClass 讓業務團隊能替根元素加上自己的 class 以定製樣式;列表 ul 的 className 同樣可配置;預設顯示傳入項目的 name 欄位,但使用者可以傳一個 itemFn 回呼來自訂渲染。若還不夠,整個模板也能作為參數傳入。
JS 實作
因為繼承關係,大部分工作已經完成,只需在關鍵位置補上程式碼:
define(['UILayer', getAppUITemplatePath('ui.bubble.layer')], function (UILayer, template) {
    return _.inherit(UILayer, {
        propertys: function ($super) {
            $super();
            this.template = template;
            this.needMask = false;

            this.datamodel = {
                data: [],
                wrapperClass: 'cui-bubble-layer',
                upClass: 'cui-pop--triangle-up',
                downClass: 'cui-pop--triangle-down',
                curClass: 'active',
                itemStyleClass: '',
                needBorder: true,
                index: -1,
                dir: 'up'  // 箭頭方向預設值
            };

            this.events = {
                'click .cui-pop-list>li': 'clickAction'
            };

            this.onClick = function (data, index, el, e) {
                console.log(arguments);
            };

            this.width = null;

            // 三角圖示偏移量
            this.triangleLeft = null;
            this.triangleRight = null;

            this.triggerEl = null;
        },

        initialize: function ($super, opts) {
            $super(opts);
        },

        createRoot: function (html) {
            this.$el = $(html).hide().attr('id', this.id);
        },

        clickAction: function (e) {
            var el = $(e.currentTarget);
            var i = el.attr('data-index');
            var data = this.datamodel.data[i];
            this.onClick.call(this, data, i, el, e);
        },

        initElement: function () {
            this.el = this.$el;
            this.triangleEl = this.$('.cui-pop-triangle');
            this.windowWidth = $(window).width();
        },

        setIndex: function (i) {
            var curClass = this.datamodel.curClass;
            i = parseInt(i);
            if (i < 0 || i > this.datamodel.data.length || i == this.datamodel.index) return;
            this.datamodel.index = i;

            // 這裡不透過 datamodel 變更去驅動整個 DOM 更新,成本太高
            this.$('.cui-pop-list li').removeClass(curClass);
            this.$('li[data-index="' + i + '"]').addClass(curClass);
        },

        // 位置定位
        reposition: function () {
            if (!this.triggerEl) return;
            var offset = this.triggerEl.offset();
            var step = 6, w = offset.width - step;
            var top = 0, left = 0, right;
            if (this.datamodel.dir == 'up') {
                top = (offset.top + offset.height + 8) + 'px';
            } else {
                top = (offset.top - this.el.offset().height - 8) + 'px';
            }

            left = (offset.left + 2) + 'px';

            if (offset.left + (parseInt(this.width) || w) > this.windowWidth) {
                this.el.css({ width: this.width || w, top: top, right: '2px' });
            } else {
                this.el.css({ width: this.width || w, top: top, left: left });
            }

            if (this.triangleLeft) {
                this.triangleEl.css({ 'left': this.triangleLeft, 'right': 'auto' });
            }
            if (this.triangleRight) {
                this.triangleEl.css({ 'right': this.triangleRight, 'left': 'auto' });
            }
        },

        addEvent: function ($super) {
            $super();
            this.on('onCreate', function () {
                this.$el.removeClass('cui-layer');
                this.$el.css({ position: 'absolute' });
            });
            this.on('onShow', function () {
                this.setzIndexTop(this.el);
            });
        }
    });
});
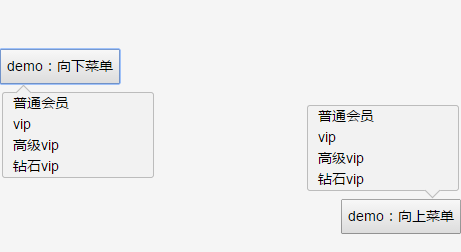
呼叫端可以寫得很簡單:
'click .demo1': function (e) {
    if (!this.demo1) {
        var data = [{ name: '<span class="center">普通會員</span>' },
                    { name: '<span class="center">vip</span>' },
                    { name: '<span class="center">高級vip</span>' },
                    { name: '<span class="center">鑽石vip</span>'}];
        this.list = new UIBubbleLayer({
            datamodel: { data: data },
            triggerEl: $(e.currentTarget),
            width: '150px',
            triangleLeft: '20px'
        });
    }
    this.list.show();
}
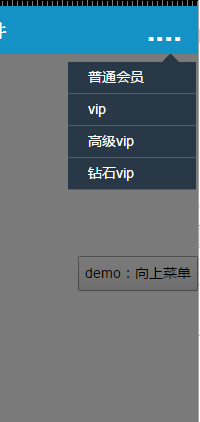
稍作修改就能變成另一種樣子:
但還有個場景得處理:項目過多過長時怎麼辦?
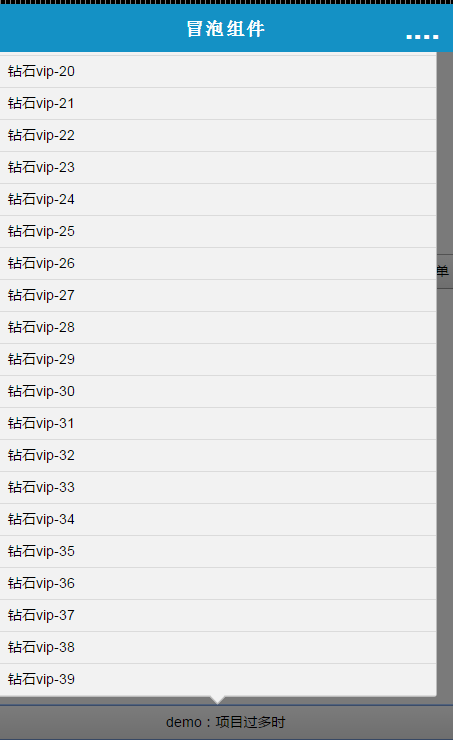
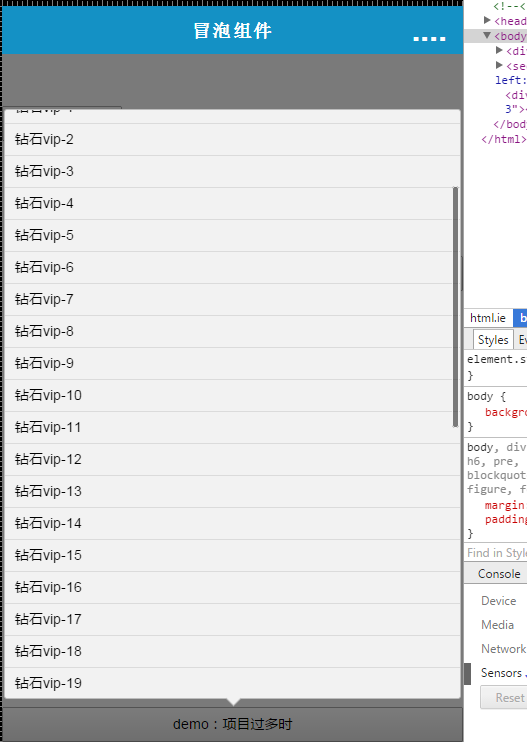
處理方式有兩種:一是直接傳入 maxHeight,超出就出現捲軸;二是動態計算元件與可視區域的關係。這裡採用後者,為元件新增一個 checkHeightOverflow 介面。
這個介面可以再拆成幾段:一個檢測可視區域的 isSizeOverflow(允許使用者覆寫),以及超框時的處理邏輯 handleSizeOverflow。考慮到超出的未必只有高度,這裡把 height 改成了 Size。另外因為涉及資源銷毀,還會新增一個 hide 介面。
isSizeOverflow: function () {
    if (!this.el) return false;
    if (this.el.height() > this.windowHeight * 0.8) return true;
    return false;
},

handleSizeOverflow: function () {
    if (!this.isSizeOverflow()) return;

    this.listWrapper.css({
        height: (parseInt(this.windowHeight * 0.8) + 'px'),
        overflow: 'hidden',
        position: 'relative'
    });

    this.listEl.css({ position: 'absolute', width: '100%' });

    // 呼叫前需要重置位置
    this.reposition();

    this.scroll = new UIScroll({
        wrapper: this.listWrapper,
        scroller: this.listEl
    });
},

checkSizeOverflow: function () {
    this.handleSizeOverflow();
},

addEvent: function ($super) {
    $super();
    this.on('onCreate', function () {
        this.$el.removeClass('cui-layer');
        this.$el.css({ position: 'absolute' });
    });
    this.on('onShow', function () {
        // 檢查可視區域是否超出
        this.checkSizeOverflow();
        this.setzIndexTop(this.el);
    });
    this.on('onHide', function () {
        if (this.scroll) this.scroll.destroy();
    });
}
最後再實作一個定制需求:把氣泡換成黑色主題。
結語
今天的分享就到這裡。因為 CSS3 我也還在學習階段,文中有誤歡迎提出。至於元件動畫,我計劃放到 Layer 基類裡統一處理,那時會一併介紹 CSS3 的動畫技術,這裡就不展開了。