Canvas 逐幀動畫實作:drawImage 加 setTimeout 的經典組合
編輯:HTML5教程
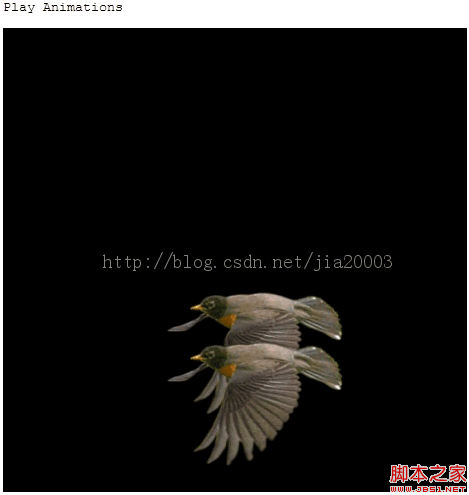
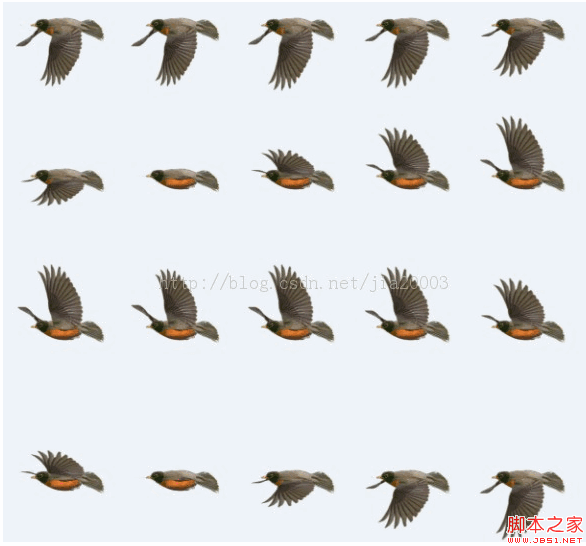
用 Canvas 做動畫,最直覺的其中一種做法就是「精靈圖逐幀播放」:準備一張把連續畫面排好的圖片,然後隨時間切換要畫哪一格,看起來就像動畫在跑。下面用一張 22 幀的大雁飛行圖來示範。
來源圖是一張 5×5 排列、共 22 格(最後一格留空)的拼圖:
兩個關鍵技術點
第一,計時器。setTimeout 的第一個參數是要執行的函式,第二個是間隔毫秒數。想跑約 30fps,就寫:
setTimeout(update, 1000/30);
第二,drawImage 的九參數形式。它能同時指定來源區域與目標區域,是裁切精靈圖的標準工具:
ctx.drawImage(myImage, offw, offh, width, height, x2, y2, width, height);
其中 offw, offh 是來源圖上的起始座標,width, height 是那一格的尺寸,x2, y2 是要畫到畫布上的位置。
程式碼
<!DOCTYPE html>
<html>
<head>
<meta http-equiv="X-UA-Compatible" content="chrome=IE8">
<meta http-equiv="Content-type" content="text/html;charset=UTF-8">
<title>Canvas Animation Demo</title>
<script>
var ctx = null;
var frame = 0;            // 目前幀序號,共 22 幀(5*5 + 2)
var imageReady = false;
var myImage = null;
var px = 300, py = 300;   // 第一隻
var x2 = 300, y2 = 0;     // 第二隻

window.onload = function() {
  var canvas = document.getElementById("animation_canvas");
  canvas.width  = canvas.parentNode.clientWidth;
  canvas.height = canvas.parentNode.clientHeight;
  if (!canvas.getContext) {
    console.log("Canvas not supported.");
    return;
  }
  ctx = canvas.getContext("2d");
  ctx.fillStyle = "black";
  ctx.fillRect(0, 0, canvas.width, canvas.height);

  myImage = document.createElement('img');
  myImage.src = "../robin.png";
  myImage.onload = loaded();
}

function loaded() {
  imageReady = true;
  setTimeout(update, 1000/30);
}

function redraw() {
  ctx.clearRect(0, 0, 460, 460);
  ctx.fillStyle = "black";
  ctx.fillRect(0, 0, 460, 460);

  // 由幀序號算出來源格子的位置
  var height = myImage.naturalHeight / 5;
  var width  = myImage.naturalWidth  / 5;
  var row = Math.floor(frame / 5);
  var col = frame - row * 5;
  var offw = col * width;
  var offh = row * height;

  // 第一隻往左上飛
  px -= 5; py -= 5;
  if (px < -50) { px = 300; }
  if (py < -50) { py = 300; }
  ctx.drawImage(myImage, offw, offh, width, height, px, py, width, height);

  // 第二隻往右下飛
  x2 -= 5; y2 += 5;
  if (x2 < -50) { x2 = 300; y2 = 0; }
  ctx.drawImage(myImage, offw, offh, width, height, x2, y2, width, height);
}

function update() {
  redraw();
  frame++;
  if (frame >= 22) frame = 0;
  setTimeout(update, 1000/30);
}
</script>
</head>
<body>
<h1>HTML Canvas Animations Demo</h1>
<div id="my_painter">
<canvas id="animation_canvas"></canvas>
</div>
</body>
</html>
幾個實作上的提醒
幀序號換算成行列是這段程式的核心:row = Math.floor(frame / 5) 配合 col = frame - row * 5,就能把一維的計數器對應到二維的拼圖座標。如果你的素材是單行排列,直接把 row 固定為 0 即可。
另外,作者提到上傳透明 PNG 時遇到問題,所以範例用的是不透明素材。實作時透明背景其實完全可行,只要確認 clearRect 有確實執行、且沒有殘留的 fill 蓋掉透明區域即可。
換成自己的圖片時,記得把 frame >= 22 的 22 改成實際幀數,並確認圖片寬高能被列數與行數整除,否則會出現切格偏移的問題。
最後一點值得注意:範例用的是 setTimeout 而非 requestAnimationFrame。前者在分頁被切到背景時仍會依計畫觸發,容易與實際更新不同步;若追求順滑,改用 requestAnimationFrame 會讓節奏跟著螢幕刷新走。