HTML5 + CSS3 仿優酷:視頻截圖生成封面圖
編輯:HTML5教程
主流視頻站點都有這樣的設計:用戶上傳視頻後,可以從播放畫面中截取一幀作為封面圖,而不必再另外準備一張展示圖。這個功能帶來的體驗提升很明顯,而實現它的核心代碼其實只有寥寥幾行。
效果預覽
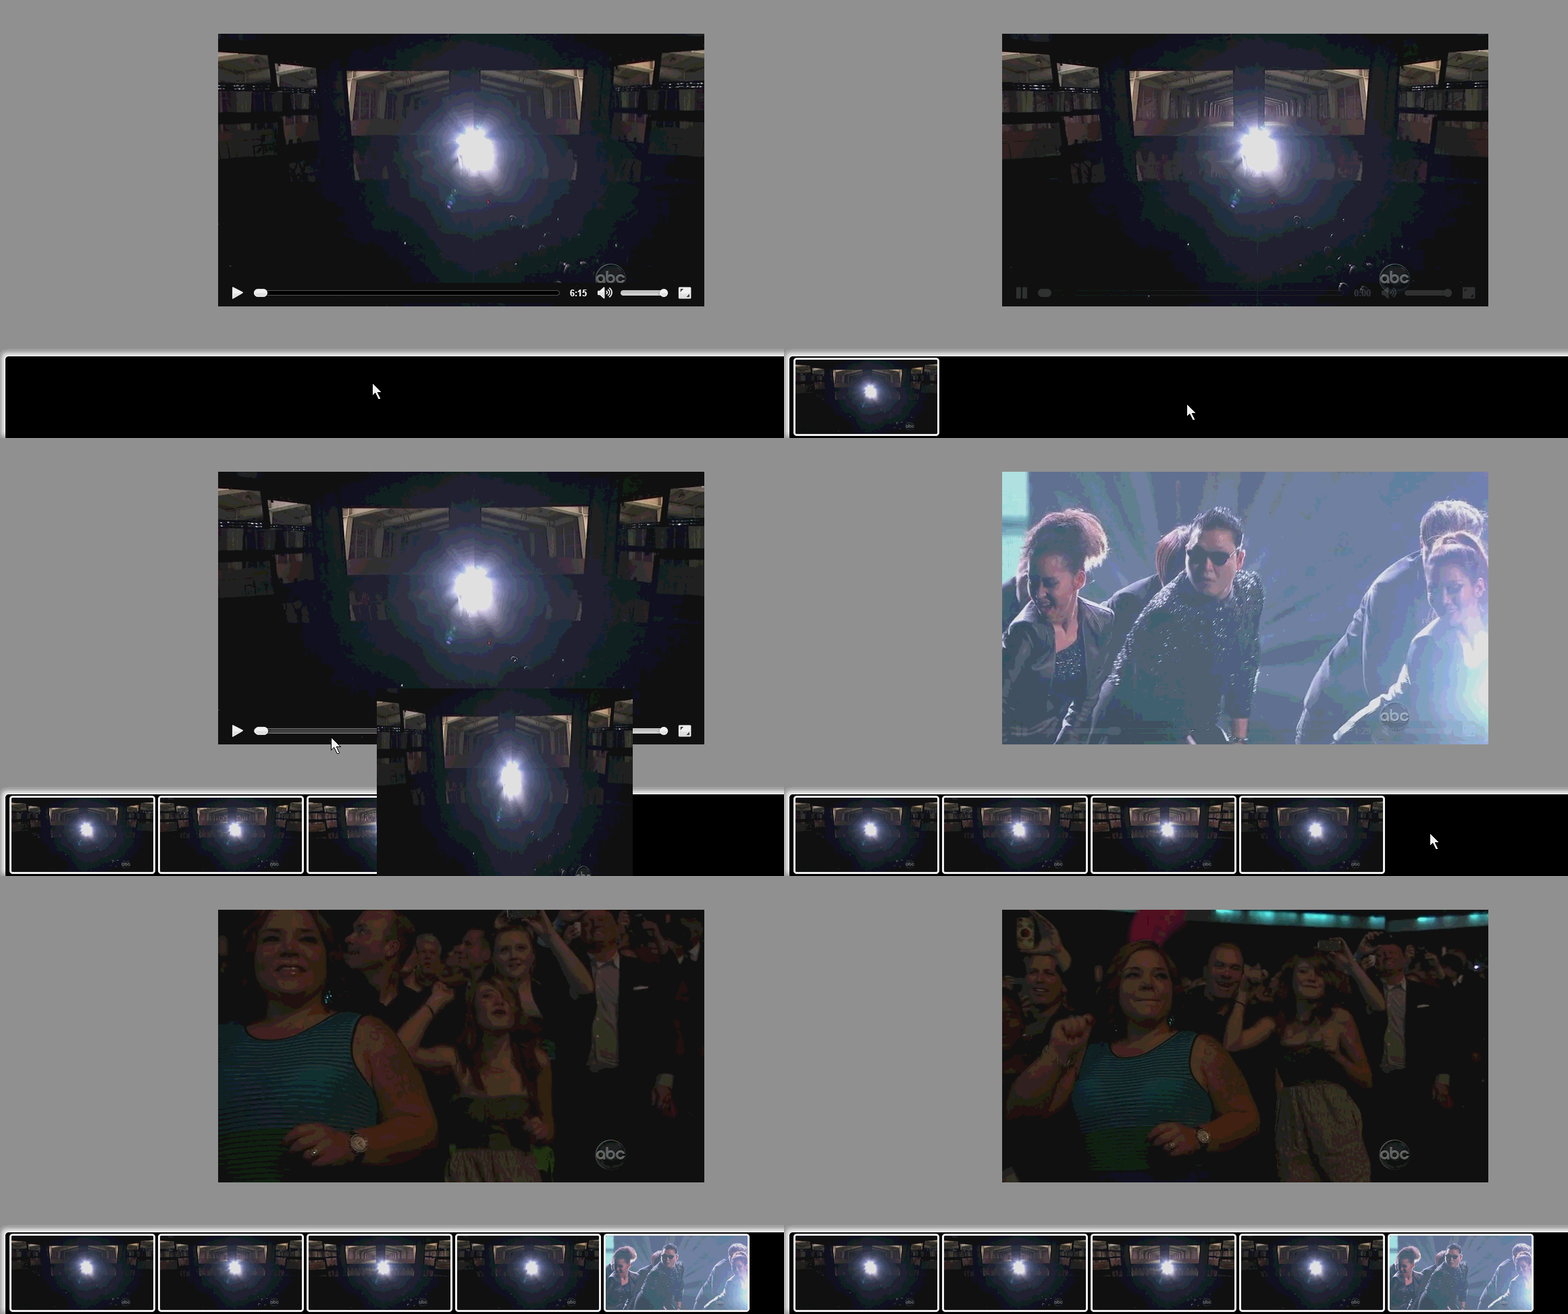
核心原理
_canvas = document.createElement("canvas");
_ctx = _canvas.getContext("2d");
_ctx.fillStyle = '#ffffff';
_ctx.fillRect(0, 0, _videoWidth, _videoWidth);
_ctx.drawImage(_video, 0, 0, _videoWidth, _videoHeight, 0, 0, _videoWidth, _videoHeight);
var dataUrl = _canvas.toDataURL("image/png");
關鍵點只有兩個:一是 ctx.drawImage() 的第一個參數可以直接傳入 video 對象,二是通過 canvas.toDataURL() 拿到 base64 數據,再賦值給 img 標籤的 src。抓住這兩點,剩下的都是常規操作。
HTML 與 CSS
<!DOCTYPE html>
<html>
<head>
<title></title>
<meta charset="utf-8">
<style type="text/css">
html { overflow: hidden; }
body { background-color: #999; }
video { display: block; margin: 60px auto 0; }
#shotBar {
  position: absolute;
  bottom: 5px;
  height: 120px;
  width: 98%;
  background-color: #000;
  box-shadow: -5px -5px 10px #fff;
  border-radius: 5px;
  padding: 2px;
  overflow: auto;
}
#shotBar img {
  border: 3px solid #fff;
  border-radius: 5px;
  height: 110px;
  width: 210px;
  margin-left: 4px;
}
</style>
<script type="text/javascript" src="../../../jquery-1.8.3.js"></script>
<script type="text/javascript" src="videoshot.js"></script>
<script type="text/javascript">
$(function () {
  ZhangHongyang.click2shot.init();
});
</script>
</head>
<body>
<video src="media/style.mp4" controls id="video"></video>
<div id="shotBar"></div>
</body>
</html>
結構與樣式都很樸素,重點在 JS。
JavaScript 實現
/**
 * Created with JetBrains WebStorm.
 * User: zhy
 * Date: 14-6-18
 * Time: 上午12:24
 */
var ZhangHongyang = {};
ZhangHongyang.click2shot = (function () {
  var _ID_VIDEO = "video";
  var _ID_SHOTBAR = "shotBar";
  var _videoWidth = 0;
  var _videoHeight = 0;
  var _canvas = null;
  var _ctx = null;
  var _video = null;

  function _init() {
    _canvas = document.createElement("canvas");
    _ctx = _canvas.getContext("2d");
    _video = document.getElementById(_ID_VIDEO);

    _video.addEventListener("canplay", function () {
      _canvas.width  = _videoWidth  = _video.videoWidth;
      _canvas.height = _videoHeight = _video.videoHeight;
      console.log(_videoWidth + " , " + _videoHeight);
      _ctx.fillStyle = '#ffffff';
      _ctx.fillRect(0, 0, _videoWidth, _videoWidth);
      $("#" + _ID_SHOTBAR).click(_click2shot);
      _video.removeEventListener("canplay", arguments.callee);
    });
  }

  function _click2shot(event) {
    _video.pause();
    _ctx.drawImage(_video, 0, 0, _videoWidth, _videoHeight, 0, 0, _videoWidth, _videoHeight);
    var dataUrl = _canvas.toDataURL("image/png");

    // 在 video 相同位置創建一張大圖
    var $imgBig = $("<img/>");
    $imgBig.width(_videoWidth)
          .height(_videoHeight)
          .css({
            position: "absolute",
            left: _video.offsetLeft,
            top: _video.offsetTop,
            width: _videoWidth + "px",
            height: _videoWidth + "px"
          })
          .attr("src", dataUrl);
    $("body").append($imgBig);

    // 創建縮略圖,準備加入 shotBar
    var $img = $("<img>");
    $img.attr("src", dataUrl);
    $(this).append($img);

    var offset = _getOffset($img[0]);
    $img.hide();

    // 用動畫把大圖「吸」進縮略圖位置
    $imgBig.animate({
      left: offset.x + "px",
      top: offset.y + "px",
      width: $img.width() + "px",
      height: $img.height() + "px"
    }, 200, function () {
      $img.attr("src", dataUrl).show();
      $imgBig.remove();
      _video.play();
    });
  }

  /**
   * 獲取元素相對於顯示區域的 left / top 偏移
   */
  function _getOffset(elem) {
    var pos = { x: elem.offsetLeft, y: elem.offsetTop };
    var offsetParent = elem.offsetParent;
    while (offsetParent) {
      pos.x += offsetParent.offsetLeft;
      pos.y += offsetParent.offsetTop;
      offsetParent = offsetParent.offsetParent;
    }
    return pos;
  }

  return { init: _init }
})();
兩個關鍵細節
第一,在 video 的 canplay 事件里取完屬性後,一定要調用 removeEventListener 解綁,否則每次暫停播放都會重複觸發回調。
第二,點擊截圖時會先暫停 video,並在原位置生成一張大圖,再用 jQuery 動畫把它移動到縮略圖位置,動畫結束後移除大圖、顯示縮略圖,這樣就形成了「畫面飛入相冊」的視覺效果。
另外還有一點很重要:canvas.toDataURL() 通常需要在服務器環境(http/https)下訪問才能正常工作,直接用 file:// 打開頁面可能會報安全性錯誤。把頁面部署到 Tomcat 或任意一個本地服務器上即可繞過。
拿到 dataUrl 之後,後續的上傳邏輯就可以按需自行補充了。
- 上一篇文章: 純 JS 打造 H5 觸屏版輪播器:從原理到完整實現
- 下一篇文章: HTML5 文件斷點續傳的實現原理與代碼解析