用 CSS 美化 HTML 表單控件:submit 與 button 的差異與樣式實作
編輯:HTML和Xhtml
一、兩種按鈕的基本語法
submit 按鈕——在 input 標籤上設定 type="submit":
<input name="" type="submit" value="提交" />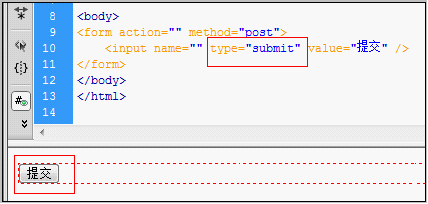
button 按鈕——把 type 改為 button:
<input name="" type="button" value="提交" />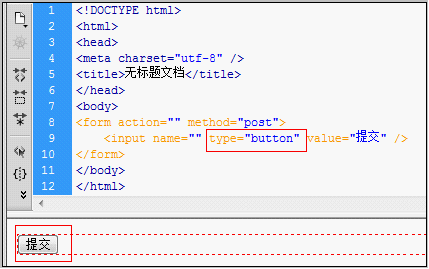
二、submit 與 button 的差別
本質上,type="button" 只是一顆普通按鈕,點了不會有任何預設行為;type="submit" 則會觸發表單送出。
從事 UI 的人特別要注意這一點:使用 submit 能提升頁面的易用性,因為表單內有 submit 按鈕時,使用者在輸入框按 Enter 就會送出表單。很多設計稿只用 button,結果頁面失去 Enter 鍵操作,鍵盤使用者與快速輸入的使用者都受到影響。
<input type="submit" name="b1" value="提交" onClick="bt_submit_onclick()">submit 會先執行 onClick,接著自動轉往 action 指定的位址,因此 onclick 在這裡其實可以省略。
<input type="button" name="b1" value="提交" onClick="bt_submit_onclick()">button 則是執行完 onClick 就結束,跳轉邏輯要自己寫在 JavaScript 裡,沒有 onClick 就什麼都不會發生。
若手邊只有 button 卻想它具有提交能力,可以在 onclick 裡手動觸發:
<input type="button" name="Button" value="按鈕" onClick="form1.action='a.jsp'; form1.submit();">或者做頁面跳轉:
<input type="button" name="Button" value="按鈕"
 onClick="javascript:window.location.href='你的網址'">
三、用背景圖美化按鈕
思路很單純:準備一張包含多種狀態的精靈圖,透過 background-position 切換,再把 input 的邊框歸零、指定寬高。
button 版素材:

<!DOCTYPE html>
<html>
<head>
<title>button 按鈕美化</title>
<style>
  html { width:100%; height:100%; }
  body {
    background:#fff; font-size:18px;
    font-family:"Arial","Tahoma","微軟正黑體";
    line-height:18px; padding:0; margin:0; text-align:center;
  }
  div { padding:18px }
  img { border:0; vertical-align:middle; padding:0; margin:0 }
  input, button {
    font-family:"Arial","Tahoma","微軟正黑體";
    border:0; vertical-align:middle;
    margin:8px; line-height:18px; font-size:18px;
  }
  .btn {
    width:140px; height:36px; line-height:18px; font-size:18px;
    background:url("bg26.jpg") no-repeat left top;
    color:#FFF; padding-bottom:4px;
  }
</style>
</head>
<body>
<form id="form1" name="form1" method="" action="/">
  <div>
    <input type="button" class="btn" value="按鈕"
      onmouseover="this.style.backgroundPosition='left -36px'"
      onmouseout="this.style.backgroundPosition='left top'" />
  </div>
</form>
</body>
</html>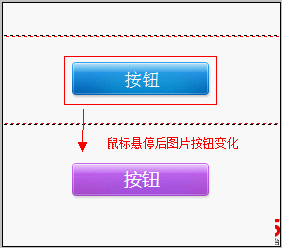
submit 版素材:

<!DOCTYPE html>
<html>
<head>
<title>submit 按鈕美化</title>
<style>
  html { width:100%; height:100%; }
  body {
    background:#fff; font-size:18px;
    font-family:"Arial","Tahoma","微軟正黑體";
    line-height:18px; padding:0; margin:0; text-align:center;
  }
  div { padding:18px }
  img { border:0; vertical-align:middle; padding:0; margin:0 }
  input, button {
    font-family:"Arial","Tahoma","微軟正黑體";
    border:0; vertical-align:middle;
    margin:8px; line-height:18px; font-size:18px;
  }
  .btns {
    width:143px; height:40px;
    background:url("bg11.jpg") no-repeat left top;
    color:#FFF;
  }
</style>
</head>
</body>
<p>
<form id="form1" name="form1" method="" action="/" target="_blank">
  <div>
    <input type="submit" class="btns" value="提交"
      onmouseover="this.style.backgroundPosition='left -40px'"
      onmouseout="this.style.backgroundPosition='left top'" />
  </div>
</form>
</p>
</body>
</html>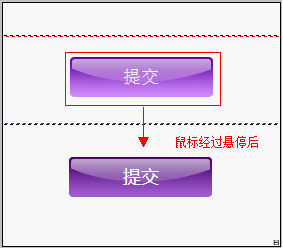
小結
美化的核心只有三步:邊框歸零、指定寬高、掛上背景圖,再用 hover 切換 background-position 做出按下的視覺回饋。切記 hover 的位移量要等於圖片中單一狀態的高度,否則會露出鄰格的像素。
- 上一篇文章: HTML 插入圖片的完整寫法與寬高調整
- 下一篇文章: CSS 虛線邊框怎麼設:border dashed 的屬性與跨標籤實作