模態視窗的視覺部分幾乎全靠 CSS,拖曳行為則只需要幾十行 JavaScript。這篇把兩邊都拆開來看。
一、先把樣子做出來
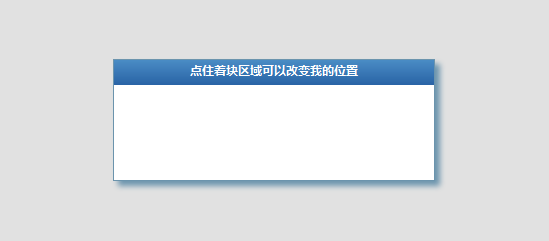
<div class="modal-background"></div>
<div class="modal-window">
  <div class="head">
    <center>按住這塊區域可以改變我的位置</center>
  </div>
</div>
.modal-background {
  background-color: #999999;
  bottom: 0; left: 0; right: 0; top: 0;
  opacity: 0.3;
  position: fixed;
  z-index: 1100;
}

.modal-window {
  background-color: #FFFFFF;
  border: 1px solid #6B94AD;
  box-shadow: 5px 5px 5px #6B94AD;
  font-family: 'Microsoft YaHei';
  font-size: 12px;
  height: 120px;
  width: 320px;
  left: 50%; top: 50%;
  margin-left: -160px;      /* 寬度的一半,用來置中 */
  margin-top: -60px;        /* 高度的一半 */
  position: fixed;
  z-index: 1110;
}

.modal-window .head {
  height: 25px;
  color: #fff;
  font-weight: 600;
  background-image: -moz-linear-gradient(top, #4A8CC5, #2963A5);
  background-image: -webkit-gradient(linear, left top, left bottom,
                   color-stop(0, #4A8CC5), color-stop(1, #2963A5));
  filter: progid:DXImageTransform.Microsoft.gradient(
            startColorstr='#4A8CC5', endColorstr='#2963A5', GradientType='0');
}
.modal-window .head center { padding-top: 2px; }
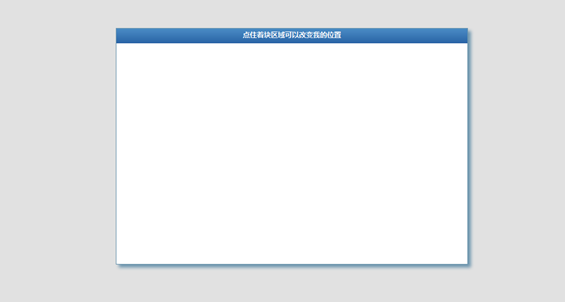
置中的關鍵是那組「left: 50% 加上負的 margin」組合。要換尺寸時,追加一個樣式類覆寫即可,同時調整 margin 維持置中:
<div class="modal-window list-window">...</div>

.list-window {
  width: 600px; height: 400px;
  margin-left: -300px; margin-top: -200px;
}
現在用 transform 可以少算兩次除法:
.modal-window {
  position: fixed;
  left: 50%; top: 50%;
  transform: translate(-50%, -50%);
}
二、拖曳行為
var left, top, $this;

$(document).delegate('.modal-window .head', 'mousedown', function (e) {
  left = e.clientX; top = e.clientY;
  $this = $(this).css('cursor', 'move');

  this.setCapture ? (
    this.setCapture(),
    this.onmousemove = function (ev) { mouseMove(ev || event); },
    this.onmouseup = mouseUp
  ) : $(document).bind("mousemove", mouseMove).bind("mouseup", mouseUp);
});

function mouseMove(e) {
  var target = $this.parents('.modal-window');
  var l = Math.max((e.clientX - left + Number(target.css('margin-left').replace(/px$/, '')) || 0),
                   -target.position().left);
  var t = Math.max((e.clientY - top + Number(target.css('margin-top').replace(/px$/, '')) || 0),
                   -target.position().top);
  l = Math.min(l, $(window).width()  - target.width()  - target.position().left);
  t = Math.min(t, $(window).height() - target.height() - target.position().top);

  left = e.clientX; top = e.clientY;
  target.css({ 'margin-left': l, 'margin-top': t });
}

function mouseUp(e) {
  var el = $this.css('cursor', 'default').get(0);
  el.releaseCapture ? (
    el.releaseCapture(),
    el.onmousemove = el.onmouseup = null
  ) : $(document).unbind("mousemove", mouseMove).unbind("mouseup", mouseUp);
}
三、原理三步驟
① 按下時(mousedown):在 document 上綁定 mousemove 與 mouseup。綁在 document 而非元素上,是因為滑鼠移動太快時,游標可能已經跑出元素範圍,綁在元素上會漏事件。
② 移動時(mousemove):用目前游標位置減去上次記錄的 left、top,得到位移量,累加到元素位置上,並用 Math.max / Math.min 夾在邊界內。
③ 放開時(mouseup):解除 document 上的綁定,拖曳結束。
核心概念是「把移動事件轉移到 document 上」,這樣即使游標移出視窗邊界,位置計算仍然正確。
四、setCapture 是什麼
setCapture 與 releaseCapture 是 IE 專屬方法,讓元素捕獲所有滑鼠事件。僅有 IE 有這兩個函式,標準瀏覽器用 document 綁定即可。這段程式碼用三元運算子同時處理兩條路徑,是為了相容舊 IE;現在可以直接刪掉這部分。
五、可以更好
既然看懂了原理,順手就能延伸——想讓拖曳改變視窗大小,在 mouseMove 裡改寬高即可。不過若重寫一次,有幾處值得調整:改用 pointerdown / pointermove / pointerup 統一處理滑鼠、觸控與手寫筆;用 transform 位移而非 margin 以免觸發重排;加上 -50% 置中後就不需要 margin 計算;記得在 pointerup 時呼叫 releasePointerCapture。另外别忘了 ESC 鍵關閉、focus trap 與 aria-modal 這些無障礙要件,以及 background 應該用 rgba 而非 opacity,才不會讓整個視窗內容一起變淡。
- 上一篇文章: 跨瀏覽器讀取下拉選單的值與文字
- 下一篇文章: JavaScript 進階技巧八則