對 Web 開發者來說,彈出框和提示框是天天要用的東西。表格的新增與編輯有兩種主流做法 —— 行內編輯與彈出框編輯;而操作成功、刪除確認這類回饋,則決定了一個系統給人的整體質感。本文把常見的三類元件整理成一篇:彈出框、確認取消提示框、訊息提示框。
一、Bootstrap 內建的彈出框
用過 jQuery UI 的人應該記得它的 dialog 組件。Bootstrap 也內建了類似能力,而且直接打包進 bootstrap.js 與 bootstrap.css,只要頁面引入了 Bootstrap 就能用,不必另外安裝。
1、頁面結構
<div class="modal fade" id="myModal" tabindex="-1" role="dialog" aria-labelledby="myModalLabel">
<div class="modal-dialog" role="document">
<div class="modal-content">
<div class="modal-header">
<button type="button" class="close" data-dismiss="modal" aria-label="Close">
<span aria-hidden="true">×</span>
</button>
<h4 class="modal-title" id="myModalLabel">新增</h4>
</div>
<div class="modal-body">
<div class="form-group">
<label for="txt_departmentname">部門名稱</label>
<input type="text" class="form-control" id="txt_departmentname" placeholder="部門名稱">
</div>
<div class="form-group">
<label for="txt_parentdepartment">上級部門</label>
<input type="text" class="form-control" id="txt_parentdepartment" placeholder="上級部門">
</div>
</div>
<div class="modal-footer">
<button type="button" class="btn btn-default" data-dismiss="modal">
<span class="glyphicon glyphicon-remove"></span>關閉
</button>
<button type="button" id="btn_submit" class="btn btn-primary" data-dismiss="modal">
<span class="glyphicon glyphicon-floppy-disk"></span>保存
</button>
</div>
</div>
</div>
</div>
最外層的 modal fade 負責隱藏與淡入動畫,真正決定尺寸的是第二層:
<div class="modal-dialog" role="document">            <!-- 預設尺寸 -->
<div class="modal-dialog modal-lg" role="document">   <!-- 加大 -->
<div class="modal-dialog modal-full" role="document"> <!-- 滿屏 -->
role="document" 是告訴輔助技術這是一份文件內容,屬於無障礙標記。
2、一行程式碼叫出來
$("#btn_add").click(function () {
    $("#myModalLabel").text("新增");
    $('#myModal').modal();
});
沒錯,就這麼一句。新增和編輯共用同一個彈出框時,只要改標題、填入不同的表單值即可。
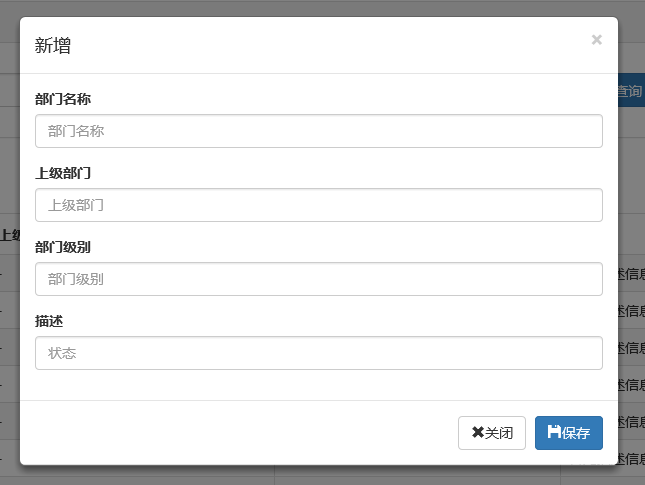
3、效果
新增:
編輯:
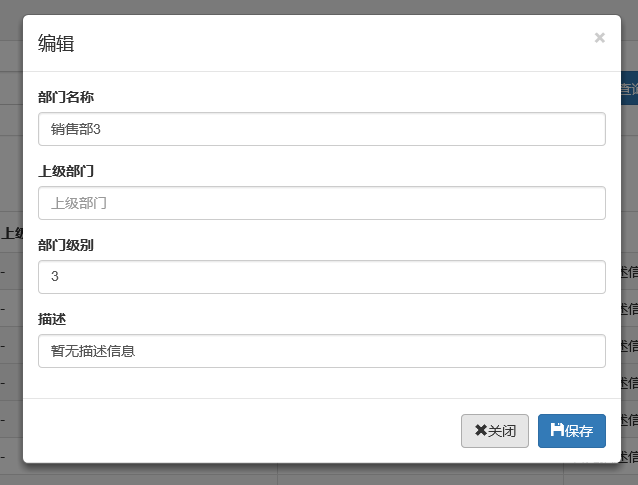
彈出後點擊遮罩或按 Esc 都能關閉,這個預設行為本身就讓操作手感好很多。
二、確認/取消提示框
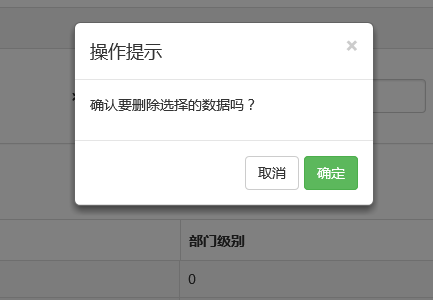
刪除、提交訂單這類「做錯代價很高」的操作,需要使用者明確點一次確定。實務上這種元件到處都要用,所以一定得封裝。
1、自己封裝一個 Ewin
(function ($) {
window.Ewin = function () {
var html = '<div id="[Id]" class="modal fade" role="dialog" aria-labelledby="modalLabel">' +
'<div class="modal-dialog modal-sm">' +
'<div class="modal-content">' +
'<div class="modal-header">' +
'<button type="button" class="close" data-dismiss="modal"><span aria-hidden="true">×</span></button>' +
'<h4 class="modal-title" id="modalLabel">[Title]</h4>' +
'</div>' +
'<div class="modal-body"><p>[Message]</p></div>' +
'<div class="modal-footer">' +
'<button type="button" class="btn btn-default cancel" data-dismiss="modal">[BtnCancel]</button>' +
'<button type="button" class="btn btn-primary ok" data-dismiss="modal">[BtnOk]</button>' +
'</div></div></div></div>';
var reg = new RegExp("\\[([^\\[\\]]*?)\\]", 'igm');
var generateId = function () { return 'mdl' + new Date().valueOf(); };
var init = function (options) {
options = $.extend({}, {
title: "操作提示", message: "提示內容",
btnok: "確定", btncl: "取消", width: 200, auto: false
}, options || {});
var modalId = generateId();
var content = html.replace(reg, function (node, key) {
return {
Id: modalId, Title: options.title, Message: options.message,
BtnOk: options.btnok, BtnCancel: options.btncl
}[key];
});
$('body').append(content);
// backdrop: static 表示點遮罩不關閉,強制使用者做選擇
$('#' + modalId).modal({ width: options.width, backdrop: 'static' });
$('#' + modalId).on('hide.bs.modal', function (e) {
$('body').find('#' + modalId).remove(); // 關閉後移除節點,避免 DOM 累積
});
return modalId;
};
return {
// 只有一個確定按鈕
alert: function (options) {
if (typeof options == 'string') { options = { message: options }; }
var id = init(options);
var modal = $('#' + id);
modal.find('.ok').removeClass('btn-success').addClass('btn-primary');
modal.find('.cancel').hide();
return {
id: id,
on: function (callback) {
if (callback instanceof Function) {
modal.find('.ok').click(function () { callback(true); });
}
},
hide: function (callback) {
if (callback instanceof Function) {
modal.on('hide.bs.modal', function (e) { callback(e); });
}
}
};
},
// 確定 + 取消
confirm: function (options) {
var id = init(options);
var modal = $('#' + id);
modal.find('.ok').removeClass('btn-primary').addClass('btn-success');
modal.find('.cancel').show();
return {
id: id,
on: function (callback) {
if (callback instanceof Function) {
modal.find('.ok').click(function () { callback(true); });
modal.find('.cancel').click(function () { callback(false); });
}
},
hide: function (callback) {
if (callback instanceof Function) {
modal.on('hide.bs.modal', function (e) { callback(e); });
}
}
};
}
};
}();
})(jQuery);
2、呼叫方式
$("#btn_delete").click(function () {
    var arrselections = $("#tb_departments").bootstrapTable('getSelections');
    if (arrselections.length <= 0) {
        toastr.warning('請選擇有效數據');
        return;
    }
    Ewin.confirm({ message: "確認要刪除選擇的數據嗎?" }).on(function (e) {
        if (!e) return; // 按取消甚麼都不做
        $.ajax({
            type: "post",
            url: "/api/DepartmentApi/Delete",
            data: { "": JSON.stringify(arrselections) },
            success: function (data, status) {
                if (status == "success") {
                    toastr.success('提交數據成功');
                    $("#tb_departments").bootstrapTable('refresh');
                }
            },
            error: function () { toastr.error('Error'); }
        });
    });
});
3、現成套件:bootbox
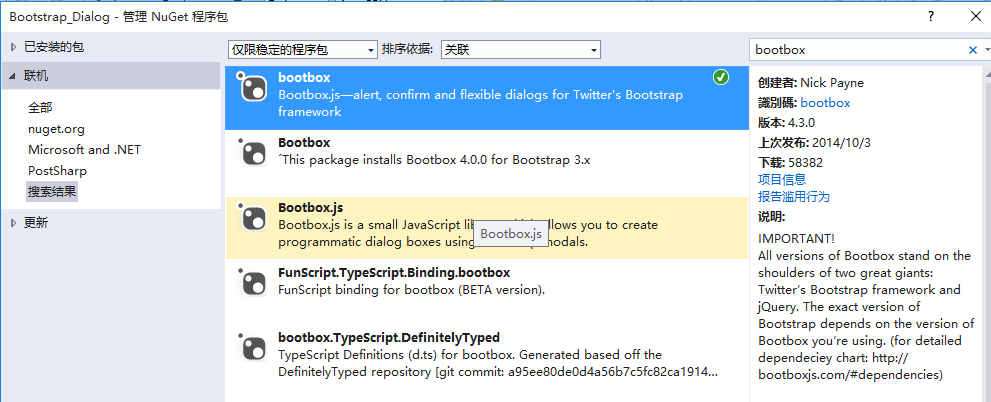
搜 Bootstrap 彈出元件時一定會遇到 bootbox,極簡,可以透過源碼或 Nuget 引入。
$("#btn_delete").click(function () {
    var arrselections = $("#tb_departments").bootstrapTable('getSelections');
    if (arrselections.length <= 0) { toastr.warning('請選擇有效數據'); return; }

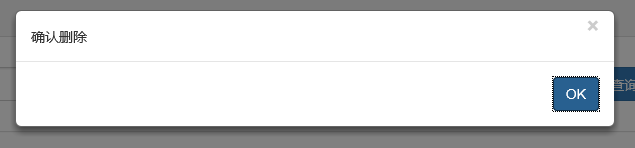
    bootbox.alert("確認刪除", function () { });
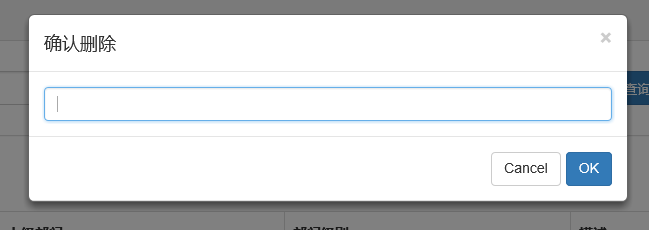
    bootbox.prompt("確認刪除", function (result) { });
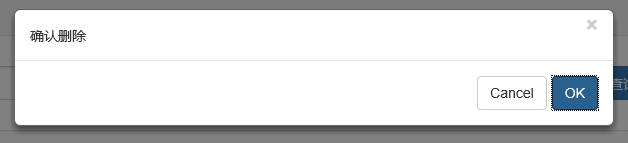
    bootbox.confirm("確認刪除", function (result) { });
});
三個方法的回呼參數不同:confirm 與 prompt 會回傳使用者輸入或布林值,alert 不回傳有意義的值。它最大的優點是樣式與 Bootstrap 完全統一。
4、視覺效果更強的 sweetalert
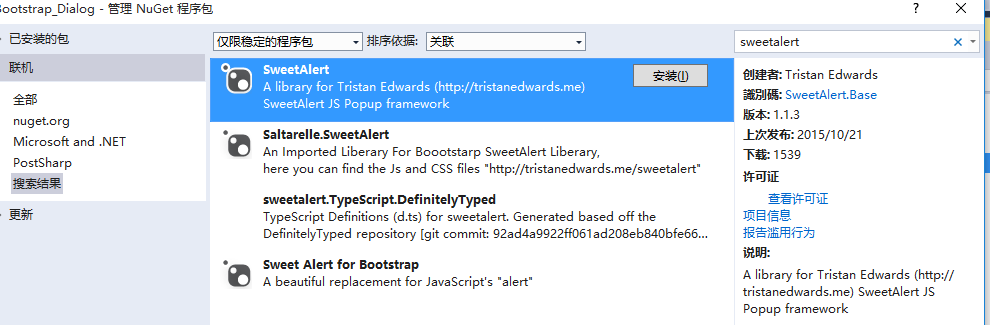
一樣透過 Nuget 安裝,然後在頁面引入樣式與腳本:
<link href="~/Styles/sweetalert.css" rel="stylesheet" />
<script src="~/Scripts/sweetalert.min.js"></script>
swal({
    title: "操作提示",
    text: "確定刪除嗎?",
    type: "warning",
    showCancelButton: true,
    confirmButtonColor: "#DD6B55",
    cancelButtonText: "取消",
    confirmButtonText: "是的,確定刪除!",
    closeOnConfirm: true
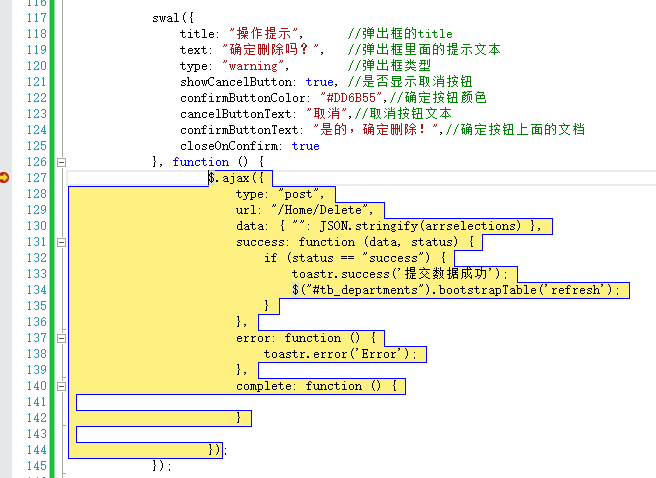
}, function () {
    $.ajax({
        type: "post",
        url: "/Home/Delete",
        data: { "": JSON.stringify(arrselections) },
        success: function (data, status) {
            if (status == "success") {
                toastr.success('提交數據成功');
                $("#tb_departments").bootstrapTable('refresh');
            }
        },
        error: function () { toastr.error('Error'); }
    });
});
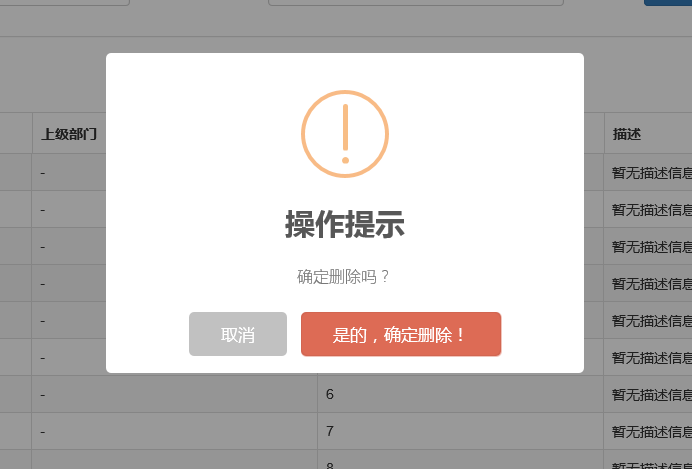
按下確定後進入回呼:
套件很多,選哪一個看場景。個人覺得電商、面向消費者的網站用 sweetalert 比較合適;一般的內部管理系統,Bootstrap 原生彈出框或 bootbox 就夠了。
三、操作完成提示框
1、toastr.js
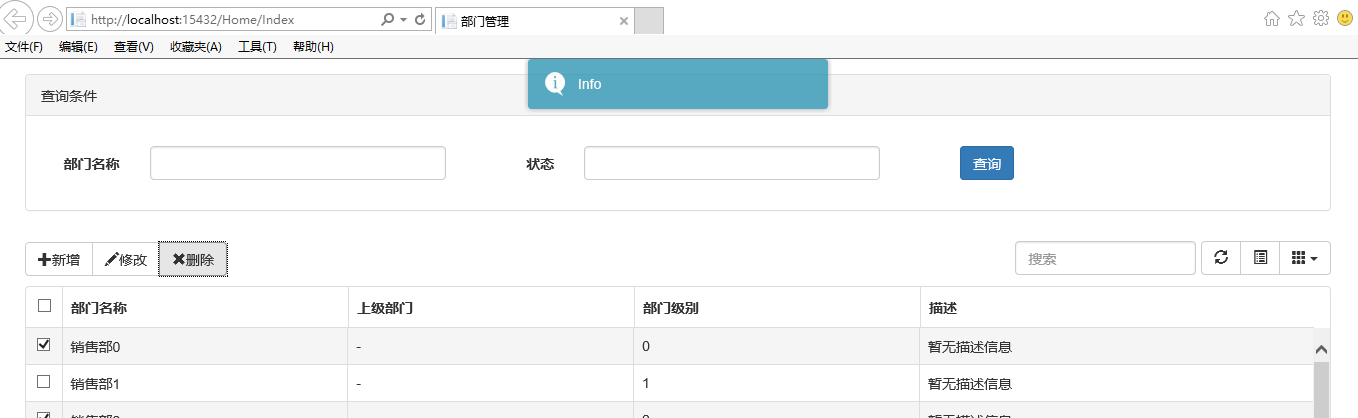
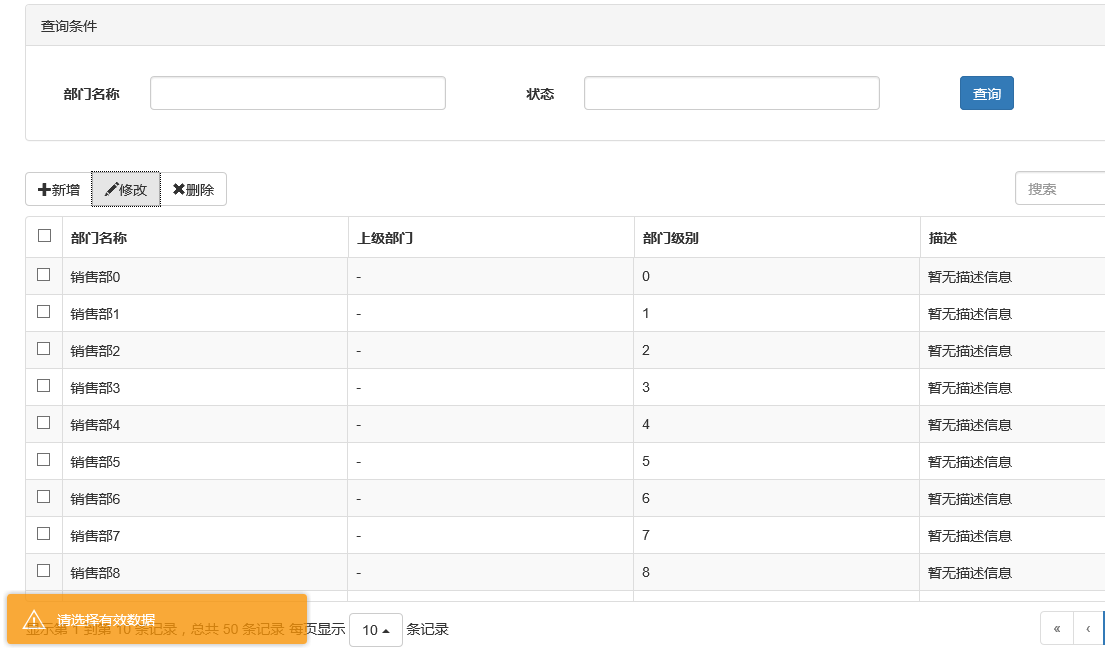
專案裡用的是 toastr,最大的好處是非同步、不阻塞,可以設定自動消失時間,也能指定顯示在畫面的哪個角落。

不同位置:
top-center
bottom-left
引入資源:
<link href="~/Content/toastr/toastr.css" rel="stylesheet" />
<script src="~/Content/toastr/toastr.min.js"></script>
全域設定位置:
toastr.options.positionClass = 'toast-bottom-right';
常見取值有 toast-bottom-right(右下)、toast-bottom-center(下中)、toast-top-center(上中)等,完整列表看官方文件。
使用時就一行:
$("#btn_edit").click(function () {
    var arrselections = $("#tb_departments").bootstrapTable('getSelections');
    if (arrselections.length > 1) { toastr.warning('只能選擇一行進行編輯'); return; }
    if (arrselections.length <= 0) { toastr.warning('請選擇有效數據'); return; }
    $('#myModal').modal();
});
四個方法對應四種顏色:
toastr.success('提交數據成功');
toastr.error('Error');
toastr.warning('只能選擇一行進行編輯');
toastr.info('info');
2、Messenger
Bootstrap 中文網提到的另一個方案,用法與 toastr 幾乎一樣,只是視覺風格不同。
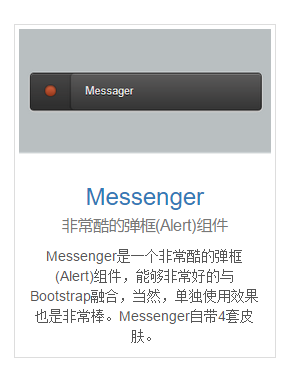
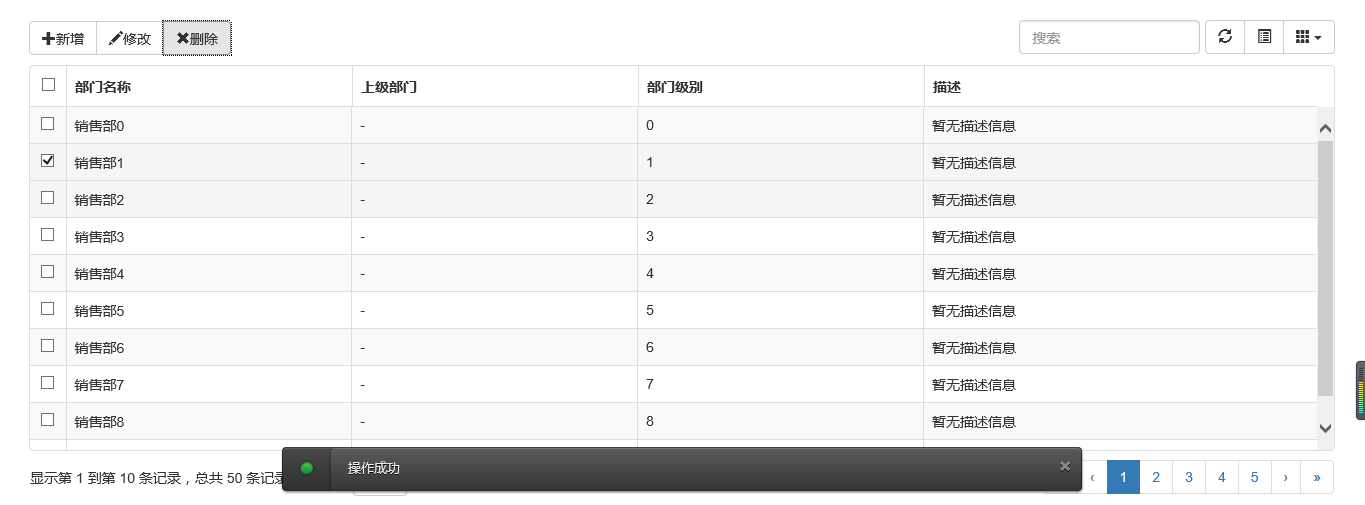
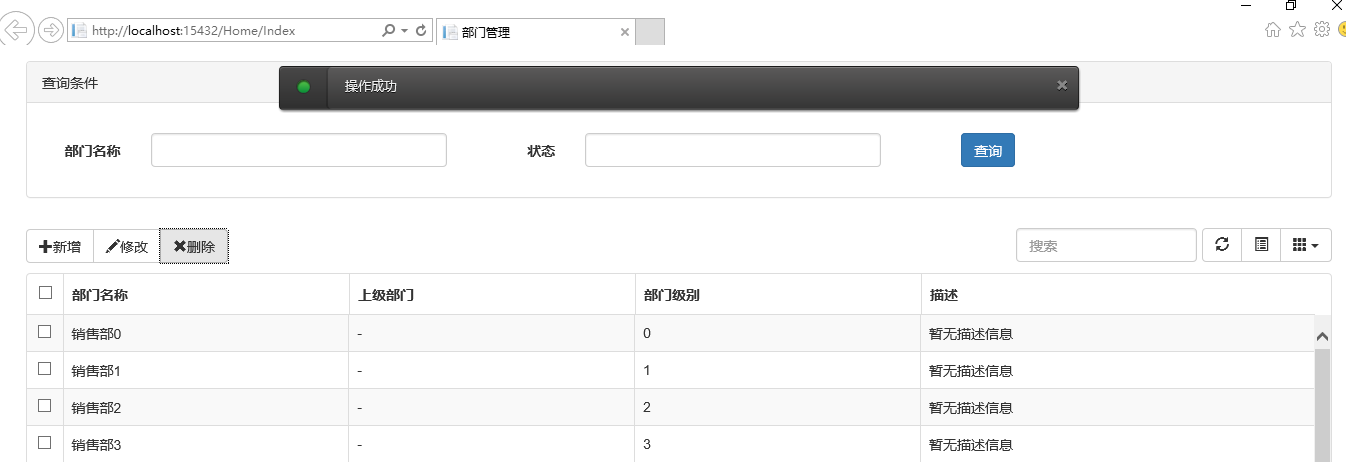
同樣可以定位到畫面各處,也有 Success / Error / Info 三種狀態,以及 Future、Block、Air、Ice 四種主題樣式。


引入:
<script src="~/Content/HubSpot-messenger-a3df9a6/build/js/messenger.js"></script>
<link href="~/Content/HubSpot-messenger-a3df9a6/build/css/messenger.css" rel="stylesheet" />
<link href="~/Content/HubSpot-messenger-a3df9a6/build/css/messenger-theme-future.css" rel="stylesheet" />
設定位置與主題:
$._messengerDefaults = {
    extraClasses: 'messenger-fixed messenger-theme-future messenger-on-bottom messenger-on-right'
};
呼叫:
$("#btn_delete").click(function () {
    $.globalMessenger().post({
        message: "操作成功",   // 提示內容
        type: 'info',          // error / info / success
        hideAfter: 2,          // 幾秒後消失
        showCloseButton: true, // 是否顯示關閉按鈕
        hideOnNavigate: true   // 頁面跳轉時隱藏
    });
});
用預設樣式的話更省事:
$.globalMessenger().post({ message: "操作成功", type: 'info' });
四、選型建議
三類元件各有分工:彈出框承載表單輸入,適合新增與編輯;確認框攔截高風險操作,記得把 backdrop 設為 static 強制作選擇;訊息提示負責事後回饋,非同步、可自動消失是重點。同一個專案裡,提示框的風格最好統一,不要 toastr、Messenger、sweetalert 混著用,畫面會顯得零碎。
- 上一篇文章: JS 日期計算技巧:取得月份天數與指定日期的週數
- 下一篇文章: JS 與 jQuery 讀取 XML 檔案的兩種做法與跨瀏覽器相容處理