JS 實作的左側豎向滑動選單效果
編輯:關於JavaScript
本文為大家示範以 JS 實作的左側豎向滑動選單效果,希望對學習中的朋友有所幫助。
這是一款經過改造的左側豎向滑動選單,基於 JavaScript+CSS,沒有過多修飾,主要想實現選單的動畫效果。想使用的朋友可以自行美化。
運行效果截圖如下:
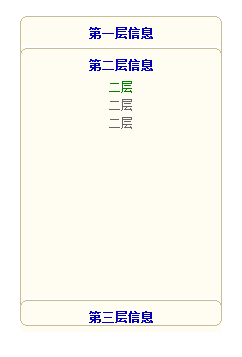
線上演示網址如下:
https://demo.jb51.net/js/2015/js-left-scroll-style-menu-demo/
具體程式碼如下:
<!DOCTYPE html PUBLIC "-//W3C//DTD XHTML 1.0 Transitional//EN">
<html xmlns="https://www.w3.org/1999/xhtml">
<title>經過改造的左側豎向滑動選單</title>
<style type="text/css">
body{ margin:10px; padding:10px; }
a:link { text-decoration: none;color: blue}
a:active { text-decoration:blink}
a:hover { text-decoration:underline;color: red}
a:visited { text-decoration: none;color: green}
body,td,div,span,li{ font-size:12px; }
.title01,.title02{ color:#00b; font-weight:bold; }
#DoorP{ width:200px; height:300px; padding:0px; background:#FFFCF2; }
.title01{ width:100%; height:25px; background:#FFFCF2; cursor:pointer; }
.title02{ width:100%; height:25px; background:#FFFCF2; cursor:pointer; }
.content{ background:#FFFCF2; border-bottom:2px solid #fff; overflow:hidden; color:#666; padding-left:4px; padding-right:4px; line-height:18px; }
</style>
<div class="curved">
<div class="boxcontent">
<div id="DoorP">
  <table><tr><td align="center">第一層信息</td></tr></table>
  <div class="content" align="center"><a href="#">二層</a><br/>二層<br/>二層<br/></div>
  <table><tr><td align="center">第二層信息</td></tr></table>
  <div class="content" align="center"><a href="#">二層</a><br/>二層<br/>二層<br/></div>
  <table><tr><td align="center">第三層信息</td></tr></table>
  <div class="content" align="center"><a href="#">二層</a><br/>二層<br/>二層<br/></div>
</div></div>
</div>
<script type="text/javascript">
var open = 2;
var openState = new Array();
var closeState = new Array();
var dH = 220;
function $(id){ if(document.getElementById(id)) { return document.getElementById(id); } else { alert("沒有找到!"); } }
function $tag(id,tagName){ return $(id).getElementsByTagName(tagName) }
function closeMe(Cid,Oid){
  var h = parseInt(Ds[Cid].style.height);
  if(h > 2) {
    h = h - Math.ceil(h/3);
    Ds[Cid].style.height = h+"px";
  } else {
    openMe(Oid);
    clearTimeout(closeState[Cid]);
    return false;
  }
  closeState[Cid] = setTimeout("closeMe("+Cid+","+Oid+")");
}
function openMe(Oid){
  var h = parseInt(Ds[Oid].style.height);
  if(h < dH) {
    h = h + Math.ceil((dH-h)/3);
    Ds[Oid].style.height = h+"px";
  } else {
    clearTimeout(openState[Oid]);
    return false;
  }
  openState[Oid] = setTimeout("openMe("+Oid+")");
}
var Ds = $tag("DoorP","div");
var Ts = $tag("DoorP","table");
if(Ds.length != Ts.length) { alert("標題和內容數目不相同!"); }
for(var i = 0 ; i < Ds.length ; i++) {
  if(i==open) {
    Ds[i].style.height = dH+"px";
    Ts[i].className="title01";
  } else {
    Ds[i].style.height = "0px";
    Ts[i].className="title02";
  }
  Ts[i].value = i;
  Ts[i].onclick = function(){
    if(open==this.value) { return false; }
    Ts[open].className="title02";
    Ts[this.value].className="title01";
    for(var i = 0 ; i < openState.length ; i++) {
      clearTimeout(openState[i]);
      clearTimeout(closeState[i]);
    }
    closeMe(open,this.value);
    open = this.value;
  }
}
</script>
希望本文所述能對大家的 JavaScript 程式設計有所幫助。
- 上一篇文章: JS 實作簡潔縱向滑動選單(滑動門)效果
- 下一篇文章: JS 實作網頁遊戲中滑塊響應滑鼠點擊移動效果