這一篇直接進到實作。前面談過的 DOM 節點屬性(firstChild、nextSibling、parentNode 等)與方法(appendChild、removeChild、insertBefore),這裡會全部派上用場。
一、DOM 的樹狀架構
先看一份最簡單的 HTML:
<html>
<head>
  <title>document</title>
</head>
<body>
  <h1>CSS Demo</h1>
  <p>我喜歡美女,特別是高個的美女</p>
</body>
</html>
它的 DOM 表示如下:
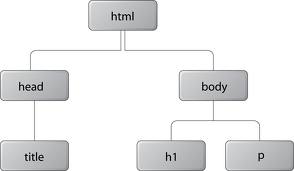
這張圖呈現的是一份 HTML 文件的樹狀結構。整棵 DOM 樹由各種不同類型的 Node 物件組成:firstChild、lastChild、nextSibling、previousSibling、parentNode 這些屬性提供了遍歷節點的方式;appendChild、removeChild、replaceChild、insertBefore 則負責新增或移除節點。接下來用幾個實際例子把這些操作串起來。
二、準備一個用 CSS 美化的清單
先寫好樣式:
<style type="text/css">
body { margin: 0px; padding: 0px; }
#container {
  font-family: tahoma; font-size: 14px;
  border: solid 1px #99ffcc;
  width: 200px; height: 140px; float: left;
}
#container ul { list-style: none; padding: 1px 0px 0px 0px; margin: 0px; }
#container ul li { border-bottom: solid 1px #99ffcc; margin: 0px; height: 27px; }
#container ul li a {
  background-color: gray; text-decoration: none; display: block;
  border-left: solid 10px red; margin: 0px; padding: 5px 0px 5px 10px;
}
#container ul li a:hover { background-color: red; color: #000000; }
</style>
再接上結構:
<div id="container">
  <ul id="list">
    <li><a href="#">Home</a></li>
    <li id="myblog"><a href="#">MyBlog</a></li>
    <li><a href="#">Sport</a></li>
    <li><a href="#">News</a></li>
    <li><a href="#">Contact</a></li>
  </ul>
</div>
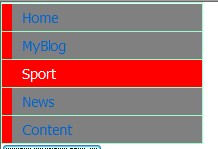
呈現結果:
三、遞迴統計元素總數
這裡示範如何把工具函式收攏到一個命名空間物件中,避免污染全域:
var Tools = {};

Tools.getElementCount = function (e) {
  var count = 0;
  elementTotal(e);
  document.forms.table.txt.value = "element: " + count;

  function elementTotal(e) {
    if (e.nodeType == 1) count++;   // 只數元素節點
    var children = e.childNodes;
    for (var i = 0; i < children.length; i++) {
      elementTotal(children[i]);
    }
  }
};
使用方式(可放在 body 中):
<button type="button" onclick="Tools.getElementCount(document)">獲取元素個數</button>
四、把所有文字轉成大寫
這個例子示範了另一種遍歷方式——用 firstChild 搭配 nextSibling 走訪兄弟節點:
Tools.ModifyElement = function modify(e) {
  if (e.nodeType == 3) {          // 3 代表文字節點
    e.data = e.data.toUpperCase();
  } else {
    for (var i = e.firstChild; i != null; i = i.nextSibling) {
      modify(i);
    }
  }
};
<button type="button" onclick="Tools.ModifyElement(document)">大寫</button>
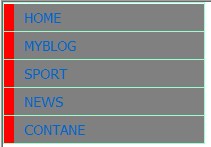
執行後:
五、為清單排序
把各項目取出、排序,再依新順序重新排列:
Tools.documentSort = function (e) {
  var textArray = [];
  if (typeof e == "string") e = document.getElementById(e);

  for (var x = e.firstChild; x != null; x = x.nextSibling) {
    if (x.nodeType == 1) textArray.push(x);
  }

  textArray.sort(function (n, m) {
    var s = n.firstChild.firstChild.data;
    var t = m.firstChild.firstChild.data;
    if (s > t) return -1;
    else if (s < t) return 1;
    else return 0;
  });

  // 依排序後的順序重新附加
  for (var i = 0; i < textArray.length; i++) {
    e.appendChild(textArray[i]);
  }
};
<button type="button" onclick="Tools.documentSort('list')">排序</button>
執行後:
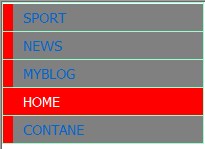
這裡的關鍵技巧是:appendChild() 對「已存在的節點」會執行搬移而非複製,因此反覆附加就能達到重新排序的效果。
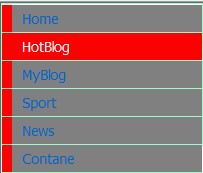
六、動態插入列表項
Tools.insertElement = function (n, e) {
  if (typeof n == "string") n = document.getElementById(n);

  var li = document.createElement(e);
  var a = document.createElement("a");
  a.setAttribute("href", "#");

  var txt = document.createTextNode("HotBlog");
  a.appendChild(txt);
  li.appendChild(a);

  var parent = n.parentNode;
  parent.insertBefore(li, n);
};
<button type="button" onclick="Tools.insertElement('myblog','li')">插入</button>
執行後:
七、用建構函式動態建立元件
接下來把上面的手法升級成一個可重複使用的 tooltip 元件。先定義樣式:
.tooltip {
  background: url('2.jpg');
  border: solid 1px #99ffcc;
  width: 200px; height: 200px;
}
.toolcontent {
  background-color: #ffffff;
  border: solid 1px #99ff00;
  padding: 5px;
  font: tahoma 12px;
  color: #000000;
}
再寫元件本體:
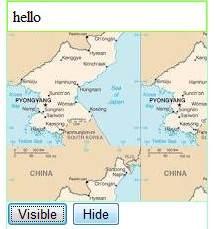
function Tooltip() {
  this.tooltip = document.createElement("div");
  this.tooltip.style.position = "absolute";
  this.tooltip.className = "tooltip";

  this.content = document.createElement("div");
  this.content.style.position = "relative";
  this.content.className = "toolcontent";

  this.tooltip.appendChild(this.content);
}

Tooltip.prototype.show = function (text, x, y) {
  this.content.innerHTML = text;
  this.tooltip.style.left = x + "px";
  this.tooltip.style.top = y + "px";
  this.tooltip.style.visibility = "visible";

  if (this.tooltip.parentNode != document.body) {
    document.body.appendChild(this.tooltip);
  }
};

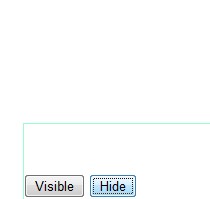
Tooltip.prototype.hide = function () {
  this.tooltip.style.visibility = "hidden";
};

var t = new Tooltip();

function showTip() { t.show("hello ", 300, 0); }
function hideTip() { t.hide(); }

function init() {
  document.forms.operator.show.onclick = showTip;
  document.forms.operator.hide.onclick = hideTip;
}
要讓它運作,還需在 body 加上 onload="init()",並補上這兩個按鈕:
<form name="operator">
  <input type="button" value="隱藏" name="hide" />
  <input type="button" value="顯示" name="show" />
</form>
執行結果:
八、動態添加與刪除樣式
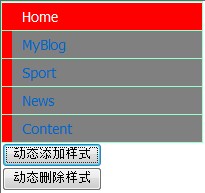
最後一個例子:不改 inline style,而是透過切換 className 來套用或移除整組樣式。這種做法關注點分離得更乾淨,樣式全部留在 CSS 檔中。
樣式表:
.container { font-family: tahoma; font-size: 14px; border: solid 1px #99ffcc; width: 200px; height: 140px; float: left; }
.container ul { list-style: none; padding: 1px 0px 0px 0px; margin: 0px; }
.container ul li { border-bottom: solid 1px #99ffcc; margin: 0px; height: 27px; }
.container ul li a {
  background-color: gray; text-decoration: none; display: block;
  border-left: solid 10px red; margin: 0px; padding: 5px 0px 5px 10px;
}
.container ul li a:hover { background-color: red; color: #ffffff; }
工具函式:
var CSSclass = {};

// 判斷元素是否已有某個 class
CSSclass.is = function (e, c) {
  if (typeof e == "string") e = document.getElementById(e);
  var classes = e.className;
  if (!classes) return false;
  if (classes == c) return true;
  return classes.search("(^|\\s)" + c + "(\\s|$)") != -1;
};

// 新增 class
CSSclass.add = function (e, c) {
  if (typeof e == "string") e = document.getElementById(e);
  if (CSSclass.is(e, c)) return;
  e.className += " " + c;
};

// 移除 class
CSSclass.remove = function (e, c) {
  if (typeof e == "string") e = document.getElementById(e);
  e.className = e.className
    .replace(new RegExp("(^|\\s)" + c + "(\\s|$)", "g"), " ")
    .replace(/^\s+|\s+$/g, "");
};
頁面上的操作元素:
<div id="con">
  <ul id="list">
    <li><a href="#">Home</a></li>
    <li id="myblog"><a href="#">MyBlog</a></li>
    <li><a href="#">Sport</a></li>
    <li><a href="#">News</a></li>
    <li><a href="#">Content</a></li>
  </ul>
  <button type="button" name="add" onclick="CSSclass.add('con','container')">動態添加樣式</button>
  <button type="button" name="remove" onclick="CSSclass.remove('con','container')">動態刪除樣式</button>
</div>
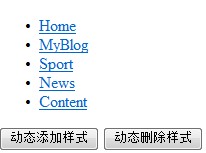
對照如下,未套用樣式時是純清單,加上 container 之後才變成帶邊框的樣式化列表:
小結與幾點補充
DOM 操作、內聯樣式、動態切換樣式,大致就是這些手法。細節上還有很多可以深入的地方,例如:
第一,用 classList API 取代手寫的正規表達式判斷,程式碼會短很多——el.classList.add('x')、el.classList.remove('x')、el.classList.toggle('x')、el.classList.contains('x') 就能涵蓋上面整個 CSSclass 工具的功能。
第二,這些範例中大量使用遞迴遍歷節點,是為了示範 DOM 樹的走訪原理。實務上,若已知結構,直接用 querySelectorAll() 或 getElementsByTagName() 會更簡潔。
第三,頻繁的 DOM 讀寫會觸發重排與重繪。上述排序範例中,每次都呼叫 appendChild 會反覆觸發版面計算;若項目數量多,改用 DocumentFragment 批次搬移會快很多。
- 上一篇文章: window.parent 與 window.opener 到底差在哪
- 下一篇文章: JavaScript 進階篇(四):函式的各種面貌
相關文章
-
原生 JavaScript 實作 getElementsByClassName 的具體寫法 用 JavaScript 透過 className 獲取元素的示例代碼 深入探討動態添加樣式規則的種種做法 用 DOM 打造自訂的 HTML5 影片控制介面 HTML5 Range 物件詳解:選取、刪除、複製與插入的實務應用 以 ASP.NET 與 XML 打造瀏覽器裡的網路硬碟 用 jQuery 動態修改 a 標籤的 hover 顏色 元素屬性與 DOM 屬性的差別,以及 each() 的操作技巧 JavaScript 控制 div 顯示與隱藏的最小範例 JavaScript 中 setAttribute 的用法與跨瀏覽器坑點