帶新人時被問到輪播圖怎麼實現,才發現自己入行一年多,一直用的是別人寫好的插件。於是從頭寫了一遍,整理成這篇適合入門者閱讀的教程。
輪播圖的實現思路和設計模式有很多種,這裡採用面向過程的函數式編程。相比面向對象的設計模式,代碼難免顯得冗長,但缺少抽象反而更適合新手理解每一步在做什麼。
原理
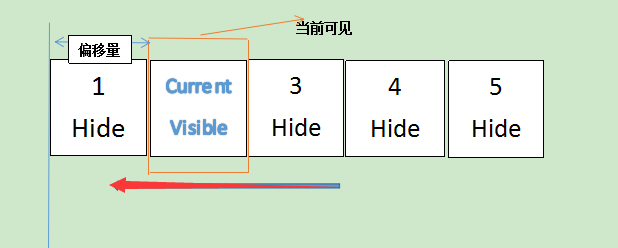
把一系列尺寸相同的圖片平鋪排列,用 CSS 只讓容器顯示其中一張,其餘隱藏在可視區域之外。通過改變偏移量配合定時器實現自動播放,或通過左右箭頭、指示點的手動點擊切換。
HTML 結構
父容器 container 存放所有內容;子容器 list 裡放圖片;buttons 裡放指示小圓點;另外兩個 a 標籤是左右箭頭。
<div id="container">
<div id="list" style="left: -600px;">
<img src="img/5.jpg" alt="1" />
<img src="img/1.jpg" alt="1" />
<img src="img/2.jpg" alt="2" />
<img src="img/3.jpg" alt="3" />
<img src="img/4.jpg" alt="4" />
<img src="img/5.jpg" alt="5" />
<img src="img/1.jpg" alt="5" />
</div>
<div id="buttons">
<span index="1" class="on"></span>
<span index="2"></span>
<span index="3"></span>
<span index="4"></span>
<span index="5"></span>
</div>
<a href="javascript:;" id="prev" class="arrow"><</a>
<a href="javascript:;" id="next" class="arrow">></a>
</div>
無縫滾動的小技巧
如果直接從最後一張跳回第一張,會出現一段空白。解法是準備兩張「輔助圖」:把最後一張複製到最前面,把第一張複製到最後面。初始狀態通過 left: -600px 讓真正的第一張停在可視區。
CSS 要點
- 理解盒子模型與文檔流,特別是绝对定位的層級關係。
- 給 list 的父容器加
overflow: hidden,只露出窗口位置的一張圖。 - 指示點要置頂,用
z-index把它抬到最高層。
* { margin: 0; padding: 0; text-decoration: none; }
body { padding: 20px; }
#container {
  width: 600px; height: 400px;
  border: 3px solid #333;
  overflow: hidden;
  position: relative;
}
#list {
  width: 4200px; height: 400px;
  position: absolute; z-index: 1;
}
#list img { width: 600px; height: 400px; float: left; }
#buttons {
  position: absolute; height: 10px; width: 100px;
  z-index: 2; bottom: 20px; left: 250px;
}
#buttons span {
  cursor: pointer; float: left;
  border: 1px solid #fff; width: 10px; height: 10px;
  border-radius: 50%; background: #333; margin-right: 5px;
}
#buttons .on { background: orangered; }
.arrow {
  cursor: pointer; display: none;
  line-height: 39px; text-align: center;
  font-size: 36px; font-weight: bold;
  width: 40px; height: 40px;
  position: absolute; z-index: 2; top: 180px;
  background-color: RGBA(0, 0, 0, .3); color: #fff;
}
.arrow:hover { background-color: RGBA(0, 0, 0, .7); }
#container:hover .arrow { display: block; }
#prev { left: 20px; }
#next { right: 20px; }
第一步:手動切換
window.onload = function () {
  var list = document.getElementById('list');
  var prev = document.getElementById('prev');
  var next = document.getElementById('next');

  function animate(offset) {
    // style.left 是字符串且為負值,需要用 parseInt 轉為數字
    var newLeft = parseInt(list.style.left) + offset;
    list.style.left = newLeft + 'px';
  }

  prev.onclick = function () { animate(600); };
  next.onclick = function () { animate(-600); };
}
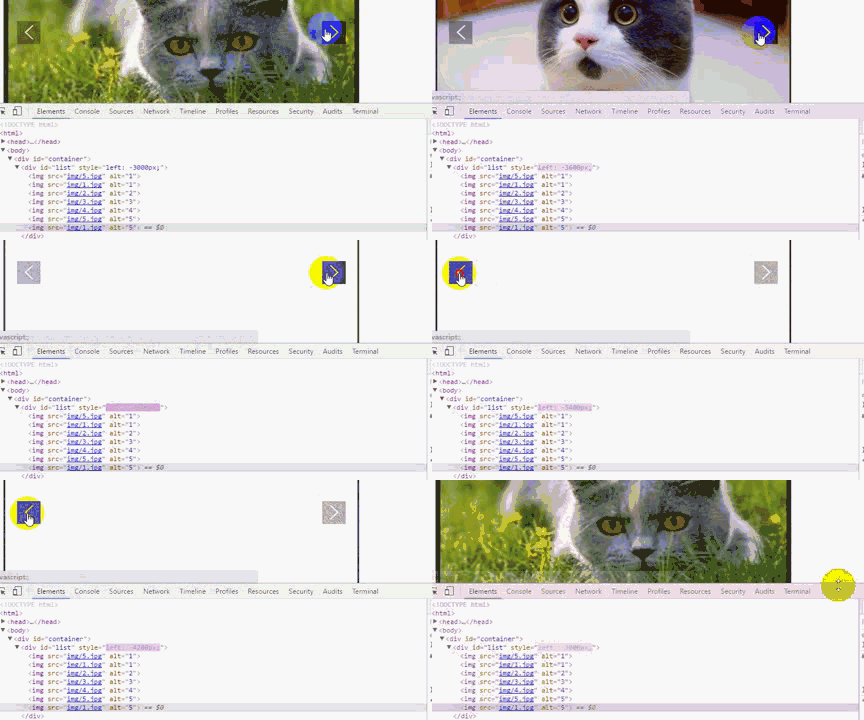
運行後會發現兩個問題:一直點右箭頭會出現空白,而且回不到第一張。用 F12 觀察 left 值可知,當它小於 -3600 時,因為不存在第 8 張圖,於是露出空白。所以必須對偏移量做邊界判斷。
if (newLeft < -3000) {
  list.style.left = -600 + 'px';
}
if (newLeft > -600) {
  list.style.left = -3000 + 'px';
}
第二步:自動播放
輪播圖顧名思義要自己動,這裡用到定時器。setInterval() 會重複執行,setTimeout() 只執行一次,我們需要前者。
var timer;
function play() {
  timer = setInterval(function () {
    prev.onclick();
  }, 1500);
}
play();
第三步:鼠標移入暫停
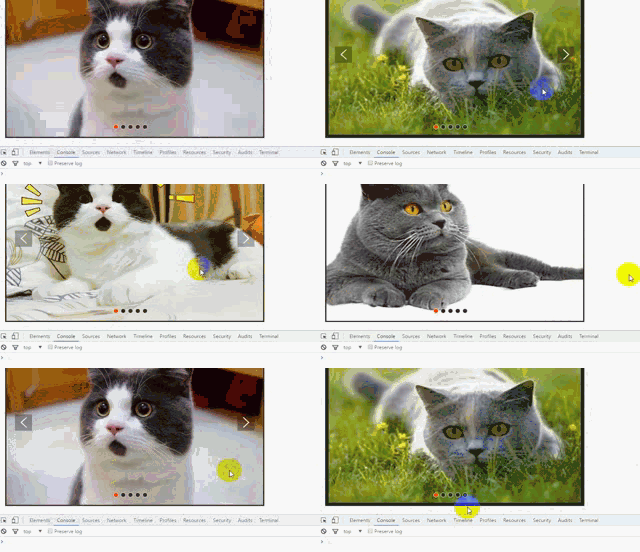
想仔細看某張圖時得讓它停下來,用 clearInterval() 清除定時器即可。
var container = document.getElementById('container');
function stop() {
  clearInterval(timer);
}
container.onmouseover = stop;
container.onmouseout = play;
第四步:升級指示點同步
var buttons = document.getElementById('buttons').getElementsByTagName('span');
var index = 1;

function buttonsShow() {
  // 先清除之前的高亮樣式
  for (var i = 0; i < buttons.length; i++) {
    if (buttons[i].className == 'on') {
      buttons[i].className = '';
    }
  }
  // 數組下標從 0 開始,所以 index 要 -1
  buttons[index - 1].className = 'on';
}

prev.onclick = function () {
  index -= 1;
  if (index < 1) { index = 5; }
  buttonsShow();
  animate(600);
};

next.onclick = function () {
  // 定時器會讓 index 持續遞增,只有 5 個點,需要循環處理
  index += 1;
  if (index > 5) { index = 1; }
  buttonsShow();
  animate(-600);
};
第五步:點擊指示點跳轉
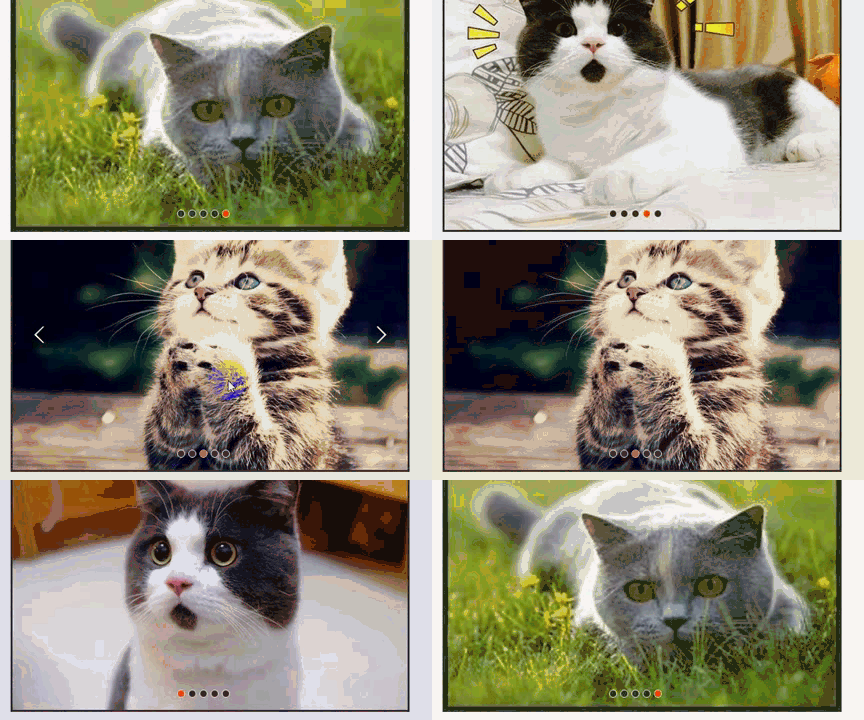
原理相同,仍需通過偏移量找到對應的圖片位置。
for (var i = 0; i < buttons.length; i++) {
  buttons[i].onclick = function () {
    // 點擊當前 Already 高亮的點時不做任何事
    if (this.className == "on") { return; }

    // this 指向被點擊的元素,用 getAttribute 讀取自定義的 index 屬性
    var clickIndex = parseInt(this.getAttribute('index'));
    var offset = 600 * (clickIndex - index);
    animate(offset);

    index = clickIndex;   // 記錄點擊後的位置,供指示點同步使用
    buttonsShow();
  };
}
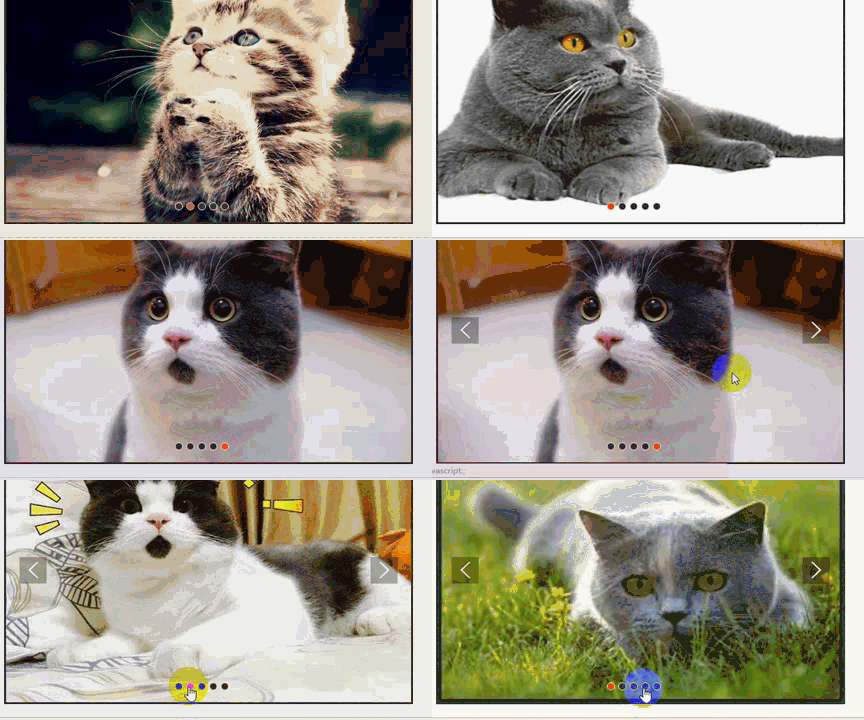
調整自動播放方向
前面的自動播放調用的是 prev,圖片是向左切換的。想改成常規的向右切換,換成 next 即可:
function play() {
  timer = setInterval(function () {
    next.onclick();
  }, 2000);
}


完整源碼
<!DOCTYPE html>
<html>
<head>
<meta charset="UTF-8">
<title></title>
<style type="text/css">
* { margin: 0; padding: 0; text-decoration: none; }
body { padding: 20px; }
#container {
width: 600px; height: 400px;
border: 3px solid #333;
overflow: hidden; position: relative;
}
#list { width: 4200px; height: 400px; position: absolute; z-index: 1; }
#list img { width: 600px; height: 400px; float: left; }
#buttons {
position: absolute; height: 10px; width: 100px;
z-index: 2; bottom: 20px; left: 250px;
}
#buttons span {
cursor: pointer; float: left;
border: 1px solid #fff; width: 10px; height: 10px;
border-radius: 50%; background: #333; margin-right: 5px;
}
#buttons .on { background: orangered; }
.arrow {
cursor: pointer; display: none;
line-height: 39px; text-align: center;
font-size: 36px; font-weight: bold;
width: 40px; height: 40px;
position: absolute; z-index: 2; top: 180px;
background-color: RGBA(0, 0, 0, .3); color: #fff;
}
.arrow:hover { background-color: RGBA(0, 0, 0, .7); }
#container:hover .arrow { display: block; }
#prev { left: 20px; }
#next { right: 20px; }
</style>
<script type="text/javascript">
/* 涉及知識點:this 用法、DOM 事件、定時器 */
window.onload = function () {
var container = document.getElementById('container');
var list = document.getElementById('list');
var buttons = document.getElementById('buttons').getElementsByTagName('span');
var prev = document.getElementById('prev');
var next = document.getElementById('next');
var index = 1;
var timer;
function animate(offset) {
var newLeft = parseInt(list.style.left) + offset;
list.style.left = newLeft + 'px';
// 無限滾動的邊界判斷
if (newLeft > -600) { list.style.left = -3000 + 'px'; }
if (newLeft < -3000) { list.style.left = -600 + 'px'; }
}
function play() {
timer = setInterval(function () { next.onclick(); }, 2000);
}
function stop() { clearInterval(timer); }
function buttonsShow() {
for (var i = 0; i < buttons.length; i++) {
if (buttons[i].className == "on") { buttons[i].className = ""; }
}
buttons[index - 1].className = "on";
}
prev.onclick = function () {
index -= 1;
if (index < 1) { index = 5; }
buttonsShow();
animate(600);
};
next.onclick = function () {
index += 1;
if (index > 5) { index = 1; }
animate(-600);
buttonsShow();
};
for (var i = 0; i < buttons.length; i++) {
buttons[i].onclick = function () {
if (this.className == "on") { return; }
var clickIndex = parseInt(this.getAttribute('index'));
var offset = 600 * (clickIndex - index);
animate(offset);
index = clickIndex;
buttonsShow();
};
}
container.onmouseover = stop;
container.onmouseout = play;
play();
};
</script>
</head>
<body>
<div id="container">
<div id="list" style="left: -600px;">
<img src="img/5.jpg" alt="1"/>
<img src="img/1.jpg" alt="1"/>
<img src="img/2.jpg" alt="2"/>
<img src="img/3.jpg" alt="3"/>
<img src="img/4.jpg" alt="4"/>
<img src="img/5.jpg" alt="5"/>
<img src="img/1.jpg" alt="5"/>
</div>
<div id="buttons">
<span index="1" class="on"></span>
<span index="2"></span>
<span index="3"></span>
<span index="4"></span>
<span index="5"></span>
</div>
<a href="javascript:;" id="prev" class="arrow"><</a>
<a href="javascript:;" id="next" class="arrow">></a>
</div>
</body>
</html>
總結
一個可用的輪播圖到這裡就完成了。回顧整個過程,核心只有三件事:用偏移量控制顯示哪張圖、用邊界判斷實現無限循環、用定時器驅動自動播放。指示點和箭頭都是在這個骨架上做的擴展。
如果想再往前一步,可以把它重構為面向對象的插件形式:把配置項(容器、間隔時間、切換方向、是否有指示點)抽成 options,把 animate、play、stop 變成原型方法,對外只暴露一個 new Carousel('#container', options) 的接口。這樣不僅可複用,也更貼近實際項目中的組織方式。
- 上一篇文章: JS 事件冒泡與事件流:從事件捕獲談事件委託
- 下一篇文章: 用 JavaScript 封裝一個通用倒計時函數