用 HTML5 Canvas 製作水波紋效果,點擊圖片即觸發
編輯:HTML5教程
今天來做一個視覺上很討喜的效果:以圖片為背景,點擊畫面上任一位置就會盪開一圈漣漪,而且多個漣漪會互相干涉。核心原理其實不難——用兩個浮動緩衝區模擬水面的高度變化,再依高度差去偏移取樣座標,做出折射感。
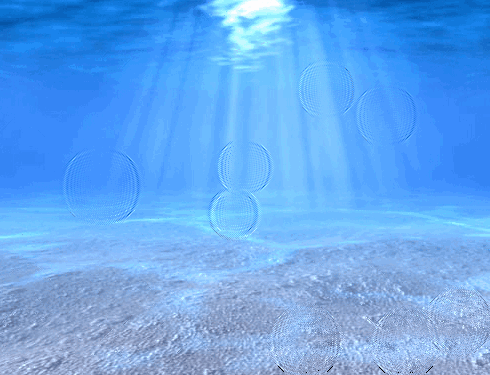
Step 1. HTML
<!DOCTYPE html>
<html>
<head>
<meta charset="utf-8" />
<title>Water drops effect</title>
<link rel="stylesheet" href="css/main.css" type="text/css" />
<script src="js/vector2d.js" type="text/javascript" charset="utf-8"></script>
<script src="js/waterfall.js" type="text/javascript" charset="utf-8"></script>
</head>
<body>
<div class="example">
  <h3><a href="#">Water drops effect</a></h3>
  <canvas id="water">需要支援 HTML5 的瀏覽器</canvas>
  <div id="switcher">
    <img onclick="watereff.changePicture(this.src);" src="data_images/underwater1.jpg" />
    <img onclick="watereff.changePicture(this.src);" src="data_images/underwater2.jpg" />
  </div>
  <div id="fps"></div>
</div>
</body>
</html>
Step 2. CSS
body { background: #eee; margin: 0; padding: 0; }
.example {
    background: #FFF; width: 600px; border: 1px #000 solid;
    margin: 20px auto; padding: 15px;
    -moz-border-radius: 3px; -webkit-border-radius: 3px;
}
#water {
    width: 500px; height: 400px;
    display: block; margin: 0 auto; cursor: pointer;
}
#switcher { text-align: center; overflow: hidden; margin: 15px; }
#switcher img { width: 160px; height: 120px; }
Step 3. JavaScript:drop 物件
function drop(x, y, damping, shading, refraction, ctx, screenWidth, screenHeight) {
    this.x = x;
    this.y = y;
    this.shading = shading;
    this.refraction = refraction;
    this.bufferSize = this.x * this.y;
    this.damping = damping;

    // 存下原始影像與一份可寫入的 ImageData
    this.background = ctx.getImageData(0, 0, screenWidth, screenHeight).data;
    this.imageData = ctx.getImageData(0, 0, screenWidth, screenHeight);

    // 兩個緩衝區:分別存目前帧與前一帧的水面高度
    this.buffer1 = [];
    this.buffer2 = [];
    for (var i = 0; i < this.bufferSize; i++) {
        this.buffer1.push(0);
        this.buffer2.push(0);
    }
更新水面
這是最核心的一段。每個像素的新高度 = 上下左右四鄰的平均值 − 自己原本的偏移量,再乘上 damping 做衰減。這其實就是古典水波方程的離散形式。
    this.update = function () {
        for (var i = this.x + 1, x = 1; i < this.bufferSize - this.x; i++, x++) {
            if (x < this.x) {
                this.buffer2[i] = (
                    (this.buffer1[i - 1] + this.buffer1[i + 1] +
                     this.buffer1[i - this.x] + this.buffer1[i + this.x]) / 2
                ) - this.buffer2[i];
                this.buffer2[i] *= this.damping;
            } else {
                x = 0;                    // 換行,跳過左右邊界
            }
        }
        // 兩緩衝區交換,next frame 繼續
        var temp = this.buffer1;
        this.buffer1 = this.buffer2;
        this.buffer2 = temp;
    };
依高度差做折射
    this.draw = function (ctx) {
        var imageDataArray = this.imageData.data;
        for (var i = this.x + 1, index = (this.x + 1) * 4;
             i < this.bufferSize - (1 + this.x); i++, index += 4) {

            // 相鄰高度差就是斜率,模擬光線偏折
            var xOffset = ~~(this.buffer1[i - 1] - this.buffer1[i + 1]);
            var yOffset = ~~(this.buffer1[i - this.x] - this.buffer1[i + this.x]);
            var shade = xOffset * this.shading;

            // 依斜率偏移取樣位置
            var texture = index +
                (xOffset * this.refraction + yOffset * this.refraction * this.x) * 4;

            imageDataArray[index]     = this.background[texture] + shade;
            imageDataArray[index + 1] = this.background[texture + 1] + shade;
            imageDataArray[index + 2] = 50 + this.background[texture + 2] + shade;
        }
        ctx.putImageData(this.imageData, 0, 0);
    };
}
主控物件
var watereff = {
    timeStep: 20,          // 每帧間隔(毫秒)
    refractions: 2,        // 折射強度
    shading: 3,            // 明暗對比
    damping: 0.99,         // 衰減,越小水波消失越快
    screenWidth: 500,
    screenHeight: 400,
    pond: null,
    textureImg: null,
    interval: null,
    backgroundURL: 'data_images/underwater1.jpg',

    init: function () {
        var canvas = document.getElementById('water');
        if (!canvas.getContext) { return; }

        canvas.onmousedown = function (e) {
            var mouse = watereff.getMousePosition(e)
                .sub(new vector2d(canvas.offsetLeft, canvas.offsetTop));
            // 在點擊處「砸」一下水面
            watereff.pond.buffer1[mouse.y * watereff.pond.x + mouse.x] += 200;
        };
        canvas.onmouseup = function () { canvas.onmousemove = null; };

        canvas.width = this.screenWidth;
        canvas.height = this.screenHeight;

        this.textureImg = new Image(256, 256);
        this.textureImg.src = this.backgroundURL;
        canvas.getContext('2d').drawImage(this.textureImg, 0, 0);

        this.pond = new drop(
            this.screenWidth, this.screenHeight,
            this.damping, this.shading, this.refractions,
            canvas.getContext('2d'), this.screenWidth, this.screenHeight
        );

        if (this.interval != null) { clearInterval(this.interval); }
        this.interval = setInterval(watereff.run, this.timeStep);
    },

    changePicture: function (url) {
        this.backgroundURL = url;
        this.init();
    },

    getMousePosition: function (e) {
        if (!e) { var e = window.event; }
        if (e.pageX || e.pageY) { return new vector2d(e.pageX, e.pageY); }
        if (e.clientX || e.clientY) { return new vector2d(e.clientX, e.clientY); }
    },

    run: function () {
        var ctx = document.getElementById('water').getContext('2d');
        watereff.pond.update();
        watereff.pond.draw(ctx);
    }
};

window.onload = function () { watereff.init(); };
原理與調參
整個效果建立在三件事上:一個存「水面高度」的數值緩衝區、一個依高度差偏移取樣座標的折射計算,以及一個把偏移量疊加到顏色上的明暗模擬。數值本身用不到矩陣也沒有所謂的物理引擎,純粹是兩層陣列反覆迭代。
想調整手感,優先動這三個值:damping 越接近 1,漣漪擴散越久;refractions 越大,畫面扭曲越誇張;shading 決定波紋的明暗對比。
效能上要留意:這個實作用的是純陣列加 getImageData/putImageData,每次都要搬運整張 500×400 的像素資料,在低階手機上會吃緊。若要在正式專案使用,建議降低內部分辨率(例如先算 250×200 再放大貼上),或改用 WebGL 以 shader 處理,效能差距會非常明顯。
程式裡的 Vector2D 由 vector2d.js 提供,只用來做座標相減;若不想多載一個檔案,改成純數值運算即可。
- 上一篇文章: 2014 年刷爆朋友圈的十大 HTML5 案例
- 下一篇文章: IE9 為何不吃 HTML5 部分功能?微軟官方回應整理