流星出現的時候,人們喜歡對著它許願,因為傳說願望會成真。可惜流星實在罕見,我一次都沒看過,也就從沒許過願。前陣子出於興趣做了一個拖尾效果,做到一半突然想到:拖尾不就是流星尾巴的樣子嗎?於是決定用它拼出一場流星雨,也算讓我這種沒見過流星的人開開眼界。
一、準備工作
範例使用開源的 lufylegend.js 引擎,官網與 API 文件可查:https://lufylegend.com/lufylegend。引擎本身沒有內建拖尾功能,所以得自己動手封裝一個。
二、拖尾效果的原理與實作
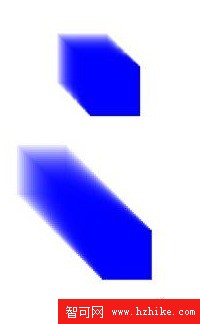
拖尾的做法其實很直白:每一幀都把原物件複製一份蓋在當前位置上,就像不停地蓋印章。當原物件移開,先前蓋下的副本並不會跟著走,副本越來越多,就連成一條尾巴。接著遍歷這串副本,用緩動逐漸降低透明度,等透明度歸零就把它移除,免得佔用資源。
依照這個思路,我封裝了一個 Smearing 類:
/**
 * Smearing:為物件加上拖尾效果
 * @param $object 需要拖尾的物件
 */
function Smearing($object){
    var self = this;
    base(self, LSprite, []);

    // 拖尾層與原物件層分開管理
    self.smearingSprite = new LSprite();
    self.addChild(self.smearingSprite);

    self.object = $object;
    self.originalSprite = new LSprite();
    self.addChild(self.originalSprite);
    self.originalSprite.addChild(self.object);

    // 每幀產生一個拖尾副本
    self.addEventListener(LEvent.ENTER_FRAME, self.smeared);
}
逐幀執行的 smeared 負責複製與淡出:
Smearing.prototype.smeared = function(self){
    var smearingChild = new SmearingChild(self.originalSprite, self.object);
    self.smearingSprite.addChild(smearingChild);

    // 遍歷所有拖尾副本,逐漸降低透明度並在動畫結束後移除
    for (var key in self.smearingSprite.childList) {
        LTweenLite.to(self.smearingSprite.childList[key], 0.5, {
            alpha: 0,
            onComplete: function(o) {
                self.smearingSprite.removeChild(o);
            }
        });
    }
};
而真正決定「尾巴長在哪裡」的是 SmearingChild:
/**
 * SmearingChild:單個拖尾副本
 * @param $parent 用來確定拖尾位置的物件
 * @param $object 要複製的物件
 */
function SmearingChild($parent, $object){
    var self = this;
    base(self, LSprite, []);
    self.addChild($object);
    self.x = $parent.x;
    self.y = $parent.y;
    self.alpha = 0.8;
}這裡有個關鍵設計:移動的對象是 originalSprite,而不是 Smearing 本身。如果連外層一起移動,已經放進 smearingSprite 的副本也會跟著跑,尾巴就會錯位、拖不出來。所以座標要從 originalSprite 傳進副本裡,這也是建構時需要 $parent 參數的原因。
最後補上一個 to 方法,讓物件能緩動移動:
Smearing.prototype.to = function($duration, $vars){
    var self = this;
    $vars.onComplete = function(){
        // 移動結束後標記狀態,方便外部判斷是否移除或改變方向
        self.mode = "complete";
    };
    LTweenLite.to(self.originalSprite, $duration, $vars);
};
封裝完成後,使用起來就三兩行的事:
init(10, "mylegend", 500, 400, main);
var back;

function main(){
    LStage.setDebug(true);
    back = new LSprite();
    back.graphics.drawRect(0, "", [0, 0, 50, 50], true, "blue");

    var smearing = new Smearing(back, 50);
    smearing.to(2, { x: 200, y: 200 });
    addChild(smearing);
}
三、把它變成一場流星雨
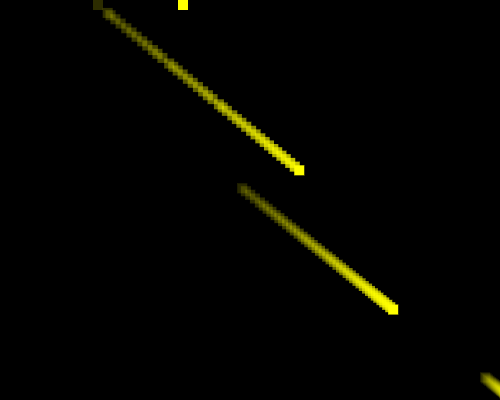
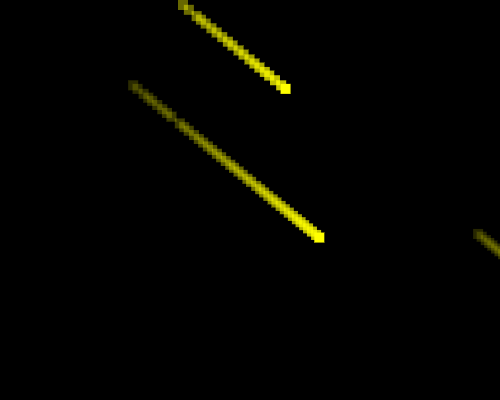
有了 Smearing,流星雨就只是「多開幾顆流星」而已。做法是在底板層放黑色背景,然後每隔一段時間在頂端隨機位置生成一顆黃色流星,讓它拖著尾巴斜飛向畫面下方,飛完就移除。
init(10, "mylegend", 500, 400, main);
var backLayer, meteorLayer;
var back, meteor;
var maxFrame = 40, indexFrame = 0;

function main(){
    LStage.setDebug(true);

    // 底板層
    backLayer = new LSprite();
    addChild(backLayer);

    // 流星層
    meteorLayer = new LSprite();
    addChild(meteorLayer);

    // 黑色背景
    back = new LGraphics();
    back.drawRect(0, "", [0, 0, LStage.width, LStage.height], true, "black");
    backLayer.addChild(back);

    // 一顆流星:10×10 的黃色方塊
    meteor = new LSprite();
    meteor.graphics.drawRect(0, "", [0, 0, 10, 10], true, "yellow");

    backLayer.addEventListener(LEvent.ENTER_FRAME, onframe);
}

function onframe(){
    if (indexFrame > maxFrame) {
        indexFrame = 0;

        // 生成一顆帶拖尾的流星
        var smearing = new Smearing(meteor, 50);
        smearing.x = Math.floor(Math.random() * 250);
        smearing.y = 0;
        smearing.to(2, {
            x: Math.floor(Math.random() * (500 - 480) + 480),
            y: 400
        });
        meteorLayer.addChild(smearing);
    }

    // 清理已經飛完的流星
    for (var key in meteorLayer.childList) {
        if (meteorLayer.childList[key].mode == "complete") {
            meteorLayer.removeChild(meteorLayer.childList[key]);
        }
    }

    indexFrame++;
}
調整 maxFrame 可以控制流星密度,改 to() 的時間參數可以改變速度。想讓尾巴更長,就降低淡出透明度或延長緩動時間——參數一轉,畫面氛圍就完全不同,這也是這類小 demo 最好玩的地方。
- 上一篇文章: 用 HTML5 打造網頁拍照功能:完整示例解析
- 下一篇文章: 用 Canvas 與 File API 縮放並上傳圖片:完整示例