uploadify 3.1 無刷新上傳入門(.NET 篇)
編輯:關於JavaScript
網路上介紹 uploadify 的文章多半還停留在 2.1.0 版,但官方已更新到 3.1,參數名稱與呼叫方式都改了。本文記錄在 .NET 專案中使用 3.1 版的完整流程。
先說結論:這個開發包官方只提供 PHP 版本,但原理完全相同,稍作修改就能用在 .NET 上。理解原理之後,版本差異就只是查文件的問題。

一、加入開發包
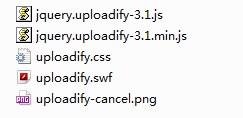
從官網下載後加入專案。我把它精簡過,移除了 PHP 相關檔案:
專案基本結構:
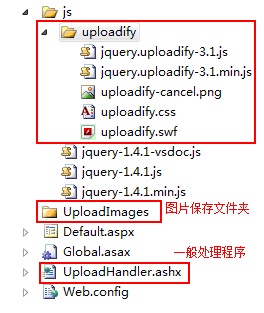
二、載入 CSS 與 JS

務必注意 jquery.js 要在 uploadify.js 之前載入。
三、Default.aspx
<head runat="server">
<title></title>
<link href="js/uploadify/uploadify.css" rel="stylesheet" type="text/css" />
<script src="js/jquery-1.4.1-vsdoc.js" type="text/javascript"></script>
<script src="js/uploadify/jquery.uploadify-3.1.js" type="text/javascript"></script>
<script type="text/javascript">
$(function () {
  $("#uploadify").uploadify({
    // swf 檔的路徑
    'swf': 'js/uploadify/uploadify.swf',
    // 後端處理頁面
    'uploader': 'UploadHandler.ashx',
    // 按鈕顯示文字
    'buttonText': '上傳圖片',
    // 高度與寬度,預設 height 30、width 120
    // 'height': 15,
    // 'width': 80,

    // 檔案類型,預設為所有檔案 'All Files' / '*.*'
    // 在檔案選擇視窗底部的下拉選單中顯示的文字
    'fileTypeDesc': 'Image Files',
    // 允許的副檔名
    'fileTypeExts': '*.gif; *.jpg; *.png',

    // 要送給後端的其他參數用 formData 指定
    // 'formData': { 'someKey': 'someValue', 'someOtherKey': 1 },

    // 佇列容器 id,預設 false 表示自動產生(不帶 #)
    // 'queueID': 'fileQueue',

    // 選檔後自動上傳
    'auto': true,

    // 允許多檔上傳
    'multi': true
  });
});
</script>
</head>
<body>
<div>
  <%-- 作為檔案佇列區域 --%>
  <div id="fileQueue"></div>
  <input type="file" name="uploadify" id="uploadify" />
  <p>
    <a href="javascript:$('#uploadify').uploadify('upload')">上傳</a>|
    <a href="javascript:$('#uploadify').uploadify('cancel')">取消上傳</a>
  </p>
</div>
</body>
</html>
四、UploadHandler.ashx
public void ProcessRequest(HttpContext context) {
  context.Response.ContentType = "text/plain";

  // 接收上傳後的檔案
  HttpPostedFile file = context.Request.Files["Filedata"];

  // 其他參數
  // string somekey = context.Request["someKey"];
  // string other   = context.Request["someOtherKey"];

  // 取得儲存路徑
  string uploadPath = HttpContext.Current.Server.MapPath("UploadImages" + "\\");

  if (file != null) {
    if (!Directory.Exists(uploadPath)) {
      Directory.CreateDirectory(uploadPath);
    }
    file.SaveAs(uploadPath + file.FileName);
    context.Response.Write("1");
  } else {
    context.Response.Write("0");
  }
}

public bool IsReusable {
  get { return false; }
}
五、常用參數說明
不另行指定的話即沿用預設值:
swf:uploadify.swf的相對路徑。uploader:後端處理程式的相對路徑。buttonText:按鈕顯示文字。- 檔案類型預設為
'All Files'/'*.*',可用fileTypeDesc與fileTypeExts指定。 auto:true 表示選檔後自動上傳;設為 false 時需自行呼叫uploadify('upload')或uploadify('cancel')。multi:true 表示允許多檔上傳。method:Post 或 Get,預設 Post。queueSizeLimit:多檔上傳時可選擇的檔案數,預設 999。
另外,取消按鈕的圖片路徑是設定在 CSS 檔案裡的,不在 JS 參數中。
六、把 Complete 顯示改成中文
有網友反映「英文的 Complete 無法改成中文」,這在舊版本可能確實如此。查看 jquery.uploadify-3.1.js 的內容後可以找到上傳完成時顯示的文字位置:
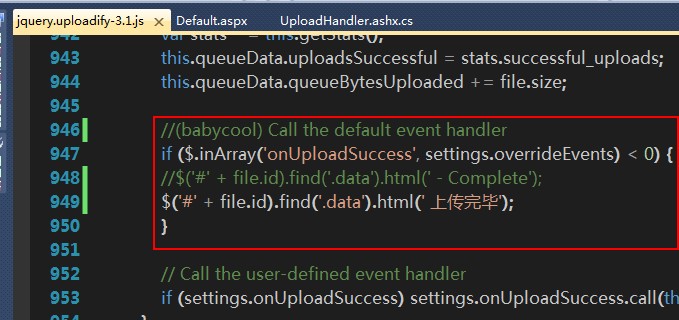
對照官方文件可知,onUploadSuccess 事件可以自訂上傳完成後要執行的程式碼,改寫如下:
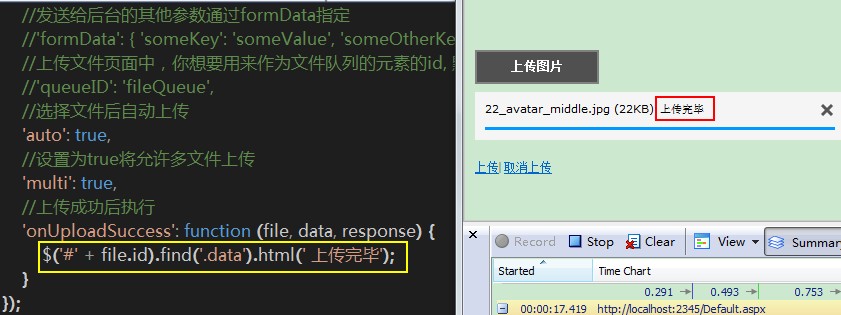
// 選檔後自動上傳
'auto': true,

// 允許多檔上傳
'multi': true,

// 上傳成功後執行
'onUploadSuccess': function (file, data, response) {
  $('#' + file.id).find('.data').html(' 上傳完畢');
}
還有一點很重要:即使前端設定了 fileTypeDesc 與 fileTypeExts 只允許 *.jpg;*.png;*.gif,伺服器端的一般處理程序中仍必須再次檢查副檔名,以防使用者繞過前端驗證直接送出惡意檔案。
相關參考文章:
- Jquery uploadify 上傳外掛使用詳解
- jQuery 外掛 uploadify 實現 AJAX 效果的圖片上傳
- uploadify 官方網站與整理好的 uploadify-v3.1 .NET 開發包
這只是一次簡單的試用,真正用在專案裡還有許多面向要考量,歡迎一起討論。