這篇記錄一下 Vue2 搭配 Webpack 的完整搭建過程,從初始化項目一路做到熱加載,中間踩過的坑也一併寫清楚。
一、初始化項目
新建目錄 vue-wkdemo 作為項目根目錄,然後執行:
npm init
會提示填寫項目信息,一路回車用默認值即可;想省事的話直接 npm init -y 跳過問答。
二、安裝依賴
npm install webpack webpack-dev-server vue-loader vue-html-loader css-loader vue-style-loader vue-hot-reload-api babel-loader babel-core babel-plugin-transform-runtime babel-preset-es2015 babel-runtime@5 --save-dev
npm install html-webpack-plugin --save-dev
npm install vue --save
三、入口文件
位置:vue-wkdemo/app/index/index.js
import Vue from 'Vue'
import Favlist from './components/Favlist.vue'
Vue.config.debug = true;//開啟錯誤提示
window.onload = function () {
  new Vue({
    el: '#app',
    components: { 'my-component': Favlist }
  });
}
四、HTML 模板
位置:vue-wkdemo/app/index/index.html
<!DOCTYPE html>
<html lang="zh">
<head>
<meta name="viewport" content="width=device-width, height=device-height, initial-scale=1.0, user-scalable=no">
<meta charset="utf-8">
<title>首頁</title>
</head>
<body>
<div id="app">
<my-component></my-component>
</div>
</body>
</html>
五、Vue 組件
位置:vue-wkdemo/app/components/Favlist.vue
<template id="template-home">
<div>
<div v-for="n in 10">div</div>
</div>
</template>
<style>
body { color: red; }
</style>
六、Webpack 配置
位置:vue-wkdemo/build/webpack.config.js
// nodejs 中的 path 模塊
var path = require('path');
var HtmlWebpackPlugin = require('html-webpack-plugin')

module.exports = {
  // 入口文件,path.resolve 會把兩個參數拼成絕對路徑,最終指向 index.js
  entry: path.resolve(__dirname, '../app/index/index.js'),

  output: {
    // 輸出目錄
    path: path.resolve(__dirname, '../output/static'),
    publicPath: 'static/',
    filename: '[name].[hash].js',
    chunkFilename: '[id].[chunkhash].js'
  },

  resolve: {
    extensions: ['', '.js', '.vue'],
    alias: { 'Vue': 'vue/dist/vue.js' }
  },

  module: {
    loaders: [
      // 用 vue-loader 加載 .vue 文件
      { test: /\.vue$/, loader: 'vue' },
      { test: /\.js$/, loader: 'babel?presets=es2015', exclude: /node_modules/ }
    ]
  },

  Favlist: { loaders: { js: 'babel' } },

  plugins: [
    new HtmlWebpackPlugin({
      filename: '../index.html',
      template: path.resolve(__dirname, '../app/index/index.html'),
      inject: true
    })
  ]
}
七、執行構建
webpack –display-modules –display-chunks –config build/webpack.config.js
構建完成後可以看到輸出目錄:
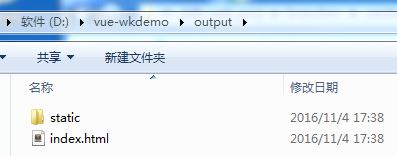
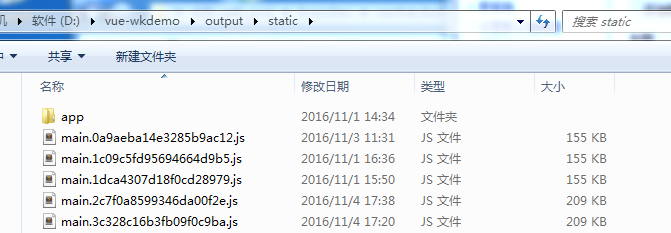
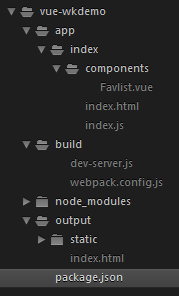
此時的目錄結構如下:
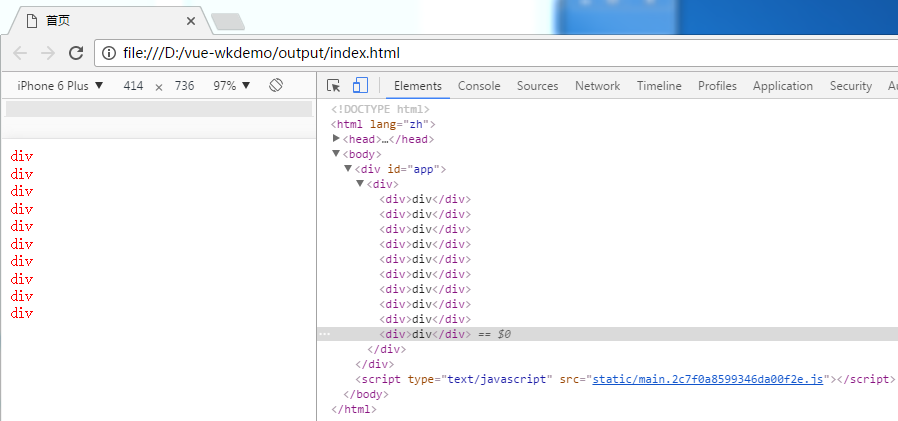
直接打開 output/static/index.html,中間會遇到各種各樣的問題(這裡省略幾百字踩坑記錄……),折騰完終於看到了預期的畫面:
八、接入开发服务器
問題來了:每改一次代碼都要手動跑一遍構建命令,效率實在太低。解法是引入 webpack-dev-middleware 與 webpack-hot-middleware 兩個中間件。
npm install webpack-dev-middleware webpack-hot-middleware --save-dev
npm install express --save-dev
webpack-dev-middleware 可以看作對 webpack 的一層輕量包裝,它通過連接服務器把 webpack 產出的文件直接伺服出去,好處有兩點:
1、不落磁盤,文件存在內存裡。注意常規構建本質上就是往硬盤寫文件。
2、源文件變動後,它不會繼續伺服舊的包,刷新瀏覽器就能看到最新結果,不必等構建,所見即所得。
在 build 目錄下新建 dev-server.js:
// 引入必要的模塊
var express = require('express')
var webpack = require('webpack')
var config = require('./webpack.config')

// 創建 express 實例
var app = express()

// 調用 webpack 並傳入配置
var compiler = webpack(config)

// 使用 webpack-dev-middleware
var devMiddleware = require('webpack-dev-middleware')(compiler, {
  publicPath: config.output.publicPath,
  stats: { colors: true, chunks: false }
})
app.use(devMiddleware)

app.listen(8888, function (err) {
  if (err) { console.log(err); return }
  console.log('Listening at https://localhost:8888')
})
接著需要微調 webpack.config.js 的兩處配置。第一,把 output.publicPath 改成 '/':
output: {
  path: path.resolve(__dirname, '../output/static'),
  publicPath: '/',
  filename: '[name].[hash].js',
  chunkFilename: '[id].[chunkhash].js'
},
第二,把 HtmlWebpackPlugin 的 filename 改成 'app/index/index.html':
plugins: [
  new HtmlWebpackPlugin({
    filename: 'app/index/index.html',
    template: path.resolve(__dirname, '../app/index/index.html'),
    inject: true
  })
]
然後在項目根目錄啟動服務:
node build/dev-server.js
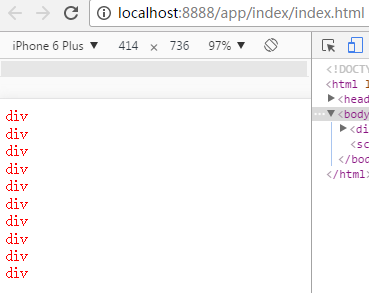
瀏覽器訪問 https://localhost:8888/app/index/index.html,看到的結果與前面直接打開本地 index.html 完全一致。
九、拆分開發環境配置
為了不污染源文件 webpack.config.js,可以在 build 目錄下再建一個 webpack.dev.conf.js,專門放開發模式下的配置:
var HtmlWebpackPlugin = require('html-webpack-plugin')
var path = require('path');

// 引入基本配置
var config = require('./webpack.config');
config.output.publicPath = '/';
config.plugins = [
  new HtmlWebpackPlugin({
    filename: 'app/index/index.html',
    template: path.resolve(__dirname, '../app/index/index.html'),
    inject: true
  })
];
module.exports = config;
這樣開發環境的配置就覆蓋了基礎配置,只需把 dev-server.js 裡的引入改一下:
var config = require('./webpack.dev.conf')
十、開啟熱加載
到這一步改完代碼還是要手動刷新。所謂熱加載,就是能追蹤代碼變化並自動更新界面,甚至保留程序狀態,這需要 webpack-hot-middleware 配合完成。
第一步,在 webpack.dev.conf.js 中添加三個插件:
var HtmlWebpackPlugin = require('html-webpack-plugin')
var path = require('path');
var webpack = require('webpack');

var config = require('./webpack.config');
config.output.publicPath = '/';
config.plugins = [
  new webpack.optimize.OccurenceOrderPlugin(),
  new webpack.HotModuleReplacementPlugin(),
  new webpack.NoErrorsPlugin(),
  new HtmlWebpackPlugin({
    filename: 'app/index/index.html',
    template: path.resolve(__dirname, '../app/index/index.html'),
    inject: true
  })
];
module.exports = config;
第二步,在入口配置里加入 'webpack-hot-middleware/client':
entry: ['webpack-hot-middleware/client', path.resolve(__dirname, '../app/index/index.js')],
第三步,在 dev-server.js 中註冊中間件:
var express = require('express')
var webpack = require('webpack')
var config = require('./webpack.dev.conf')

var app = express()
var compiler = webpack(config)

var devMiddleware = require('webpack-dev-middleware')(compiler, {
  publicPath: config.output.publicPath,
  stats: { colors: true, chunks: false }
})
var hotMiddleware = require('webpack-hot-middleware')(compiler)

app.use(devMiddleware)
app.use(hotMiddleware)

app.listen(8888, function (err) {
  if (err) { console.log(err); return }
  console.log('Listening at https://localhost:8888')
})
重啟服務,把 Favlist.vue 裡的文字顏色改成 black:
<style>
body { color: black; }
</style>
一保存,效果立刻出現在瀏覽器裡,不用再手動刷新了。
剛才動了基礎配置的入口,為了避免這種侵入,改成在 webpack.dev.conf.js 裡動態注入:
var HtmlWebpackPlugin = require('html-webpack-plugin')
var path = require('path');
var webpack = require('webpack');

var config = require('./webpack.config');
config.output.publicPath = '/';
config.plugins = [
  new webpack.optimize.OccurenceOrderPlugin(),
  new webpack.HotModuleReplacementPlugin(),
  new webpack.NoErrorsPlugin(),
  new HtmlWebpackPlugin({
    filename: 'app/index/index.html',
    template: path.resolve(__dirname, '../app/index/index.html'),
    inject: true
  })
];

// 動態向入口配置中注入 webpack-hot-middleware/client
var devClient = 'webpack-hot-middleware/client';
Object.keys(config.entry).forEach(function (name, i) {
  var extras = [devClient]
  config.entry[name] = extras.concat(config.entry[name])
});

module.exports = config;
同時把 webpack.config.js 的入口改為對象形式:
entry: {
  index: [ path.resolve(__dirname, '../app/index/index.js') ]
},
十一、讓 HTML 變更也能自動刷新
目前只監聽到了 Favlist.vue 的改動,index.html 變了還是不會刷新,還需要補一點工作。
第一步,在 dev-server.js 中監聽 html 變化事件:
var express = require('express')
var webpack = require('webpack')
var config = require('./webpack.dev.conf')

var app = express()
var compiler = webpack(config)

var devMiddleware = require('webpack-dev-middleware')(compiler, {
  publicPath: config.output.publicPath,
  stats: { colors: true, chunks: false }
})
var hotMiddleware = require('webpack-hot-middleware')(compiler)

// 監聽 html 文件改變事件
compiler.plugin('compilation', function (compilation) {
  compilation.plugin('html-webpack-plugin-after-emit', function (data, cb) {
    hotMiddleware.publish({ action: 'reload' })
    cb()
  })
})

app.use(devMiddleware)
app.use(hotMiddleware)

app.listen(8888, function (err) {
  if (err) { console.log(err); return }
  console.log('Listening at https://localhost:8888')
})
第二步,把 webpack.dev.conf.js 裡的 devClient 換成自定義腳本:
var devClient = './build/dev-client';
Object.keys(config.entry).forEach(function (name, i) {
  var extras = [devClient]
  config.entry[name] = extras.concat(config.entry[name])
});
此時入口配置變成:
entry: {
  index: [ './build/dev-client', path.resolve(__dirname, '../app/index/index.js') ]
},
第三步,新建 build/dev-client.js:
var hotClient = require('webpack-hot-middleware/client')

// 訂閱事件,當 event.action === 'reload' 時執行頁面刷新
hotClient.subscribe(function (event) {
  if (event.action === 'reload') {
    window.location.reload()
  }
})
這裡除了引入 client,還多訂閱了一個事件。dev-server.js 那邊在 html-webpack-plugin 產出後發布了 reload 事件,兩邊一對應,html 一改就會自動刷新頁面。

至此,一套能用的 Vue2 + Webpack 開發環境就搭完了。
- 上一篇文章: 用 Vue.js 打造可複用的翻頁組件(含完整源碼)
- 下一篇文章: 用 JS + CSS3 做出背景高斯模糊的炫酷彈窗
相關文章
-
詳解 webpack 多入口配置:打造多頁面的 Vue 專案 詳解 Vue 2.0 transition 在嵌套元素上的過渡設定 解決 vue-cli 專案裡 stylus 無法使用的問題 Webpack 打包 CSS 後 z-index 被重新計算怎麼辦 動手做 Vue2 + Vue Router + Webpack 單頁應用實例 webpack 進階實戰:從代碼分離到長效緩存的最終方案 使用 Webpack 為 Node.js 實現代碼熱替換 使用 vue.js 製作分頁組件 webpack 與 Vue 快速入門:建立第一個打包專案 用 webpack 與 Vue 組件化:從 .vue 到熱替換