相信大家在空閒時都會逛逛微博、推特等社交網站。筆者每次登入微博時都會留意它有什麼變化,從版面調整到 API 介面的改變。在首頁登入微博時,我們可以看到一欄「大家正在說」,它滾動顯示著每個人發送的微博。這個效果相當有趣,因此本文將介紹如何實作滾動顯示微博訊息的效果。
仔細觀察「大家正在說」,它是透過由上往下滾動來不斷顯示微博,且每則新微博都以淡入效果呈現。

圖1 微博「大家正在說」
1、定義微博外掛
接下來我們定義一個外掛來取得某話題下的微博。這裡使用 jQuery 的擴充功能來定義微博外掛。jQuery 提供了一種機制,讓使用者能為核心模組增加自訂方法與額外功能,藉此封裝常用方法、提高開發效率。
首先,我們透過自執行函式(IIFE)並把 jQuery 物件作為參數傳入,建立「$」與 jQuery 的對應關係,這樣「$」就不會在其執行範圍內被其他庫覆蓋:
// Defines a jquery plugin. ; (function($) { $.fn.weiboSearch = function() { // your plugin logic }; })(jQuery);
由於微博 API 2.0 提供了 search/topics 介面來搜尋某話題下的微博,請求成功時會回傳 JSON 格式資料。

圖2 微博搜尋介面參數
如上圖,微博搜尋介面需要提供應用的 AppKey(非 OAuth 授權方式)與話題關鍵字(q)。接著定義一個字面量物件 defaults,包含 url、appKey、q、單頁返回筆數(count)等屬性:
// Defines weibo defaults type. $.fn.weiboSearch.defaults = { url: 'https://api.weibo.com/2/search/topics.json?q=', appKey: '5786724301', numWeibo: 15, term: '' };
2、發送跨源請求
我們可以透過 ajax 請求呼叫微博搜尋介面,成功後伺服器會回傳 JSON 資料,再將資料呈現到頁面。由於涉及跨源請求,需以 JSONP 格式取得資料,它允許在伺服器端整合 Script tags 回傳至客戶端,透過 JavaScript callback 形式實現跨域存取。
$.getJSONP = function(s) { // Due to cross origin request, so we to use jsonp format. s.dataType = "jsonp"; $.ajax(s); // figure out what the callback fn is var $script = $(document.getElementsByTagName('head')[0].firstChild); var url = $script.attr('src') || ''; // Gets callback function var cb = (url.match(/callback=(\w+)/) || [])[1]; if (!cb) return; // bail var t = 0, cbFn = window[cb]; $script[0].onerror = function(e) { $script.remove(); handleError(s, {}, "error", e); clearTimeout(t); }; if (!s.timeout) return; window[cb] = function(json) { clearTimeout(t); cbFn(json); cbFn = null; }; // Gets time out function flag. t = setTimeout(function() { $script.remove(); handleError(s, {}, "timeout"); if (cbFn) window[cb] = function() { }; }, s.timeout); /** * Fix issue: "jQuery.handleError is not a function" */ function handleError(s, xhr, msg, e) { s.error && s.error.call(s.context, xhr, msg, e); s.global && $.event.trigger("ajaxError", [xhr, s, e || msg]); s.complete && s.complete.call(s.context, xhr, e || msg); } };
接著在 $.fn.weiboSearch() 中定義私有方法 grabWeibos(),負責呼叫 getJSONP() 並取得回傳的 JSON 資料顯示到頁面:
/** * Uses ajax request to grab weibos. */ function grabWeibos() { var url = opts.url; grabFlag = false; grabbing = true; $.getJSONP({ url: url, timeout: 30000, data: { source: opts.appKey, q: opts.term, count: opts.numWeibo }, error: function(xhr, status, e) { }, complete: function() { }, success: function(json) { if (json.error) { // Can't get results displays error. return; } // iterates weibo results $.each(json.data.statuses, function(i) { // Adds data to page. }) } }); }
3、JSON 資料處理
介面部分的 HTML 如下:
<!-- From design--> <!DOCTYPE html> <html> <head> <meta content="text/html; charset=utf-8" http-equiv="Content-Type"> <title></title> <link rel="stylesheet" type="text/css" href="css/weibo.serach.style.css"> </head> <body> <table> <tbody> <tr> <td> <div id="weibo1" class="weibo"> </div> </td> <td> <div id="weibo2" class="weibo"> </div> </td> </tr> </tbody> </table> </body> </html>
接著引用 jQuery 與自訂外掛 jquery.weibo.search.js:
<!-- Adds Javascript reference --> <script type="text/javascript" src="https://ajax.googleapis.com/ajax/libs/jquery/1.7.1/jquery.min.js"></script> <script type="text/javascript" src="js/jquery.weibo.search.js"></script>
然後呼叫 weiboSearch() 方法,搜尋「情人節」與「元宵節」話題下的微博:
<!-- When document ready invokes charCount function--> <script type="text/javascript"> // Invokes webioSearch function. $(document).ready(function () { $("#weibo1").weiboSearch({ term:'情人節', direction:'down' }); $("#weibo2").weiboSearch({ term:'元宵節', direction:'up' }); }); </script>
開啟 Chrome 的 Network 選項,可看到 search/topics 的請求包含了 source、count、q 與 callback 參數。
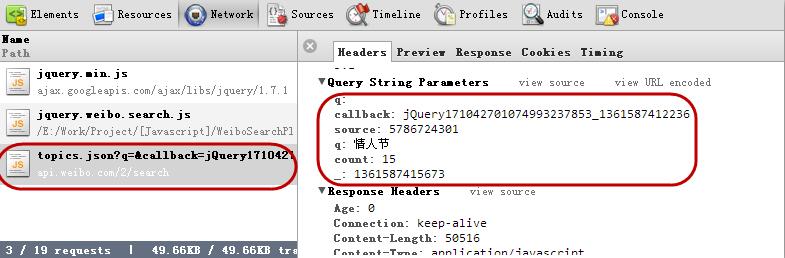
圖3 Ajax 請求
由於 Chrome 中的 JSON 資料沒有換行不便查看,我們改用 Firefox 檢視回傳的 JSON 格式資料。
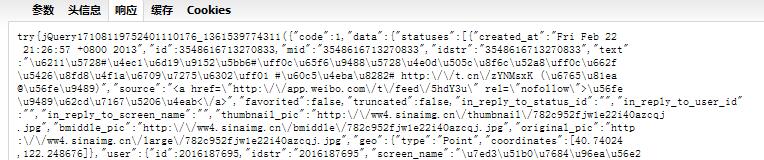
圖4 微博 JSON 資料
使用 JSON viewer 格式化後的資料如下:
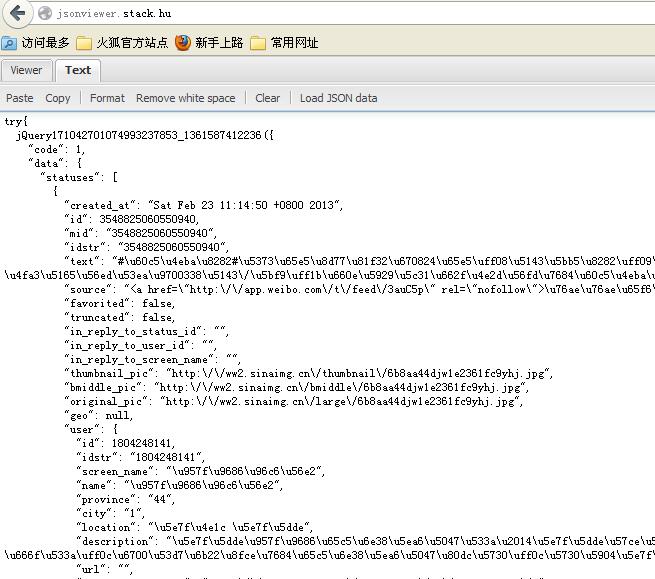
圖5 格式化的 JSON 資料
可以發現微博資料被包在 try/catch 語句中,請求成功時 catch 為空,反之則回傳錯誤訊息。
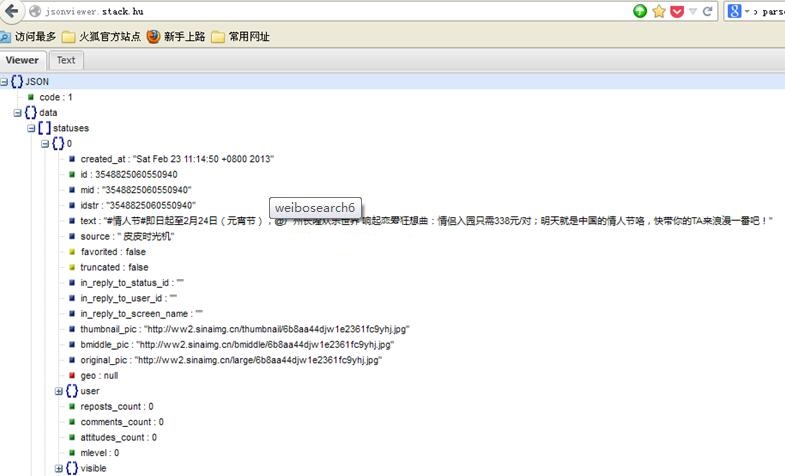
圖6 微博 JSON 資料
如上圖,回傳資料是一個 JSON 陣列,其大小由請求參數 count 決定,且微博規定每個請求最多回傳 200 筆。
接著實現 success 方法,將資料顯示到頁面:
// Gets response data from weibo api. success: function(json) { if (json.data.error) { // Can't get data displays error. failEye(json.data.error); return; } // Emptys contain with fade out effect. $cont.fadeOut('fast', function() { $cont.empty(); // iterates weibo results $.each(json.data.statuses, function(i) { if (!opts.filter.call(opts, this) || this.truncated) return; // skip this weibo, some weibos may be deleted. var $img, $text, w, tweet = opts.formatter(this, opts), $tweet = $(tweet); // Weibo data. $tweet.css(opts.css['tweet']); $img = $tweet.find('.weiboSearchProfileImg').css(opts.css['img']); $tweet.find('.weiboSearchUser').css(opts.css['user']); $tweet.find('.weiboSearchTime').css(opts.css['time']); $tweet.find('a').css(opts.css['a']); $tweet.appendTo($cont); $text = $tweet.find('.weiboSearchText').css(opts.css['text']); if (opts.avatar) { w = $img.outerWidth() + parseInt($tweet.css('paddingLeft')); $text.css('paddingLeft', w); } }) // Loads weibos with fade in effect. $cont.fadeIn('fast'); // Invokes weibo api again. if (json.data.statuses.length < 2) { if (opts.refreshSeconds) setTimeout(gradWeibos, opts.refreshSeconds * 1000); return; } }); }
在 success() 中,我們用 fadeIn() 與 fadeOut() 實現微博載入時淡入、清除時淡出的效果,並用 $.each() 遍歷每則微博加入 DOM。
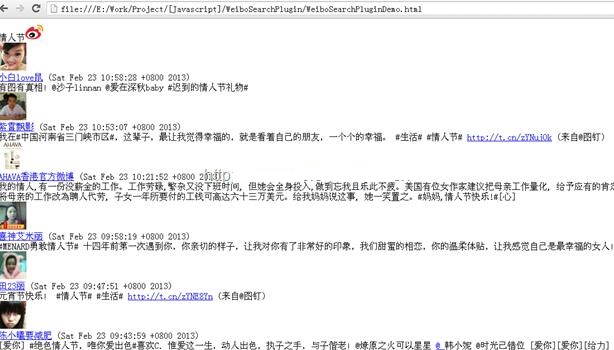
圖7 微博訊息
4、微博相對時間
我們發現每則微博的時間顯示不太正常,因此定義 relativeTime() 方法,把微博的建立時間(created_at,格式為「Thu Feb 14 20:33:30 +0800 2013」)轉換為相對時間:
function relativeTime(dateString) { var values = dateString.split(" "); dateString = values[1] + " " + values[2] + ", " + values[5] + " " + values[3]; var parsed_date = Date.parse(dateString); var relative_to = (arguments.length > 1) ? arguments[1] : new Date(); var delta = parseInt((relative_to.getTime() - parsed_date) / 1000); delta = delta + (relative_to.getTimezoneOffset() * 60); if (delta < 60) { return 'just now'; } else if (delta < 120) { return 'a minute ago'; } else if (delta < (60 * 60)) { return (parseInt(delta / 60)).toString() + ' minutes ago'; } else if (delta < (120 * 60)) { return 'about an hour ago'; } else if (delta < (24 * 60 * 60)) { return 'about ' + (parseInt(delta / 3600)).toString() + ' hours ago'; } else if (delta < (48 * 60 * 60)) { return '1 day ago'; } else { return (parseInt(delta / 86400)).toString() + ' days ago'; } }
它先把時間格式轉換為「Feb 14, 2013 20:33:30」,再轉為 Date,最後以當前時間減去微博時間計算出相對時間。
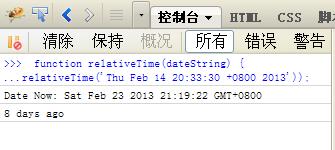
圖8 relativeTime 計算相對時間
5、微博動態效果
要實現由上往下的滾動效果,可使用 jQuery 的 animate() 方法:
/** * Weibos rolling from top to bottom */ function weiboIn() { if (paused || grabbing) { setTimeout(weiboIn, 500); return; } // Gets last element. var h, $el = $cont.children(':last'), $elFirst = $cont.children(':first'); // Gets last weibo item height. h = $el.outerHeight(); // Animate: increases the first weibo item margin top to 'h'. // Then decreases the first weibo item margin top to '0'. $elFirst.animate({ marginTop: h }, opts.animInSpeed, function() { $elFirst.css({ marginTop: 0, opacity: 1 }); /*@cc_on try { el.style.removeAttribute('filter'); } // ie cleartype fix catch (smother) { } @*/ // append the last weibo item first. $el.css(opts.css['tweet']).hide().prependTo($cont); // Fade in display new item. $el.fadeIn(opts.animInSpeed); // Loop setTimeout(grabFlag ? grabWeibos : weiboIn, opts.timeout); }); }
weiboIn() 透過 animate() 動態修改 div 的 marginTop 屬性,讓微博由上往下滾動;接著把滾到最後的微博重新插入到最前面,再用 fadeIn() 淡入顯示。
若要做向上滾動與淡出效果,邏輯正好相反:先淡出隱藏微博,再向上滾動:
/** * Weibos rolling from bottom to top. */ function weiboOut() { if (paused || grabbing) { setTimeout(weiboOut, 500); return; } // Gets last element. var h, $el = $cont.children(':first'), el = $el[0]; // Implements fade out effect. $el.animate(opts.animOut, opts.animOutSpeed, function() { // Gets first weibo item height. h = $el.outerHeight(); $el.animate({ marginTop: -h }, opts.animInSpeed, function() { $el.css({ marginTop: 0, opacity: 1 }); /*@cc_on try { el.style.removeAttribute('filter'); } // ie cleartype fix catch (smother) { } @*/ // append the last weibo item last. $el.css(opts.css['tweet']).show().appendTo($cont); setTimeout(grabFlag ? grabWeibos : weiboOut, opts.timeout); }); }); }
在 weiboOut() 中,我們透過修改 opacity 實現淡出,並以 animate() 修改 marginTop(從 -h 開始變化)。接著為介面加上 CSS 樣式讓畫面更美觀:
// Weibo css style in jquery plugin. css:{ // default styling a:{ textDecoration:'none', color:'#3B5998' }, eye:{ width:'40px', height:'40px', position:'absolute', left:'-30px', top:'-20px', border:'none' }, container:{ overflow:'hidden', backgroundColor:'#eee', height:'100%' }, fail:{ background:'#6cc5c3 url(./images/error_page_small.png) no-repeat 50% 50%', height:'100%', padding:'10px' }, frame:{ border:'10px solid #C2CFF1', borderRadius:'10px', '-moz-border-radius':'10px', '-webkit-border-radius':'10px' }, tweet:{ padding:'5px 10px', clear:'left' }, img:{ 'float':'left', margin:'5px', width:'48px', height:'48px' }, loading:{ padding:'20px', textAlign:'center', color:'#888' }, text:{}, time:{ fontSize:'smaller', color:'#888' }, title:{ backgroundColor:'#C2CFF1', margin:0, padding:'0 0 5px 0', textAlign:'center', fontWeight:'bold', fontSize:'large', position:'relative' }, titleLink:{ textDecoration:'none', color:'#3B5998' }, user:{ fontWeight:'bold' } } 然後,我們weibo.serach.style.css文件中添加以下樣式,具體定義如下: div.weibo { margin: auto; width: 300px } #weibo1 { height: 300px;} #weibo2 { height: 300px; } body { background-color: white } body, div { font-family: '微軟雅黑', helvetica, verdana, arial, sans-serif } body { margin: 20px 0; padding: 0; font-size: small; color: #333 } div {display: block} /* Image rounded corner*/ .weiboSearchProfileImg{ border-radius: 10px; -moz-border-radius: 10px; -webkit-border-radius: 10px; } table { margin: auto; border-collapse: separate; border-spacing: 25px; } table { border-collapse: collapse; }

圖9 程式介面
至此,我們已完成微博搜尋外掛,能搜尋「情人節」與「元宵節」話題下的微博,並將資料顯示到頁面中。以上就是本文的全部內容,希望對大家學習有所幫助。