本文以打造一個 TAB 元件為例,示範如何以 JavaScript 依照物件導向的思路組建可重複使用的 UI 元件,供需要的朋友參考。
元件的兩個切面
從功能來看,一個元件包含可視部分與邏輯控制部分;從程式碼結構來看,則包含程式碼本身與資源(樣式、圖片等)。好的元件應具備四個特質:
高內聚、低耦合——不與其他程式邏輯交叉,可被繼承或組合。
封裝性——隱藏私有方法與變數。
可重用性——能反覆使用,並作為組裝更複雜應用的積木。
程式碼
<html>
<head>
<meta http-equiv="Content-Type" content="text/html; charset=gb2312">
<title>JS 組件</title>
<style>
.TabControl{ position:absolute; }
.TabControl .tab-head{
    height:22px;
    width:100%;
    position:absolute;
    z-index:9;
}
.TabControl ul{
    position:absolute;
    top:2px;
    padding:0px;
    margin:0px;
    z-index:10;
}
.TabControl li{
    list-style:none; /* 將默認的列表符號去掉 */
    padding-left:10px;
    padding-right:10px;
    margin:0;
    float:left;
    border: solid 1px #e0e0e0;
    background-color:#ffffff;
    height:20px;
    cursor:default;
}
.TabControl li.selected{
    border-bottom: solid 1px #ffffff;
    border-top: solid 1px #ff0000;
    z-index:10;
}
.TabControl li.unselected{
    border-bottom: solid 1px #e0e0e0;
    border-top: solid 1px #e0e0e0;
    z-index:10;
}
.TabControl .pageSelected{
    position:absolute;
    display:block;
    border: solid 1px #e0e0e0;
    width:100%;
    height:100%;
    z-index:1;
    top:23px;
}
.TabControl .pageUnSelected{
    display:none;
    border: solid 1px #e0e0e0;
    width:100%;
    height:100%;
    z-index:1;
    top:23px;
}
</style>
</head>
<body>
<script lang="javascript">
var TabControl = function(width, height){
    var me = this;
    //TAB控件容器,頭,列表
    var cbody, tabHead, ul;
    //最後選中的TAB頁
    var lastSelectedPage = 0;
    //TAB頁管理容器
    var pages = [];

    /**
     * 初始化函數
     * param{tabCount}, 創建tab頁的個數
     */
    me.init = function(tabCount){
        //創建TAB容器
        cbody = document.createElement("DIV");
        cbody.className = "TabControl";
        cbody.style.width = width || "400px";
        cbody.style.height = height || "300px";

        //創建TAB控件頭
        tabHead = document.createElement("DIV");
        tabHead.className = "tab-head";
        cbody.appendChild(tabHead);

        //創建TAB頭 ul
        ul = document.createElement("UL");
        tabHead.appendChild(ul);

        //根據參數初始化TAB頁,缺省創建2個TAB頁
        var tc = tabCount || 2;
        for(var i=0;i<tc;i++){
            me.insertPage(i,"tabPage" + i)
        }

        //缺省選中第一頁
        me.selectPage(0);
    }

    /**
     * 插入TAB頁
     * param{idx},插入位置
     * param{title},TAB頁標題
     */
    me.insertPage = function(idx,title){
        if(parseInt(idx)>=0){
            var li = document.createElement("LI");
            li.className = "unselected";
            li.innerText = title;

            var chd = ul.childNodes[idx];
            ul.insertBefore(li, chd);   // 修正:原寫法少了第二個參數

            li.onclick = function(){
                me.selectPage(getSelectedIndex(li));
            }

            //創建page
            var page = document.createElement("DIV");
            page.className = "pageUnSelected";
            pages.push(page);
            cbody.appendChild(page);
        }
    }

    /* 內部函數:根據選中的對象,獲取對應的TAB頁索引 */
    function getSelectedIndex(li){
        var chd = ul.childNodes;
        for(var i=0;i<chd.length;i++){
            if(chd[i] == li){
                return i;
            }
        }
    }

    /**
     * 選中某頁
     * param{idx},選中頁的索引
     */
    me.selectPage = function(idx){
        if(parseInt(idx)>=0){
            var lis = ul.childNodes;
            lis[lastSelectedPage].className = "unselected";
            lis[idx].className = "selected";
            //隱藏無需顯示的TAB頁,顯示選中的TAB頁
            pages[lastSelectedPage].className = "pageUnSelected";
            pages[idx].className = "pageSelected";
            lastSelectedPage = idx;
        }
    }

    //在函數尾部調用初始化函數執行初始化
    me.init();

    //最後返回DOM對象
    return cbody;
}

var tabControl = new TabControl();
document.body.appendChild(tabControl);
</script>
</body>
</html>
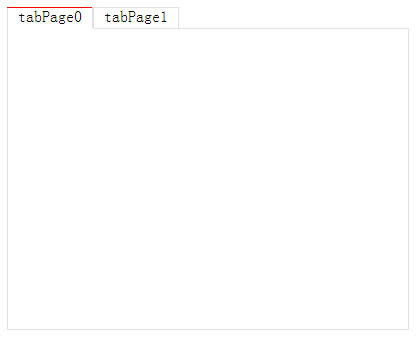
這個元件做對了什麼
用閉包實現封裝。cbody、tabHead、ul、pages、lastSelectedPage 全部宣告在建構子內部的 var,外部完全無法存取;只有 init、insertPage、selectPage 三個方法被掛到 me 上成為公開介面。getSelectedIndex 則是純內部函數,不對外暴露。
對外只暴露三個方法。介面極小,使用方只需知道「怎麼建、怎麼加頁、怎麼切頁」,這是低耦合的具體體現。
回傳 DOM 而非 this。建構子最後回傳 cbody 這個 DOM 節點,因此 new TabControl() 得到的就是可直接 appendChild 的元素,使用起來很順手。
需要修正的幾處
ul.insertBefore 少了參數。原始碼寫成 ul.insertBefore(li),而 insertBefore 需要 (新節點, 參考節點) 兩個參數。若第二參數省略會丟 TypeError。應改為 ul.insertBefore(li, ul.childNodes[idx]);若 idx 超出範圍則改用 appendChild。
pages 的索引與 li 的索引不對應。li 是插入到 ul 的指定位置,而 page 一律用 push 附加到尾端。當插入位置不是尾端時,兩者的索引就會錯位,切頁會顯示錯誤的內容。正確做法是讓 page 也插入到對應位置,或改用一個以 key 索引的物件來對應。
innerText 不是跨瀏覽器標準。Firefox 早期不支援 innerText,應改用 textContent。
lang 屬性寫錯。script 標籤上應是 lang="javascript"(已廢棄)或 type,原寫法拼字有誤。
缺 selected 樣式的預設值。li.selected 定義了樣式,但初始狀態下所有 li 都是 unselected,需靠 selectPage(0) 才會套用;若 selectPage 出錯,畫面會缺少頁籤高亮。
用 ES6 class 重寫骨架
class TabControl {
    #pages = [];
    #current = 0;
    #el;

    constructor(width = '400px', height = '300px') {
        this.#el = document.createElement('div');
        this.#el.className = 'tab';
        Object.assign(this.#el.style, { width, height, position: 'relative' });
    }

    get element() { return this.#el; }

    addPage(title, contentNode) {
        const tab = document.createElement('button');
        tab.type = 'button';
        tab.className = 'tab__btn';
        tab.textContent = title;

        const panel = document.createElement('div');
        panel.className = 'tab__panel';
        panel.hidden = true;
        panel.append(contentNode);

        const index = this.#pages.length;
        tab.addEventListener('click', () => this.select(index));

        this.#pages.push({ tab, panel });
        this.#el.append(tab, panel);
        if (index === 0) this.select(0);
        return this;
    }

    select(index) {
        if (!this.#pages[index]) return;
        this.#pages.forEach((p, i) => {
            const active = i === index;
            p.tab.setAttribute('aria-selected', String(active));
            p.panel.hidden = !active;
        });
        this.#current = index;
        return this;
    }
}
這個版本補上了原範例缺少的關鍵環節:# 私有欄位由語言層級保證隱藏;aria-selected 與 hidden 讓螢幕閱讀器能正確理解頁籤狀態;用 button 而非 li 作為頁籤,使鍵盤 Tab 鍵與 Enter 鍵天生可用。原範例以 li 加 onclick 實作,鍵盤使用者完全無法操作——這是自製元件最常見的無障礙疏漏。
希望本文所述對你的 JavaScript 學習有所幫助。
- 上一篇文章: IE 中 Textarea 捲軸無法拖曳的原因與解法
- 下一篇文章: JavaScript 為元素綁定事件監聽器的幾種方式