這裡示範一個可以自行縮放的內容區。操作方式很直覺:把游標移到區域的右下角,出現斜向的放大箭頭後按住往上或往下拉,就能改變區塊尺寸;當區域被壓縮到小於內容時,內部會自動出現捲動條。這個模式在後台面板、浮動視窗裡相當常見。
運行效果預覽:
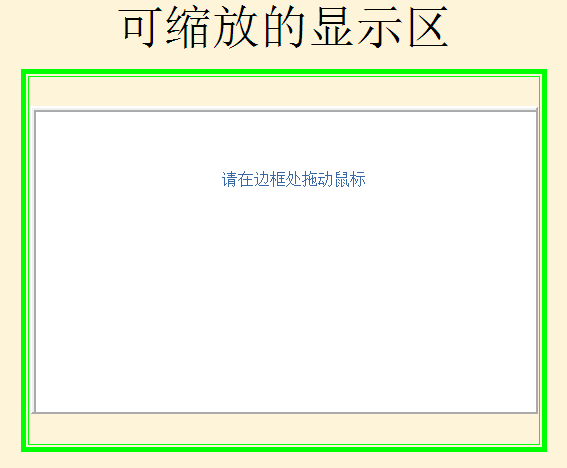
線上展示:https://demo.jb51.net/js/2015/js-ksf-box-style-demo/
完整程式碼
<HTML> <HEAD> <TITLE>可縮放的顯示區</TITLE> <STYLE type=text/css> BODY { MARGIN-TOP: 0px; FONT-SIZE: 9pt; MARGIN-LEFT: 0px; MARGIN-RIGHT: 0px; FONT-FAMILY: "宋體" } A { FONT-WEIGHT: 400; FONT-SIZE: 9pt; COLOR: black; TEXT-DECORATION: none } A:hover { FONT-WEIGHT: 400; FONT-SIZE: 9pt; COLOR: red; TEXT-DECORATION: underline } A:active { FONT: 9pt "宋體"; CURSOR: hand; COLOR: #ff0033 } .STYLE1 {font-family: "華文彩雲", "華文仿宋", "華文細黑", "華文新魏", "華文行楷", "華文中宋", "新宋體", "幼圓"} .STYLE2 { font-family: "方正姚體"; font-weight: bold; } </STYLE> <META http-equiv=Content-Type content="text/html; charset=gb2312"> </HEAD> <BODY bgColor=#fef4d9> <CENTER> <span class="STYLE1"><FONT color=black size=16>可縮放的顯示區</FONT></span> </CENTER><BR> <CENTER> <TABLE borderColor=#00FF00 border=5 borderlight="green"> <TBODY> <TR> <TD align=left> <STYLE>UNKNOWN { box-sizing: border-box; moz-box-sizing: border-box } #testDiv { BORDER-RIGHT: white 2px outset; PADDING-RIGHT: 2px; BACKGROUND-POSITION: 0% 50%; BORDER-TOP: white 2px outset; PADDING-LEFT: 2px; Z-INDEX: 2; BACKGROUND-ATTACHMENT: scroll; LEFT: 30px; PADDING-BOTTOM: 2px; MARGIN: 0px; OVERFLOW: hidden; BORDER-LEFT: white 2px outset; WIDTH: 500px; COLOR: #3969a5; PADDING-TOP: 2px; BORDER-BOTTOM: white 2px outset; BACKGROUND-REPEAT: repeat; HEIGHT: 300px; BACKGROUND-COLOR: buttonface } BODY { FONT-SIZE: 9pt; FONT-FAMILY: Verdana } #innerNice { BORDER-RIGHT: white 2px inset; PADDING-RIGHT: 8px; BACKGROUND-POSITION: 0% 50%; BORDER-TOP: white 2px inset; PADDING-LEFT: 8px; BACKGROUND-ATTACHMENT: scroll; PADDING-BOTTOM: 8px; OVERFLOW: auto; BORDER-LEFT: white 2px inset; WIDTH: 100%; COLOR: #3969a5; PADDING-TOP: 8px; BORDER-BOTTOM: white 2px inset; BACKGROUND-REPEAT: repeat; HEIGHT: 100%; BACKGROUND-COLOR: white } </STYLE> <DIV class=resizeMe id=testDiv> <DIV id=innerNice> <P align=center> </P> <P align=center>請在邊框處拖動鼠標</P> <P> </P> <P> </P> <P> </P></DIV></DIV> <SCRIPT language=javascript> var theobject = null; //This gets a value as soon as a resize start function resizeObject() { this.el = null; //pointer to the object this.dir = ""; //type of current resize (n, s, e, w, ne, nw, se, sw) this.grabx = null; //Some useful values this.graby = null; this.width = null; this.height = null; this.left = null; this.top = null; } function getDirection(el) { var xPos, yPos, offset, dir; dir = ""; xPos = window.event.offsetX; yPos = window.event.offsetY; offset = 8; //The distance from the edge in pixels if (yPos<offset) dir += "n"; else if (yPos > el.offsetHeight-offset) dir += "s"; if (xPos<offset) dir += "w"; else if (xPos > el.offsetWidth-offset) dir += "e"; return dir; } function doDown() { var el = getReal(event.srcElement, "className", "resizeMe"); if (el == null) { theobject = null; return; } dir = getDirection(el); if (dir == "") return; theobject = new resizeObject(); theobject.el = el; theobject.dir = dir; theobject.grabx = window.event.clientX; theobject.graby = window.event.clientY; theobject.width = el.offsetWidth; theobject.height = el.offsetHeight; theobject.left = el.offsetLeft; theobject.top = el.offsetTop; window.event.returnValue = false; window.event.cancelBubble = true; } function doUp() { if (theobject != null) { theobject = null; } } function doMove() { var el, xPos, yPos, str, xMin, yMin; xMin = 8; //The smallest width possible yMin = 8; // height el = getReal(event.srcElement, "className", "resizeMe"); if (el.className == "resizeMe") { str = getDirection(el); //Fix the cursor if (str == "") str = "default"; else str += "-resize"; el.style.cursor = str; } //Dragging starts here if(theobject != null) { if (dir.indexOf("e") != -1) theobject.el.style.width = Math.max(xMin, theobject.width + window.event.clientX - theobject.grabx) + "px"; if (dir.indexOf("s") != -1) theobject.el.style.height = Math.max(yMin, theobject.height + window.event.clientY - theobject.graby) + "px"; if (dir.indexOf("w") != -1) { theobject.el.style.left = Math.min(theobject.left + window.event.clientX - theobject.grabx, theobject.left + theobject.width - xMin) + "px"; theobject.el.style.width = Math.max(xMin, theobject.width - window.event.clientX + theobject.grabx) + "px"; } if (dir.indexOf("n") != -1) { theobject.el.style.top = Math.min(theobject.top + window.event.clientY - theobject.graby, theobject.top + theobject.height - yMin) + "px"; theobject.el.style.height = Math.max(yMin, theobject.height - window.event.clientY + theobject.graby) + "px"; } window.event.returnValue = false; window.event.cancelBubble = true; } } function getReal(el, type, value) { temp = el; while ((temp != null) && (temp.tagName != "BODY")) { if (eval("temp." + type) == value) { el = temp; return el; } temp = temp.parentElement; } return el; } document.onmousedown = doDown; document.onmouseup = doUp; document.onmousemove = doMove; </SCRIPT> </TD></TR></TBODY></TABLE> </CENTER> </BODY> </HTML>
四個環節看懂縮放原理
判斷游標靠近哪一條邊。getDirection() 取出游標在元素內的 offsetX/offsetY,若距邊界小於 8px,就組出 n(上)、s(下)、e(右)、w(左)的組合字串,例如右下角是 se。這個字串同時也拿來設定游標樣式,湊成 se-resize 這類系統級的縮放箭頭。
按下時記錄初始狀態。doDown() 用 getReal() 沿著 parentElement 往上找,確認游標下方確實屬於 class="resizeMe" 的容器,然後把元素寬高、位置與游標座標存進 theobject。若方向字串為空(游標在內容區中間),就直接 return,不啟動縮放。
拖曳時逐邊計算。doMove() 用 indexOf("e") 等判斷逐邊處理:往東改 width、往南改 height;往西或往北時則同時改 left/top 與尺寸,讓「拉左邊」看起來真的是左緣在移動,而非右緣。所有尺寸都包在 Math.max(xMin, ...) 裡,最小鎖在 8px。
放開即結束。doUp() 把 theobject 設回 null,拖曳狀態解除。
至於「變小出現捲動條」,靠的是外層 #testDiv 的 overflow: hidden 搭配內層 #innerNice 的 overflow: auto 與 height: 100%——外層負責裁切,內層負責產生捲軸,兩層分工明確。這份程式大量使用 window.event,屬 IE 風格寫法,移植到現代瀏覽器時需要把事件物件改為參數傳入。