本文分享一個完整的微信小程序實作——電影資訊與影評瀏覽。資料來源是豆瓣電影的公開 API,功能包含熱映中、即將上映、關鍵字搜尋與詳情頁,並支援捲動到底自動載入。
專案結構
這是專案包含的檔案:
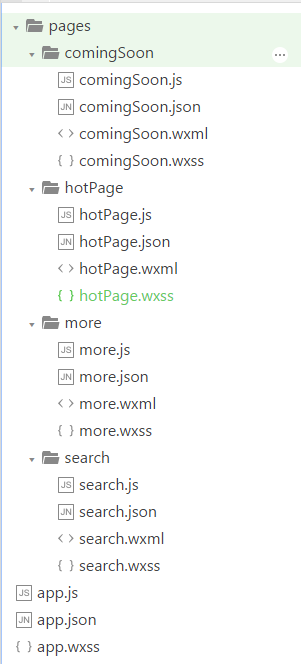
先建立資料夾與各頁面,然後更新 app.json:
{ "pages": [ "pages/hotPage/hotPage", "pages/comingSoon/comingSoon", "pages/search/search", "pages/more/more" ], "window": { "backgroundTextStyle": "light", "navigationBarBackgroundColor": "#fff", "navigationBarTitleText": "WeChat", "navigationBarTextStyle": "black" }, "tabBar": { "list": [{ "pagePath": "pages/hotPage/hotPage", "text": "本地熱映" },{ "pagePath": "pages/comingSoon/comingSoon", "text": "即將上映" },{ "pagePath": "pages/search/search", "text": "影片搜索" }] } }
tabBar 設定了三個主頁籤,詳情頁則不放在籤列中,而是透過跳轉進入。
接著是 app.wxss,這裡放的是後續各頁共用的樣式:
/**app.wxss**/ .container { height: 100%; display: flex; flex-direction: column; align-items: center; justify-content: space-between; padding: 200rpx 0; box-sizing: border-box; } /* hotPage.wxss */ .movies{ display:flex; } .myimage{ flex: 1; } .moveInfo{ flex: 2; } .yanyuanlist{ display:flex; } .left{ flex:1; } .right{ flex:2; }
頁面呈現如下:
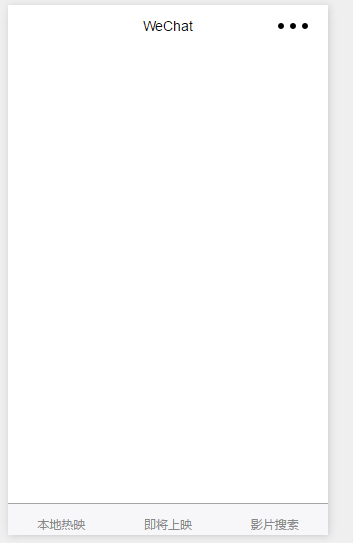
熱映頁 hotPage
wxml:用 wx:for 迴圈渲染電影列表,並在每個項目上掛 bindtap 以便跳轉詳情。
<view class="movies" wx:for="{{movies}}" id="{{item.id}}" bindtap="jumpTomore"> <view class="myimage"> <image src="{{item.images.medium}}"></image> </view> <view class="moveInfo"> <view class="title"> 名稱:{{item.title}} </view> <view class="daoyan"> 導演:{{item.directors["0"].name}} </view> <view class="yanyuanlist"> <view class="left">演員:</view> <view class="right"> <block wx:for="{{item.casts}}">{{item.name}} </block> </view> </view> <view class="fenlei"> 分類:{{item.genres}} </view> <view class="year"> 上映時間:{{item.year}} </view> </view> </view>
js:這裡有兩個關鍵設計。一是用 concat 而非直接覆寫來累加資料,配合 onReachBottom 就能實現捲動載入;二是當回傳資料為空時給出提示,避免使用者一直捲動卻沒有回應。
var that; var page = 0; // more.js Page({ /** * 頁面的初始數據 */ data: { movies: [] }, /** * 生命周期函數--監聽頁面加載 */ onLoad: function (options) { that = this; that.linkNet(0); }, jumpTomore: function (e) { console.log(e.currentTarget.id); wx.navigateTo({ url: '/pages/more/more?id=' + e.currentTarget.id, }) }, linkNet: function (page) { wx.request({ header: { "Content-Type": "json" }, url: 'https://api.douban.com/v2/movie/in_theaters', data: { start: 10 * page, count: 10, city: '成都' }, success: function (e) { console.log(e); if (e.data.subjects.length == 0) { wx.showToast({ title: '沒有更多數據', }) } else { that.setData({ movies: that.data.movies.concat(e.data.subjects) }) } } }) }, onReachBottom: function () { that.linkNet(++page); } })
運行結果:

wxss:這頁只需要補上圖片尺寸。
image{ width:350rpx; height:280rpx; }
即將上映頁 comingSoon
版面結構與熱映頁完全相同,所以 wxml 直接複製即可;js 也幾乎一致,唯一要改的是請求的介面路徑與參數:
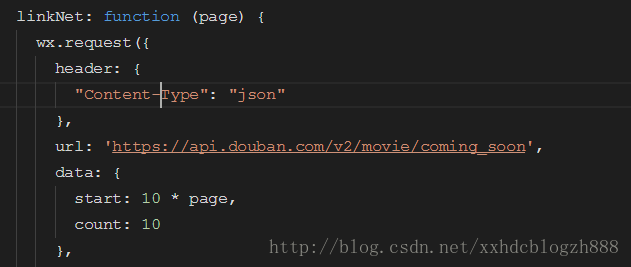
wxss 也相同。運行結果:

搜尋頁 search
wxml:上方是輸入框與搜尋按鈕,下方沿用相同的列表結構。
<input placeholder="輸入關鍵字" bindinput="myInput" /> <button bindtap="mySearch">搜索</button> <view class="movies" wx:for="{{movies}}" id="{{item.id}}" bindtap="jumpTomore"> <view class="myimage"> <image src="{{item.images.medium}}"></image> </view> <view class="moveInfo"> <view class="title"> 名稱:{{item.title}} </view> <view class="daoyan"> 導演:{{item.directors["0"].name}} </view> <view class="yanyuanlist"> <view class="left">演員:</view> <view class="right"> <block wx:for="{{item.casts}}">{{item.name}} </block> </view> </view> <view class="fenlei"> 分類:{{item.genres}} </view> <view class="year"> 上映時間:{{item.year}} </view> </view> </view>
js:用一個全域變數暫存輸入值,按下按鈕時再發請求。wxss 與 hotPage 相同。
var input; var that; // search.js Page({ /** * 頁面的初始數據 */ data: { movies: [] }, /** * 生命周期函數--監聽頁面加載 */ onLoad: function (options) { that = this; }, myInput: function (e) { input = e.detail.value; }, mySearch: function () { wx.request({ header: { "Content-Type": "json" }, url: 'https://api.douban.com/v2/movie/search?q=' + input, success: function (e) { that.setData({ movies: e.data.subjects }) } }) } })
運行結果:
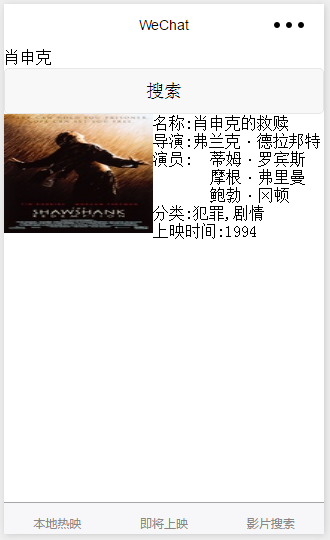
詳情頁 more
點擊任一電影會跳到詳情頁取得完整資訊。
wxml:
<!--more.wxml--> <image src="{{imageUrl}}"></image> <view class="moveInfo"> <view class="title">名字:{{title}}</view> <view class="director">導演:{{director}}</view> <view class="castleft">主演:</view> <view class="casts" wx:for="{{casts}}"> <block class="castright">{{item.name}}</block> </view> <view class="year">年份:{{year}}</view> <view class="rate">評分:{{rate}}</view> <view class="summary">介紹:{{summary}}</view> </view>
js:透過 options.id 取得上一頁傳來的電影 id,再請求詳情介面。
var that; // more.js Page({ /** * 頁面的初始數據 */ data: { title: 0, imageUrl: 0, director: 0, casts: [], year: 0, rate: 0, summary: 0 }, /** * 生命周期函數--監聽頁面加載 */ onLoad: function (options) { that = this; wx.request({ header: { "Content-Type": "json" }, url: 'https://api.douban.com/v2/movie/subject/' + options.id, success: function (e) { console.log(e) that.setData({ title: e.data.original_title, imageUrl: e.data.images.large, director: e.data.directors["0"].name, casts: e.data.casts, year: e.data.year, rate: e.data.rating.average, summary: e.data.summary }) } }) } })
運行結果:

可優化之處
這個版本求證於把功能跑通,仍有幾處值得改進。第一,用全域變數 that 與 input 傳遞狀態並不安全,應改用 Page 內的 data 或閉包;在 success 回呼中直接用 const self = this 或箭頭函式即可,不必外掛全域變數。第二,搜尋的關鍵字應做 encodeURIComponent 編碼,中文或特殊字元才不會出錯。第三,請求失敗目前沒有任何處理,建議補上 fail 回呼與載入中的提示。第四,詳情頁的 summary 可能為空,直接渲染會出現空白,記得加上預設值。最後,豆瓣的公開 API 已有呼叫頻率限制,正式專案建議自建一層快取或代理服務。
以上就是完整的實作程式碼,供大家參考。
- 上一篇文章: ES6 Map 常用方法總整理
- 下一篇文章: Form 表單上傳檔案(type="file")使用教學