jQuery 圖片裁剪的思路與實作解析
編輯:JQuery特效代碼
首先要說明一個關鍵觀念:JS 與 jQuery 本身其實無法真正「裁剪」圖片,它只是顯示了一個裁剪的假象。真正的裁剪必須交由後端處理。本文分享完整的實作思路與程式碼。
整體思路
1. 將使用者選中的圖片上傳到伺服器;
2. 將選取頭像的矩形框在圖片上的座標(包含寬、高、左上角 x/y 座標,以及圖片本身的寬高)發送到伺服器;
3. 在伺服器上用這些座標值與原始圖片,用 Java 進行真正的裁剪。
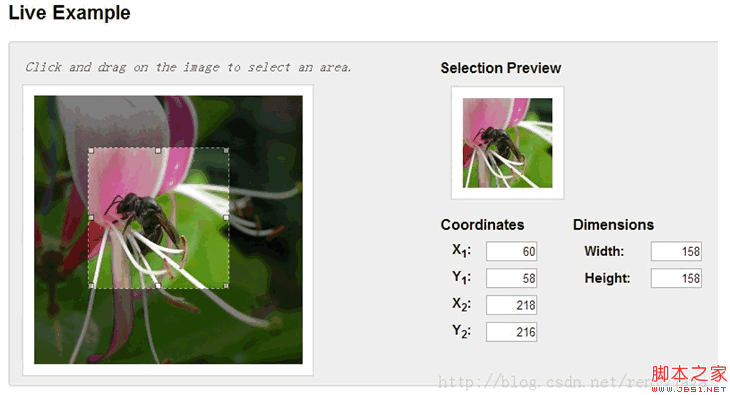
前端裁剪效果:imgAreaSelect
前端的裁剪效果可以借助 imgAreaSelect 這個外掛來實現:
https://odyniec.net/projects/imgareaselect/
https://www.cnblogs.com/mizzle/archive/2011/10/13/2209891.html
效果如下:
後端 Java 實現裁剪圖片可参考:
https://blog.csdn.net/renfyjava/article/details/9942743
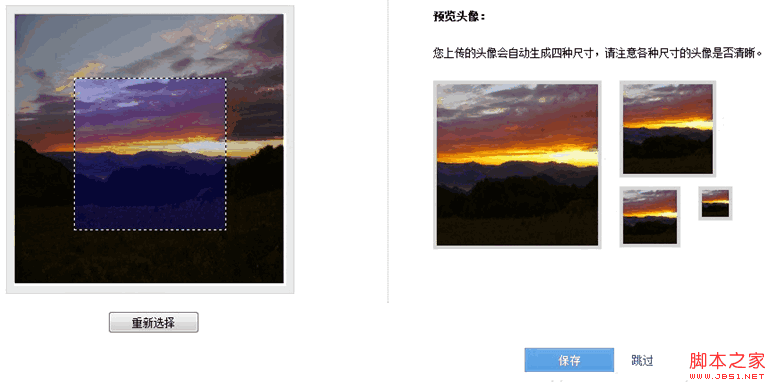
我的範例:同時顯示 4 種尺寸的頭像
以下示範如何同時預覽 4 個不同尺寸的頭像,部分程式碼如下:
<script type="text/javascript">
var $thumb_width = 180; //縮略圖大小
var $thumb_height = 180;
function preview(img, selection) {
var scaleX = $thumb_width / selection.width;
var scaleY = $thumb_height / selection.height;
var scaleX2 = 100 / selection.width;
var scaleY2 = 100 / selection.height;
var scaleX3 = 60 / selection.width;
var scaleY3 = 60 / selection.height;
var scaleX4 = 30 / selection.width;
var scaleY4 = 30 / selection.height;

$('#avatar180 img').css({
width: Math.round(scaleX * 300) + 'px', //獲取圖像的實際寬度
height: Math.round(scaleY * 300) + 'px', //獲取圖像的實際高度
marginLeft: '-' + Math.round(scaleX * selection.x1) + 'px',
marginTop: '-' + Math.round(scaleY * selection.y1) + 'px'
});
$('#avatar100 img').css({
width: Math.round(scaleX2 * 300) + 'px',
height: Math.round(scaleY2 * 300) + 'px',
marginLeft: '-' + Math.round(scaleX2 * selection.x1) + 'px',
marginTop: '-' + Math.round(scaleY2 * selection.y1) + 'px'
});
$('#avatar60 img').css({
width: Math.round(scaleX3 * 300) + 'px',
height: Math.round(scaleY3 * 300) + 'px',
marginLeft: '-' + Math.round(scaleX3 * selection.x1) + 'px',
marginTop: '-' + Math.round(scaleY3 * selection.y1) + 'px'
});
$('#avatar30 img').css({
width: Math.round(scaleX4 * 300) + 'px',
height: Math.round(scaleY4 * 300) + 'px',
marginLeft: '-' + Math.round(scaleX4 * selection.x1) + 'px',
marginTop: '-' + Math.round(scaleY4 * selection.y1) + 'px'
});
$('#x1').val(selection.x1);
$('#y1').val(selection.y1);
$('#x2').val(selection.x2);
$('#y2').val(selection.y2);
$('#w').val(selection.width);
$('#h').val(selection.height);
}
$(document).ready(function () {
$('#save_thumb').click(function() {
var x1 = $('#x1').val();
var y1 = $('#y1').val();
var x2 = $('#x2').val();
var y2 = $('#y2').val();
var w = $('#w').val();
var h = $('#h').val();
var jyduploadfile = $('#jyduploadfile').val();
if(x1=="" || y1=="" || x2=="" || y2=="" || w=="" || h=="" || jyduploadfile==""){
alert("請先選擇上傳圖片");
return false;
}else{
return true;
}
});
});
$(window).load(function () {
$('#picView').imgAreaSelect({ selectionColor: 'blue', x1:60, y1:60, x2: 240,
maxWidth:300,minWidth:100,y2:240,minHeight:100,maxHeight:300,
selectionOpacity: 0.2 , aspectRatio: '1:'+($thumb_height/$thumb_width)+'', onSelectChange: preview });
});
</script>
顯示效果:
原理說明
核心在於:透過 imgAreaSelect 讓使用者在圖片上框選一個矩形區域,onSelectChange 回呼中的 preview 函式會根據選取區域的比例,即時縮放並定位各尺寸預覽圖,達到「所選即所見」的效果;同時把選取框的座標寫入隱藏欄位,提交時一併送到後端,由後端依座標進行真正的裁剪。