用 jQuery 實作可拖拉的分隔條 jsplit
編輯:JQuery特效代碼
左右兩欄的版面,使用者常希望能自己拉動中間的分隔線調整寬度。這個 jsplit 外掛就做了這件事:以拖曳改變容器寬度,並夾在最小與最大寬度之間,還可以雙擊收合。
外掛本體
把下面程式存成 jsplit.js,之後在 HTML 中引用即可。
jQuery.noConflict();
jQuery.fn.extend({
  jsplit: function (j) {
    return this.each(function () {
      j = j || {};
      j.Btn = j.Btn || {};
      j.Btn.oBg = j.Btn.oBg || {};
      j.Btn.cBg = j.Btn.cBg || {};

      var jun = {
        MaxW: "600px", MinW: "260px",
        FloatD: "left", IsClose: false,
        BgUrl: "", Bg: "#fff",
        Btn: { btn: true,
               oBg: { Out: "#333", Hover: "orange" },
               cBg: { Out: "#333", Hover: "orange" } },
        Fn: function () {}
      };

      // 逐項合併使用者設定與預設值
      j.MaxW = parseInt(j.MaxW) || parseInt(jun.MaxW);
      j.MinW = parseInt(j.MinW) || parseInt(jun.MinW);
      j.FloatD = j.FloatD || jun.FloatD;
      j.IsClose = j.IsClose != undefined ? j.IsClose : jun.IsClose;
      j.BgUrl = j.BgUrl || jun.BgUrl;
      j.Bg = j.Bg || jun.Bg;
      j.Btn.btn = j.Btn.btn != undefined ? j.Btn.btn : jun.Btn.btn;
      j.Btn.oBg.Out   = j.Btn.oBg.Out   || jun.Btn.oBg.Out;
      j.Btn.oBg.Hover = j.Btn.oBg.Hover || jun.Btn.oBg.Hover;
      j.Btn.cBg.Out   = j.Btn.cBg.Out   || jun.Btn.cBg.Out;
      j.Btn.cBg.Hover = j.Btn.cBg.Hover || jun.Btn.cBg.Hover;
      j.Fn = j.Fn || jun.Fn;

      var antiD = j.FloatD == "left" ? "right" : "left";
      if (j.MinW > j.MaxW) { var amax = j.MaxW; j.MaxW = j.MinW; j.MinW = amax; }

      var _self = this;
      var Close = false;

      jQuery(_self).css({ position: "relative", float: j.FloatD, overflow: "hidden", padding: "0px" });
      jQuery(_self).wrapInner("<div class='jsplit-c' style='top:0px;z-index:9999;zoom:1;width:100%;overflow:hidden;position:relative;height:100%'></div>");
      jQuery(_self).children(".jsplit-c").append(
        "<div class='jsplit-e' unselectable='on' style='background:#fff;height:100%;width:6px;top:0px;-moz-user-select:none;"
        + antiD + ":0px;position:absolute;cursor:e-resize;overflow:hidden;z-index:10000;'>"
        + "<div class='jsplit-e-handle' unselectable='on' style='height:40px;width:100%;top:50%;margin-top:-20px;left:0;position:absolute;cursor:pointer;-moz-user-select:none;'></div></div>");

      var dw = jQuery(_self).width();
      var jsplitc = jQuery(_self).children(".jsplit-c");
      var jsplite = jsplitc.children(".jsplit-e");
      var jsplith = jsplite.children(".jsplit-e-handle");

      if (j.Btn.btn == false) { jsplith.css({ display: "none" }); }
      if (jQuery.browser.msie) { document.execCommand("BackgroundImageCache", false, true); }
      if (dw > j.MaxW) { jQuery(_self).css({ width: j.MaxW }); }
      if (dw < j.MinW) { jQuery(_self).css({ width: j.MinW }); }

      jsplite.css({ background: j.Bg, "background-image": j.BgUrl, opacity: 0 });

      if (j.IsClose != false) {
        jsplith.css({ background: j.Btn.cBg.Out, "background-image": j.BgUrl });
        _selfclose();
      } else {
        jsplith.css({ background: j.Btn.oBg.Out, "background-image": j.BgUrl });
      }

      // 分隔條按鈕的 hover 換色
      jsplith.hover(function () {
        if (Close == false) {
          jQuery(this).css({ background: j.Btn.oBg.Hover, "background-image": j.BgUrl });
        } else {
          jQuery(this).css({ background: j.Btn.cBg.Hover, "background-image": j.BgUrl });
        }
      }, function () {
        if (Close == false) {
          jQuery(this).css({ background: j.Btn.oBg.Out, "background-image": j.BgUrl });
        } else {
          jQuery(this).css({ background: j.Btn.cBg.Out, "background-image": j.BgUrl });
        }
      });

      // 滑鼠在容器上時,分隔線淡入;離開後淡出
      jQuery(_self).hover(function () {
        if (Close == false) { jsplite.stop().animate({ opacity: 0.85 }, 200); }
      }, function () {
        if (Close == false) { jsplite.stop().animate({ opacity: 0 }, 2000); }
      });

      // 拖曳改變寬度
      jsplite.mousedown(function (e) {
        j['Fn'] && j['Fn'].call(_self);
        var screenX = e.screenX, w = jQuery(_self).width();
        jQuery(document).mousemove(function (e2) {
          curW = j.FloatD == "left" ? w + (e2.screenX - screenX) : w - (e2.screenX - screenX);
          if (curW >= j.MaxW) { curW = j.MaxW; }
          if (curW <= j.MinW) { curW = j.MinW; }
          jQuery(_self).css({ width: curW });
          dw = curW;
        });
        jQuery(document).mouseup(function () { jQuery(document).unbind(); });

        if (Close == true) {
          jQuery(this).css({ cursor: "e-resize", opacity: 0.8 });
          jQuery(_self).animate({ width: dw }, 200);
          Close = false;
        }
        return false;
      });

      // 雙擊分隔線收合
      jsplite.dblclick(function () { if (Close == false) { _selfclose(); } return false; });
      // 點擊把手收合
      jsplith.click(function () { if (Close == false) { _selfclose(); } return false; });

      function _selfclose() {
        jsplite.css({ cursor: "pointer", opacity: 1 });
        jsplith.css({ background: j.Btn.cBg.Out, "background-image": j.BgUrl });
        jQuery(_self).animate({ width: "6px" }, 400);
        Close = true;
      }
    });
  }
});
HTML 三個步驟
1. 引入 jQuery 與外掛
<script language='javascript' src='jquery-1.4.4.min.js'></script>
<script language='javascript' src='jsplit.js'></script>
2. 為要拖拉的元素加上 id(div 或 td 都可以)
<table>
<tr>
  <td id="tt" style="background:#999999">test</td>
  <td style="background:#009999" width="400">test Table</td>
</tr>
</table>
3. 呼叫外掛
<script type="text/javascript">
$(document).ready(function(){
  jQuery('#tt').jsplit();
});
</script>
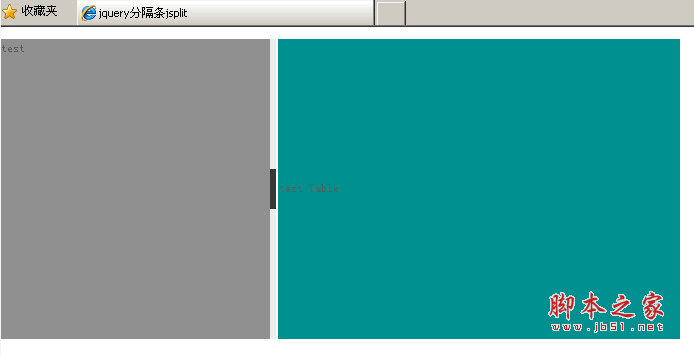
執行後如下圖,中間那條淡色的細線就是拖曳把手:
幾點觀察
拖曳的實作邏輯很值得學:在 mousedown 時記下起始 screenX 與當前寬度,之後在 document 上監聽 mousemove,用位移量推算新寬度,最後記得在 mouseup 時 unbind 全部事件——少了這一步,拖一次就會多綁一層監聽器,越拖越卡。
另外要注意這段程式使用了 jQuery.browser.msie,這個 API 在 jQuery 1.9 已被移除,在新版 jQuery 上會直接報錯。若要沿用,需自行改用 navigator.userAgent 判斷,或乾脆移除該分支(它原本只是為了解決 IE 的背景圖片快取問題)。
- 上一篇文章: 用 jQuery 做一個簡單的九宮格:滑過就依序填入數字
- 下一篇文章: 精選 12 款優秀的 jQuery Ajax 分頁外掛與教學