原生javascript實現圖片放大鏡效果
編輯:JavaScript基礎知識
當我們在電商網站上購買商品時,經常會看到這樣一種效果,當我們把鼠標放到我們浏覽的商品圖片上時,會出現類似放大鏡一樣的一定區域的放大效果,方便消費者觀察商品。今天我對這一技術,進行簡單實現,實現圖片放大鏡效果。
我在代碼中進行了代碼編寫的思路的說明和詳細的代碼注釋,方便讀者,請看代碼:
 <!doctype html>
 <html>
     <head>
         <meta charset="UTF-8">
         <title>Document</title>
         <style type="text/css">
             *{margin:0px; padding:0px;}
             .small-box {
                 width:300px;
                 height:300px;
                 margin-left:100px;
                 margin-top:100px;
                 border:1px #ccc solid;
                 cursor:move;
                 float:left;
                 position:relative;
             }
             .small-box img {
                 width:300px;
                 height:300px;
             }
             .tool {
                 width:150px;
                 height:150px;
                 background-color:gold;
                 opacity:0.6;
                 filter:alpha(opacity=60);
                 position:absolute;
                 left:0px;
                 top:0px;
                 display:none;
             }
             .tool.active {
                 display:block;
             }
             .big-box {
                 width:300px;
                 height:300px;
                 border:1px #ccc solid;
                 overflow:hidden;
                 float:left;
                 margin-top:100px;
                 position:relative;
                 display:none;
             }
             .big-box.active {
                 display:block;
             }
             .big-box img {
                 width:600px;
                 height:600px;
                 position:absolute;
             }
         </style>
     </head>
     <body>
         <div class="small-box" id="smallBox">
             <img src="img1.jpg"/>
             <div class="tool" id="tool"></div>
         </div>
         <div class="big-box" id="bigBox">
             <img src="img1.jpg" id="bigImg" />
         </div>
         <script>
             /*
                 第一步:當頁面加載完後,獲取所要操作的節點對象。
                 第二步:為smallBox添加一個鼠標浮動事件
                             當鼠標浮動到smallBox可視區域的時候,顯示出小黃盒子tool
                             和右邊的大盒子(小黃盒子的放大版)bigBox
                             添加active

                         為smallBox添加一個鼠標離開事件
                             隱藏小黃盒子和右邊的大盒子
                             去掉active

                 第三步:為smallBox添加一個鼠標移動事件
                         小黃盒子tool要跟著鼠標的坐標移動
                         右邊的大盒子裡的圖片也跟著指定的比例移動
             */
             var smallBox = document.getElementById("smallBox");//小盒子
             var tool = document.getElementById("tool");//小盒子中的黃色區域
             var bigBox = document.getElementById("bigBox");//大盒子
             var bigImg = document.getElementById("bigImg");//放大的圖片
             //鼠標進入小盒子區域內,顯示黃色區域和大盒子
             smallBox.onmouseenter = function(){
                 tool.className = "tool active";
                 bigBox.className = "big-box active";
             }
             //鼠標離開小盒子區域,不顯示黃色區域和大盒子
             smallBox.onmouseleave = function(){
                 tool.className = "tool";
                 bigBox.className = "big-box";
             }
             //鼠標在小盒子內移動
             smallBox.onmousemove = function(e){
                 var _e = window.event||e;//事件對象
                 var x = _e.clientX-this.offsetLeft-tool.offsetWidth/2;//事件對象在小盒子內的橫向偏移量
                 var y = _e.clientY-this.offsetTop-tool.offsetHeight/2;//豎向偏移量
                 if(x<0){
                     x = 0;//當左偏移出小盒子時,設為0
                 }
                 if(y<0){
                     y = 0;//當上偏移出小盒子時,設為0
                 }
                 if(x>this.offsetWidth-tool.offsetWidth){
                     x = this.offsetWidth-tool.offsetWidth;//當右偏移出小盒子時,設為小盒子的寬度-黃色放大區域寬度
                 }
                 if(y>this.offsetHeight-tool.offsetHeight){
                     y = this.offsetHeight-tool.offsetHeight;//當下偏移出小盒子時,設為小盒子的高度-黃色放大區域高度
                 }
                 tool.style.left = x + "px";//黃色放大區域距離小盒子左偏距
                 tool.style.top = y + "px";//黃色放大區域距離小盒子上偏距
                 bigImg.style.left = -x*2 + "px";//放大圖片移動方向相反,偏移距離加倍
                 bigImg.style.top = -y*2 + "px";
             }
         </script>
     </body>
 </html>
這裡,我並沒有對代碼中css樣式,JavaScript行為進行和html結構的分離,方便讀者閱讀和運行。
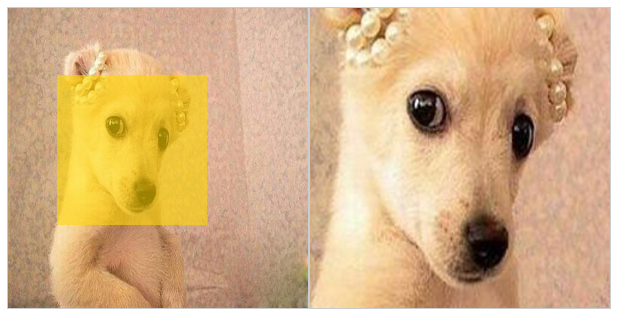
有讀者可能考慮,獲取事件對象的偏移距離時直接使用offsetX和offsetY屬性,省去了計算,但是筆者在試驗時,出現了異常,黃色放大區域並不能穩定的隨著鼠標進行移動,筆者認為,當時用offsetX和offsetY時,執行onmousemove會不斷地出發onmouseover,而onmouseover會產生事件傳播,從而導致在獲取offsetX時出現異常。最終,筆者采用上述代碼中的方法,能夠出現穩定的效果。讀者可以自行運行代碼,查看效果。這裡附上筆者的效果圖:
- 上一頁:js字符串轉數組
- 下一頁:js獲取和設置元素屬性值
小編推薦
熱門推薦