React 本身只是一個技術棧的起點,光靠它很難撐起一個結構完整的 Web 應用,實務上多半還得搭配其他生態系成員一起使用。React Router 就是那個最常見的搭檔——它負責讓畫面上的元件與網址保持同步,換頁不必重新載入整個頁面。
以下依序說明它的基本用法,更完整的內容可以參考官方指南。
一、先看它長什麼樣子
寫在頁面檔案中的形式:
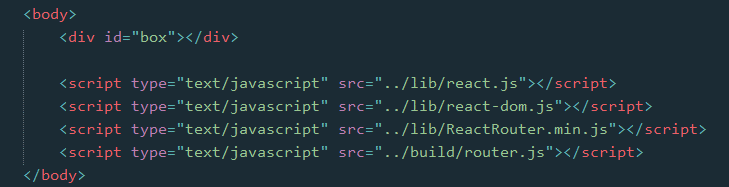
抽到外部腳本檔案後的形式:

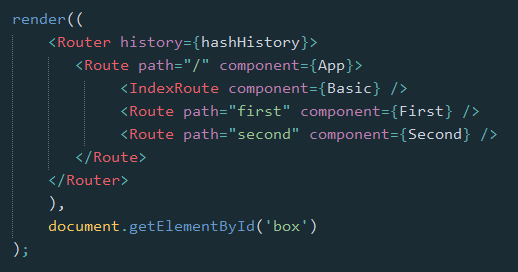
二、兩種引入方式
2.1 瀏覽器直接引入
可以引用官方提供的瀏覽器版本,或下載後自行引入。引入完成即可直接使用 ReactRouter 這個全域物件,常用的成員大概有這些:
let {Router, Route, IndexRoute, Redirect, IndexRedirect, Link, IndexLink, hashHistory, browserHistory} = ReactRouter;
2.2 用 npm 安裝,再交給建置工具編譯
npm install --save react-router
安裝好之後,在腳本檔案中解構出需要的成員:
import {Router, Route, IndexRoute, Redirect, IndexRedirect, Link, IndexLink, hashHistory, browserHistory} from 'react-router';
由於當時瀏覽器普遍還不支援 import/export,而 Babel 也不會幫你把 require 轉譯掉,所以這條路徑通常還需要 Webpack 這類建置工具收尾。引入完成後,就能在 ReactDOM 的 render 裡直接使用這些元件了。
三、最基礎的路由用法
最基本的目標很單純:根據網址決定要渲染哪個元件。

 class First extends Component {
   constructor(props) { super(props); }
   render() { return <p>First</p> }
 }
 class Second extends Component {
   constructor(props) { super(props); }
   render() { return <p>Second</p> }
 }
 class App extends Component {
   constructor(props) { super(props); }
   render() { return <div></div> }
 }
 render((
   <Router history={hashHistory}>
     <Route path="/" component={App} />
     <Route path="first" component={First} />
     <Route path="second" component={Second} />
   </Router>
 ), document.getElementById('box') );
這裡 Router 扮演容器角色,而 history 屬性決定了 URL 要用哪一種機制來處理,共有三種選擇:
- browserHistory:隨網址變化切換路由,官方推薦做法,但需要伺服器端配合設定(例如把所有路徑都導回同一份 HTML)。
- hashHistory:靠
#/運作,概念上等同單頁應用常見的 hashbang 寫法,例如example.com/#/path/path。設定最省事,本文範例都採用它。 - createMemoryHistory:不讀取也不操作位址列,主要用於伺服器端渲染,需要手動建立 history 物件。
接著在容器內用 Route 定義各條路由:path 指定路徑(注意比對時不分大小寫),component 指定該路徑要渲染的元件。
也可以把路由集中宣告,再用 routes 屬性一次傳進 Router:
 let routes = <div>
   <Route path="/" component={App} />
   <Route path="first" component={First} />
   <Route path="second" component={Second} />
 </div>;
 render(<Router routes={routes} history={hashHistory}></Router>, document.getElementById('box'));
要注意 routes 只能有一個父節點,所以這裡外層包了一個 <div>。
另外,Route 是可以嵌套的,實務上這種寫法往往更貼近真實的頁面結構。此時 App 是父層,若想讓它渲染子層的 First 與 Second,必須在 App 裡放入 this.props.children:
 class App extends Component {
   constructor(props) { super(props); }
   render() { return <div>{this.props.children}</div> }
 }
 render((
   <Router history={hashHistory}>
     <Route path="/" component={App}>
       <Route path="first" component={First} />
       <Route path="second" component={Second} />
     </Route>
   </Router>
 ), document.getElementById('box') );
同樣地,嵌套結構也能改用 routes 屬性來寫:
 let routes = <Route path="/" component={App}>
   <Route path="first" component={First} />
   <Route path="second" component={Second} />
 </Route>;
 render(<Router routes={routes} history={hashHistory}></Router>, document.getElementById('box'));
四、其他常用元件
除了 Route,還有 IndexRoute、Redirect、IndexRedirect、Link、IndexLink 等,光看名字大致能猜到用途:
- IndexRoute:用於設定預設頁面。前面的範例中,進入
/只看到空白,加上 IndexRoute 就能給它一個預設元件充當導覽入口。 - Link:可以把它理解成 React 版的
<a>,用to屬性指定目標路徑,還能用activeClass或activeStyle定義啟用狀態的外觀。 - IndexLink:與 Link 類似,官方建議用來指向首頁,當然也沒有硬性限制。

 class First extends Component {
   constructor(props) { super(props); }
   render() {
     return (
       <p>First <IndexLink to="/" activeStyle={{color: 'red'}}>Basic</IndexLink> </p>
     )
   }
 }
 class Second extends Component {
   constructor(props) { super(props); }
   render() { return <p>Second</p> }
 }
 class Basic extends Component {
   constructor(props) { super(props); }
   render() {
     return (
       <ul role="nav">
         <li><IndexLink to="/" activeStyle={{color: 'red'}}>Basic</IndexLink></li>
         <li><Link to="/first" activeStyle={{color: 'red'}}>First</Link></li>
         <li><Link to="/Second" activeClass="active">Second</Link></li>
       </ul>
     )
   }
 }
 class App extends Component {
   constructor(props) { super(props); }
   render() { return <div>{this.props.children}</div> }
 }
 render((
   <Router history={hashHistory}>
     <Route path="/" component={App}>
       <IndexRoute component={Basic} />
       <Route path="first" component={First} />
       <Route path="second" component={Second} />
     </Route>
   </Router>
 ), document.getElementById('box') );
- Redirect:把 from 路徑重新導向 to 路徑。
- IndexRedirect:進入首頁時直接導向 to 指定的路徑。

 render((
   <Router history={hashHistory}>
     <Route path="/" component={App}>
       <IndexRoute component={Basic} />
       <IndexRedirect to="first" />
       <Redirect from="second" to="first" />
       <Route path="first" component={First} />
       <Route path="second" component={Second} />
     </Route>
   </Router>
 ), document.getElementById('box') );
五、path 的語法規則
在 hashHistory 模式下,首頁路徑是 #/。自訂 Route 的路徑會先與父層 Route 的 path 合併,再與首頁路徑合併,最後才得出實際的網址。
path 支援的語法:
:paramName:匹配 URL 的一段內容,直到遇到下一個/、?、#。():代表這一段是可選的。*:非貪婪匹配任意字元,遇到模式中的下一個字元就停。**:貪婪匹配任意字元,直到下一個/、?、#。
 <Route path="/hello/:name">      // 可匹配 /hello/michael、/hello/ryan
 <Route path="/hello(/:name)">   // 可匹配 /hello、/hello/michael、/hello/ryan
 <Route path="/files/*.*">       // 可匹配 /files/hello.jpg、/files/hello.html
 <Route path="/**/*.jpg">        // 可匹配 /files/hello.jpg、/files/path/to/file.jpg
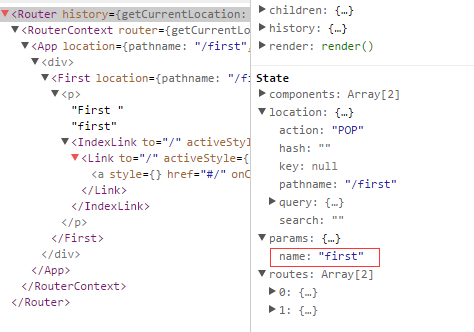
而 :name 的值可以透過 this.props.params 取得:
 class First extends Component {
   constructor(props) { super(props); }
   render() {
     return (
       <p>First {this.props.params.name} <IndexLink to="/" activeStyle={{color: 'red'}}>Basic</IndexLink> </p>
     )
   }
 }
 // ...
 <Route path="/:name" component={First} />

裝上 React Dev Tool 之後,也能直接在開發者工具裡看到元件與對應的 props 資料,除錯時非常方便。
六、onEnter 與 onLeave 鉤子
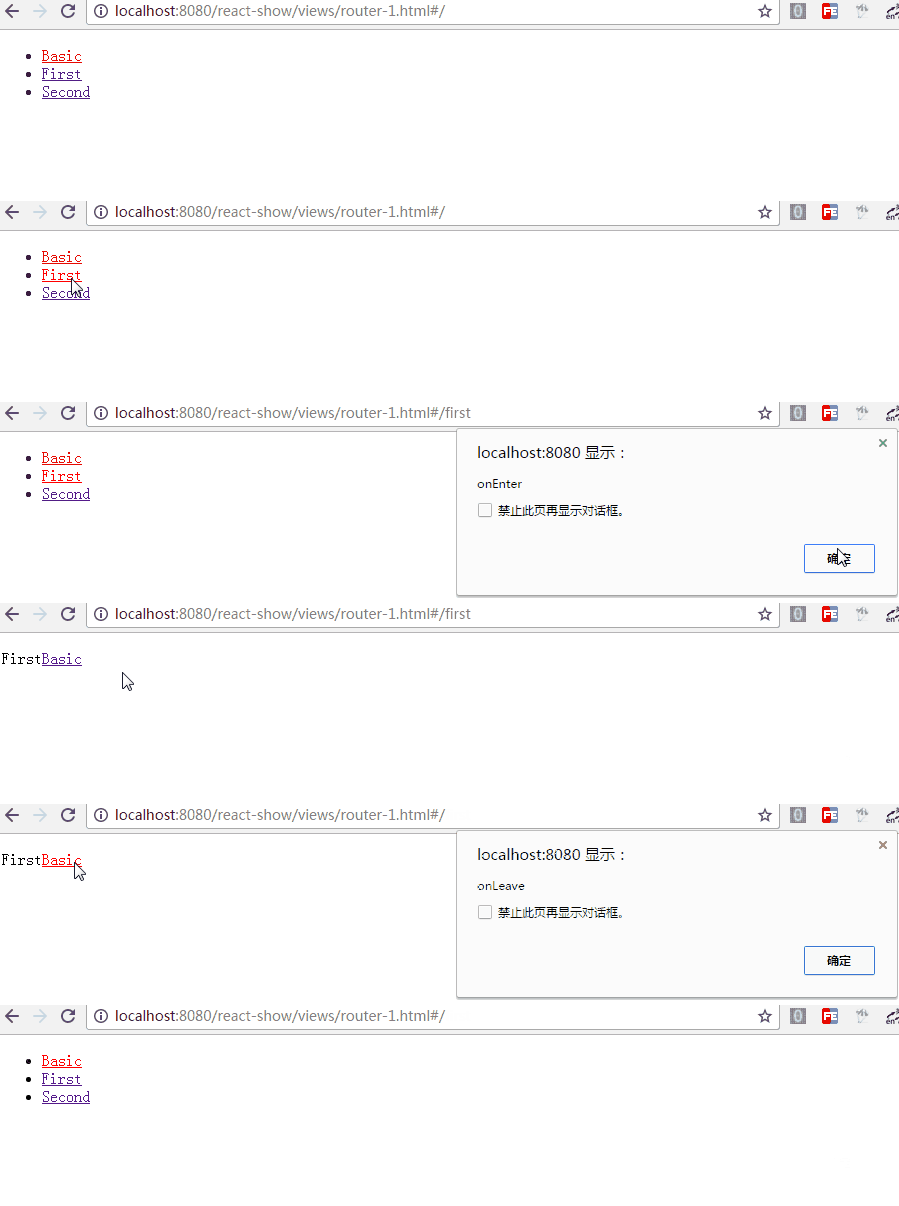
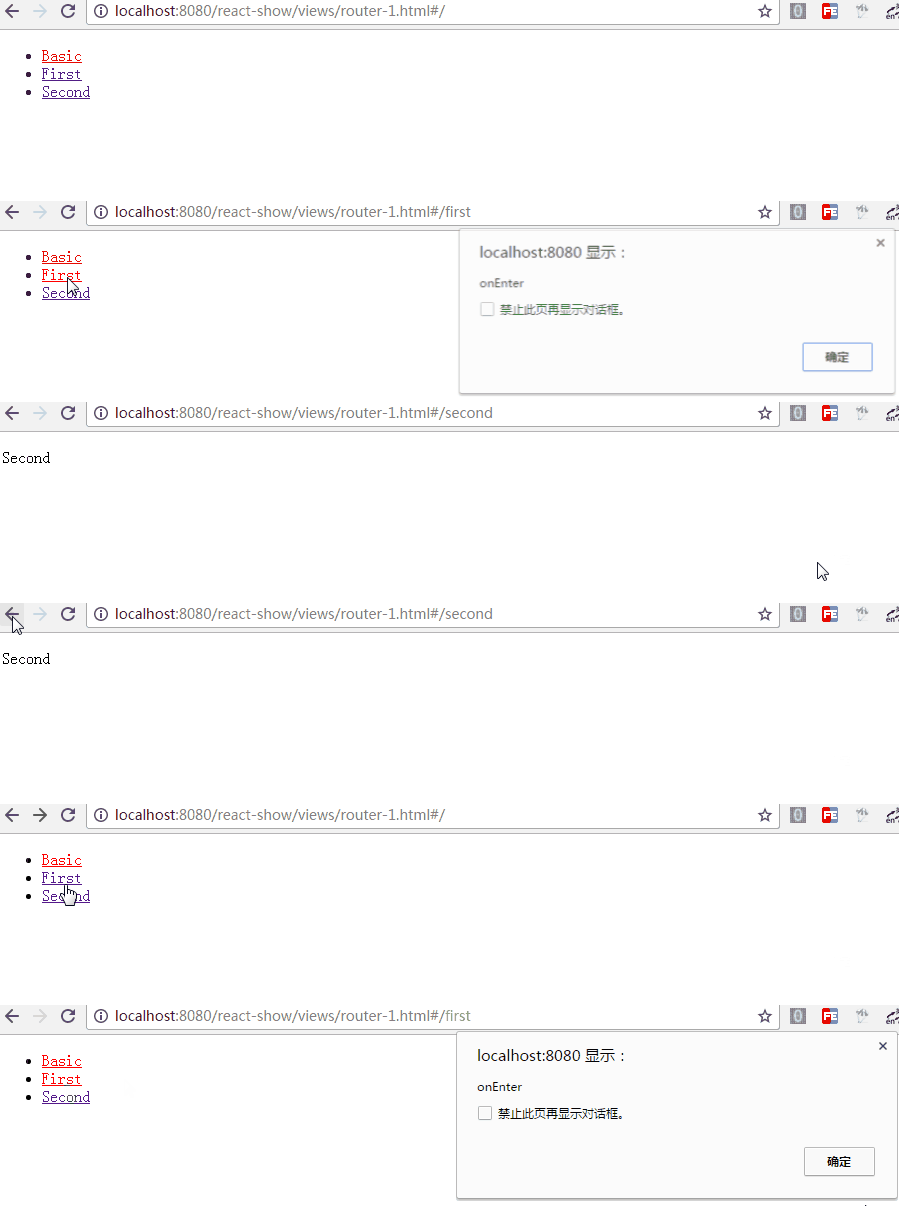
路由跳轉時,我們常常需要在進入或離開頁面的那一刻做些事情——例如檢查登入狀態。Route 提供的 onEnter 與 onLeave 正好對應這兩個時機。
 <Route path="first" component={First}
   onEnter={(nextState, replace) => {
     console.log(nextState);
     alert('onEnter');
     // replace('second');
   }}
   onLeave={() => {
     alert('onLeave');
   }}
 />
如你所見,onEnter 會帶兩個參數,其中 replace 可以改寫當前的路由。把註解那行打開,進入 /first 的瞬間就會被導到 /second——這個技巧在做登入攔截時特別好用。
更多進階用法請參考官方指南。
以上就是本次整理的全部內容,希望對你的學習或工作有所幫助。