譯自:CSS3 Image Styles 中文:CSS3 圖片樣式
直接在圖片元素上套用 CSS3 的 inset box-shadow 或 border-radius 時,瀏覽器往往無法完美渲染。但如果把圖片改用作背景圖,就能自由添加各種樣式,渲染效果也會好得多。本文將示範如何運用 box-shadow、border-radius 與 transition,創造多種不同的圖片風格。
問題
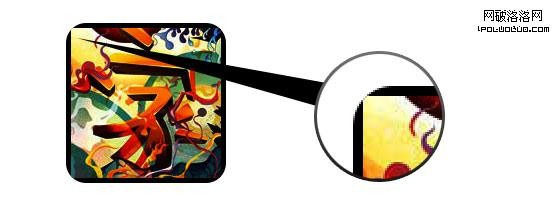
看範例第一行的圖片,同時使用了 border-radius 與 inset box-shadow。Firefox 會在圖片元素上渲染 border-radius,卻不渲染 inset box-shadow;Chrome/Safari 則兩者都不渲染。
解決方案
要讓 border-radius 與 inset box-shadow 正常運作,關鍵就是把實際圖片轉為 background-image。

動態做法
若想動態實現,可以簡單地用 jQuery 為每個圖片元素外層包一個背景容器。下面的腳本會為所有圖片包上一層 span,並把圖片設為它的背景(jQuery 代碼由 Darcy Clarke 編寫)。
<script type="text/javascript" src="https://ajax.googleapis.com/ajax/libs/jquery/1.5/jquery.min.js"></script>
<script type="text/javascript">
$(document).ready(function(){
  $("img").load(function() {
    $(this).wrap(function(){
      return '<span class="image-wrap ' + $(this).attr('class') + '" style="position:relative; display:inline-block; background:url(' + $(this).attr('src') + ') no-repeat center center; width: ' + $(this).width() + 'px; height: ' + $(this).height() + 'px;" />';
    });
    $(this).css("opacity","0");
  });
});
</script>
輸出結果
<span class="image-wrap " style="position:relative; display:inline-block; background:url(image.jpg) no-repeat center center; width: 150px; height: 150px;">
  <img src="image.jpg" style="opacity: 0;">
</span>
圓形圖片
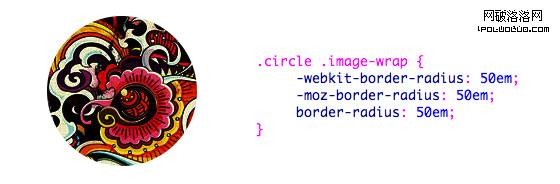
圖片成為背景圖後,就能自由添加想要的樣式。下面用 border-radius 做出簡單的圓形圖片。
CSS
.circle .image-wrap { -webkit-border-radius: 50em; -moz-border-radius: 50em; border-radius: 50em; }
卡片風格
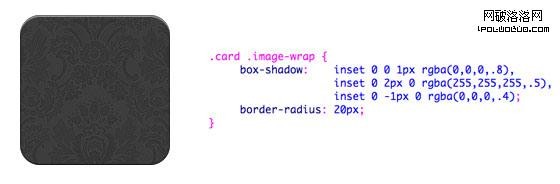
使用多層 inset box-shadow,做出卡片般的圖片效果。
CSS
.card .image-wrap { -webkit-box-shadow: inset 0 0 1px rgba(0,0,0,.8), inset 0 2px 0 rgba(255,255,255,.5), inset 0 -1px 0 rgba(0,0,0,.4); -moz-box-shadow: inset 0 0 1px rgba(0,0,0,.8), inset 0 2px 0 rgba(255,255,255,.5), inset 0 -1px 0 rgba(0,0,0,.4); box-shadow: inset 0 0 1px rgba(0,0,0,.8), inset 0 2px 0 rgba(255,255,255,.5), inset 0 -1px 0 rgba(0,0,0,.4); -webkit-border-radius: 20px; -moz-border-radius: 20px; border-radius: 20px; }
浮雕風格
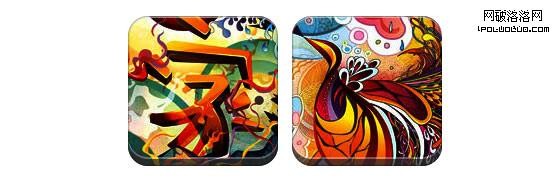
稍作調整,就能把卡片風格轉為浮雕效果。
CSS
.embossed .image-wrap { -webkit-box-shadow: inset 0 0 2px rgba(0,0,0,.8), inset 0 2px 0 rgba(255,255,255,.5), inset 0 -7px 0 rgba(0,0,0,.6), inset 0 -9px 0 rgba(255,255,255,.3); -moz-box-shadow: inset 0 0 2px rgba(0,0,0,.8), inset 0 2px 0 rgba(255,255,255,.5), inset 0 -7px 0 rgba(0,0,0,.6), inset 0 -9px 0 rgba(255,255,255,.3); box-shadow: inset 0 0 2px rgba(0,0,0,.8), inset 0 2px 0 rgba(255,255,255,.5), inset 0 -7px 0 rgba(0,0,0,.6), inset 0 -9px 0 rgba(255,255,255,.3); -webkit-border-radius: 20px; -moz-border-radius: 20px; border-radius: 20px; }
軟浮雕風格
與浮雕風格相當接近,只是額外加了 1px 的模糊。
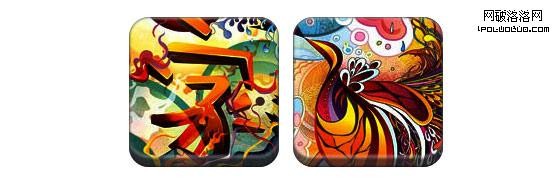
CSS
.soft-embossed .image-wrap { -webkit-box-shadow: inset 0 0 4px rgba(0,0,0,1), inset 0 2px 1px rgba(255,255,255,.5), inset 0 -9px 2px rgba(0,0,0,.6), inset 0 -12px 2px rgba(255,255,255,.3); -moz-box-shadow: inset 0 0 4px rgba(0,0,0,1), inset 0 2px 1px rgba(255,255,255,.5), inset 0 -9px 2px rgba(0,0,0,.6), inset 0 -12px 2px rgba(255,255,255,.3); box-shadow: inset 0 0 4px rgba(0,0,0,1), inset 0 2px 1px rgba(255,255,255,.5), inset 0 -9px 2px rgba(0,0,0,.6), inset 0 -12px 2px rgba(255,255,255,.3); -webkit-border-radius: 20px; -moz-border-radius: 20px; border-radius: 20px; }
剪貼畫風格
同樣只靠 inset box-shadow,就能做出剪貼畫般的質感。
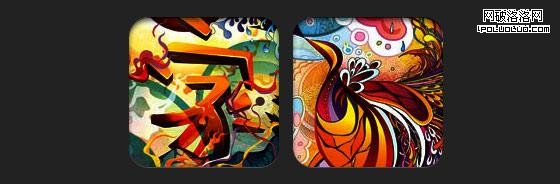
CSS
.cut-out .image-wrap { -webkit-box-shadow: 0 1px 0 rgba(255,255,255,.2), inset 0 4px 5px rgba(0,0,0,.6), inset 0 1px 0 rgba(0,0,0,.6); -moz-box-shadow: 0 1px 0 rgba(255,255,255,.2), inset 0 4px 5px rgba(0,0,0,.6), inset 0 1px 0 rgba(0,0,0,.6); box-shadow: 0 1px 0 rgba(255,255,255,.2), inset 0 4px 5px rgba(0,0,0,.6), inset 0 1px 0 rgba(0,0,0,.6); -webkit-border-radius: 20px; -moz-border-radius: 20px; border-radius: 20px; }
變形與發光
為圖片外容器加上變形:滑鼠移入時從圓角形狀轉為圓形,並出現發光效果,發光以多重 box-shadow 實現。
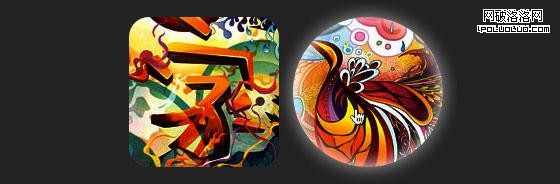
CSS
.morphing-glowing .image-wrap { -webkit-transition: 1s; -moz-transition: 1s; transition: 1s; -webkit-border-radius: 20px; -moz-border-radius: 20px; border-radius: 20px; }
.morphing-glowing .image-wrap:hover { -webkit-box-shadow: 0 0 20px rgba(255,255,255,.6), inset 0 0 20px rgba(255,255,255,1); -moz-box-shadow: 0 0 20px rgba(255,255,255,.6), inset 0 0 20px rgba(255,255,255,1); box-shadow: 0 0 20px rgba(255,255,255,.6), inset 0 0 20px rgba(255,255,255,1); -webkit-border-radius: 60em; -moz-border-radius: 60em; border-radius: 60em; }
發光遮罩
發光的漸變遮罩以 :after 偽元素實現。
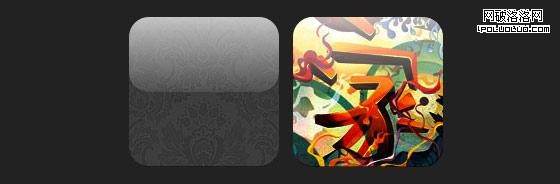
CSS
.glossy .image-wrap { -webkit-box-shadow: inset 0 -1px 0 rgba(0,0,0,.5); -moz-box-shadow: inset 0 -1px 0 rgba(0,0,0,.5); box-shadow: inset 0 -1px 0 rgba(0,0,0,.5); -webkit-border-radius: 20px; -moz-border-radius: 20px; border-radius: 20px; }
.glossy .image-wrap:after { position: absolute; content: ' '; width: 100%; height: 50%; top: 0; left: 0; -webkit-border-radius: 20px; -moz-border-radius: 20px; border-radius: 20px; background: -moz-linear-gradient(top, rgba(255,255,255,0.7) 0%, rgba(255,255,255,.1) 100%); background: -webkit-gradient(linear, left top, left bottom, color-stop(0%,rgba(255,255,255,0.7)), color-stop(100%,rgba(255,255,255,.1))); background: linear-gradient(top, rgba(255,255,255,0.7) 0%,rgba(255,255,255,.1) 100%); }
倒影
把遮罩漸變移到下方,就成了倒影。
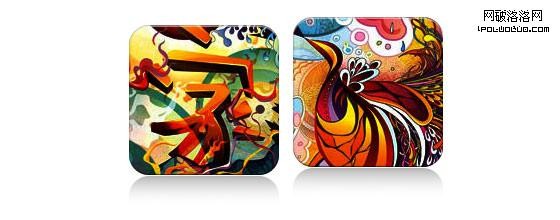
CSS
.reflection .image-wrap:after { position: absolute; content: ' '; width: 100%; height: 30px; bottom: -31px; left: 0; -webkit-border-top-left-radius: 20px; -webkit-border-top-right-radius: 20px; -moz-border-radius-topleft: 20px; -moz-border-radius-topright: 20px; border-top-left-radius: 20px; border-top-right-radius: 20px; background: -moz-linear-gradient(top, rgba(0,0,0,.3) 0%, rgba(255,255,255,0) 100%); background: -webkit-gradient(linear, left top, left bottom, color-stop(0%,rgba(0,0,0,.3)), color-stop(100%,rgba(255,255,255,0))); background: linear-gradient(top, rgba(0,0,0,.3) 0%,rgba(255,255,255,0) 100%); }
.reflection .image-wrap:hover { position: relative; top: -8px; }
光澤與倒影
同時使用 :before 與 :after,做出帶倒影的光澤效果。
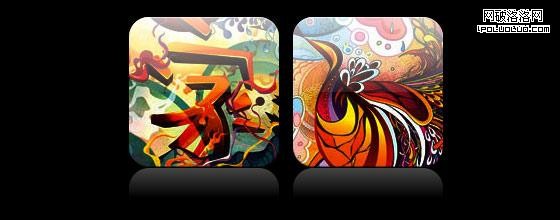
CSS
.glossy-reflection .image-wrap { -webkit-box-shadow: inset 0 -1px 0 rgba(0,0,0,.5), inset 0 1px 0 rgba(255,255,255,.6); -moz-box-shadow: inset 0 -1px 0 rgba(0,0,0,.5), inset 0 1px 0 rgba(255,255,255,.6); box-shadow: inset 0 -1px 0 rgba(0,0,0,.5), inset 0 1px 0 rgba(255,255,255,.6); -webkit-transition: 1s; -moz-transition: 1s; transition: 1s; -webkit-border-radius: 20px; -moz-border-radius: 20px; border-radius: 20px; }
.glossy-reflection .image-wrap:before { position: absolute; content: ' '; width: 100%; height: 50%; top: 0; left: 0; -webkit-border-radius: 20px; -moz-border-radius: 20px; border-radius: 20px; background: -moz-linear-gradient(top, rgba(255,255,255,0.7) 0%, rgba(255,255,255,.1) 100%); background: -webkit-gradient(linear, left top, left bottom, color-stop(0%,rgba(255,255,255,0.7)), color-stop(100%,rgba(255,255,255,.1))); background: linear-gradient(top, rgba(255,255,255,0.7) 0%,rgba(255,255,255,.1) 100%); }
.glossy-reflection .image-wrap:after { position: absolute; content: ' '; width: 100%; height: 30px; bottom: -31px; left: 0; -webkit-border-top-left-radius: 20px; -webkit-border-top-right-radius: 20px; -moz-border-radius-topleft: 20px; -moz-border-radius-topright: 20px; border-top-left-radius: 20px; border-top-right-radius: 20px; background: -moz-linear-gradient(top, rgba(230,230,230,.3) 0%, rgba(230,230,230,0) 100%); background: -webkit-gradient(linear, left top, left bottom, color-stop(0%,rgba(230,230,230,.3)), color-stop(100%,rgba(230,230,230,0))); background: linear-gradient(top, rgba(230,230,230,.3) 0%,rgba(230,230,230,0) 100%); }
膠帶風格
用 :after 偽元素在圖片頂部做出膠帶般的漸變。
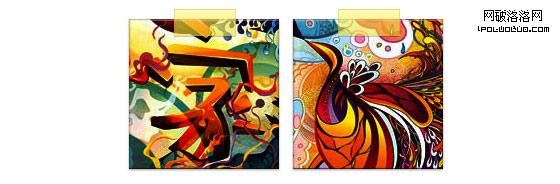
CSS
.tape .image-wrap { -webkit-box-shadow: inset 0 0 2px rgba(0,0,0,.7), inset 0 2px 0 rgba(255,255,255,.3), inset 0 -1px 0 rgba(0,0,0,.5), 0 1px 3px rgba(0,0,0,.4); -moz-box-shadow: inset 0 0 2px rgba(0,0,0,.7), inset 0 2px 0 rgba(255,255,255,.3), inset 0 -1px 0 rgba(0,0,0,.5), 0 1px 3px rgba(0,0,0,.4); box-shadow: inset 0 0 2px rgba(0,0,0,.7), inset 0 2px 0 rgba(255,255,255,.3), inset 0 -1px 0 rgba(0,0,0,.5), 0 1px 3px rgba(0,0,0,.4); }
.tape .image-wrap:after { position: absolute; content: ' '; width: 60px; height: 25px; top: -10px; left: 50%; margin-left: -30px; border: solid 1px rgba(137,130,48,.2); background: -moz-linear-gradient(top, rgba(254,243,127,.6) 0%, rgba(240,224,54,.6) 100%); background: -webkit-gradient(linear, left top, left bottom, color-stop(0%,rgba(254,243,127,.6)), color-stop(100%,rgba(240,224,54,.6))); background: linear-gradient(top, rgba(254,243,127,.6) 0%,rgba(240,224,54,.6) 100%); -webkit-box-shadow: inset 0 1px 0 rgba(255,255,255,.3), 0 1px 0 rgba(0,0,0,.2); }
變形與著色
用 :after 元素在滑鼠移入時加上發光漸變。
CSS
.morphing-tinting .image-wrap { position: relative; -webkit-transition: 1s; -moz-transition: 1s; transition: 1s; -webkit-border-radius: 20px; -moz-border-radius: 20px; border-radius: 20px; }
.morphing-tinting .image-wrap:hover { -webkit-border-radius: 30em; -moz-border-radius: 30em; border-radius: 30em; }
.morphing-tinting .image-wrap:after { position: absolute; content: ' '; width: 100%; height: 100%; top: 0; left: 0; -webkit-transition: 1s; -moz-transition: 1s; transition: 1s; -webkit-border-radius: 30em; -moz-border-radius: 30em; border-radius: 30em; }
.morphing-tinting .image-wrap:hover:after { background: -webkit-gradient(radial, 50% 50%, 40, 50% 50%, 80, from(rgba(0,0,0,0)), to(rgba(0,0,0,1))); background: -moz-radial-gradient(50% 50%, circle, rgba(0,0,0,0) 40px, rgba(0,0,0,1) 80px); }
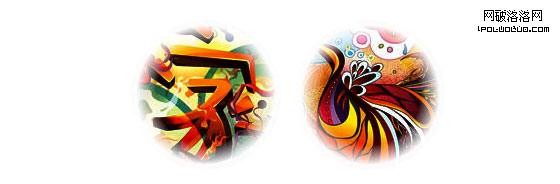
羽化邊緣的圓形
發散漸變同樣可作為遮罩層,實現圓形羽化效果。
CSS
.feather .image-wrap { position: relative; -webkit-border-radius: 30em; -moz-border-radius: 30em; border-radius: 30em; }
.feather .image-wrap:after { position: absolute; content: ' '; width: 100%; height: 100%; top: 0; left: 0; background: -webkit-gradient(radial, 50% 50%, 50, 50% 50%, 70, from(rgba(255,255,255,0)), to(rgba(255,255,255,1))); background: -moz-radial-gradient(50% 50%, circle, rgba(255,255,255,0) 50px, rgba(255,255,255,1) 70px); }
瀏覽器支援
以上做法適用於支援 border-radius、box-shadow、:before 與 :after 的瀏覽器,如 Chrome、Safari、Firefox。較舊的瀏覽器支援有限:IE6/7/8 完全沒有表現,IE9 只會顯示普通圓角。
發揮創造力
如你所見,幾乎任何效果都能透過 :before 與 :after 實現。若你用 CSS3 做出更多創意圖片效果,歡迎分享。補充:本文使用單冒號寫法,其實更建議用雙冒號 ::before/::after,對這些 CSS3 效果而言更安全。
- 上一篇文章: 交互設計最重要的是態度:用交互引導用戶
- 下一篇文章: CSS3 教程:pointer-events 屬性值詳解