用 HTML5 Canvas 做水波紋特效,點一下照片就蕩開漣漪
編輯:HTML5詳解
很多時候,最有趣的效果只需要最原始的 JavaScript 就能做出來。本文示範一個以圖片為背景的水波紋動畫:滑鼠點擊畫面任意位置,該處就會盪開一圈漣漪,並真實地扭曲底下的影像。
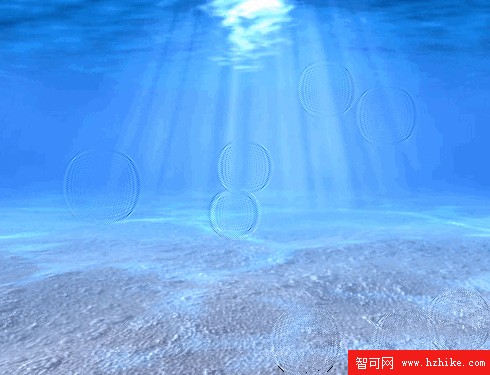
原理:古典的「高度場」水波模擬
這個效果不是用 WebGL 著色器,而是回歸到最經典的演算法。做法是在記憶體中維護兩個二維浮點陣列(buffer1 存目前帧的水面高度、buffer2 存下一帧),每一帧反覆套用同一條公式:
下一帧高度 = (上 + 下 + 左 + 右) / 2 − 該點前一帧的高度,再乘上阻尼係數
這其實就是波動方程的離散形式。左減右、上減下的高度差就是該點的斜率,用它來當作取樣時的 X / Y 位移,畫面看起來就像光線穿過起伏水面後被折射;斜率同時也決定明暗,於是有了光影。
Step 1. HTML 結構
<!DOCTYPE Html>
<Html>
<head>
<meta charset=utf-8 />
<title>Water drops effect</title>
<link rel="stylesheet" href="CSS/main.css" type="text/CSS" />
<script src="js/vector2d.JS" type="text/Javascript" charset="utf-8"></script>
<script src="js/waterfall.JS" type="text/Javascript" charset="utf-8"></script>
</head>
<body>
<div class="example">
  <h3><a href="#">Water drops effect</a></h3>
  <canvas id="water">需要支援 HTML5 的瀏覽器</canvas>
  <div id="switcher">
    <img onclick='watereff.changePicture(this.src);' src="data_images/underwater1.jpg" />
    <img onclick='watereff.changePicture(this.src);' src="data_images/underwater2.jpg" />
  </div>
  <div id="fps"></div>
</div>
</body>
</Html>
Step 2. CSS
body { background:#eee; margin:0; padding:0 }
.example {
  background:#FFF; width:600px; border:1px #000 solid; margin:20px auto;
  padding:15px; -moz-border-radius:3px; -webkit-border-radius:3px;
}
#water { width:500px; height:400px; display:block; margin:0px auto; cursor:pointer; }
#switcher { text-align:center; overflow:hidden; margin:15px; }
#switcher img { width:160px; height:120px; }
Step 3. 核心 JavaScript
drop 建構子負責兩件事:update 推進模擬一格,draw 把高度場轉成像素。
function drop(x, y, damping, shading, refraction, ctx, screenWidth, screenHeight) {
    this.x = x;
    this.y = y;
    this.shading    = shading;
    this.refraction = refraction;
    this.bufferSize = this.x * this.y;
    this.damping    = damping;
    this.background = ctx.getImageData(0, 0, screenWidth, screenHeight).data;
    this.imageData  = ctx.getImageData(0, 0, screenWidth, screenHeight);
    this.buffer1 = [];
    this.buffer2 = [];
    for (var i = 0; i < this.bufferSize; i++) {
        this.buffer1.push(0);
        this.buffer2.push(0);
    }

    // 推進波動方程
    this.update = function() {
        for (var i = this.x + 1, x = 1; i < this.bufferSize - this.x; i++, x++) {
            if (x < this.x) {
                this.buffer2[i] = ((this.buffer1[i - 1] + this.buffer1[i + 1] +
                                    this.buffer1[i - this.x] + this.buffer1[i + this.x]) / 2)
                                  - this.buffer2[i];
                this.buffer2[i] *= this.damping;
            } else x = 0;
        }
        var temp = this.buffer1;
        this.buffer1 = this.buffer2;
        this.buffer2 = temp;
    };

    // 依斜率做折射取樣與打光
    this.draw = function(ctx) {
        var imageDataArray = this.imageData.data;
        for (var i = this.x + 1, index = (this.x + 1) * 4;
             i < this.bufferSize - (1 + this.x); i++, index += 4) {
            var xOffset = ~~(this.buffer1[i - 1] - this.buffer1[i + 1]);
            var yOffset = ~~(this.buffer1[i - this.x] - this.buffer1[i + this.x]);
            var shade   = xOffset * this.shading;
            var texture = index + (xOffset * this.refraction +
                          yOffset * this.refraction * this.x) * 4;
            imageDataArray[index]     = this.background[texture]     + shade;
            imageDataArray[index + 1] = this.background[texture + 1] + shade;
            imageDataArray[index + 2] = 50 + this.background[texture + 2] + shade;
        }
        ctx.putImageData(this.imageData, 0, 0);
    };
}
控制器則負責初始化、計時迴圈與滑鼠互動。點擊時,把該點在 buffer1 中的值加上一個衝擊量,漣漪就從那裡開始擴散。
var watereff = {
    timeStep    : 20,      // 每帧間隔(毫秒),越小越快
    refractions : 2,       // 折射強度
    shading     : 3,       // 明暗對比
    damping     : 0.99,    // 阻尼,越接近 1 波紋存留越久
    screenWidth : 500,
    screenHeight: 400,
    pond        : null,
    textureImg  : null,
    interval    : null,
    backgroundURL: 'data_images/underwater1.jpg',

    init: function() {
        var canvas = document.getElementById('water');
        if (canvas.getContext) {
            canvas.onmousedown = function(e) {
                var mouse = watereff.getMousePosition(e)
                    .sub(new vector2d(canvas.offsetLeft, canvas.offsetTop));
                watereff.pond.buffer1[mouse.y * watereff.pond.x + mouse.x] += 200;
            };
            canvas.width  = this.screenWidth;
            canvas.height = this.screenHeight;
            this.textureImg = new Image(256, 256);
            this.textureImg.src = this.backgroundURL;
            canvas.getContext('2d').drawImage(this.textureImg, 0, 0);
            this.pond = new drop(this.screenWidth, this.screenHeight, this.damping,
                                 this.shading, this.refractions,
                                 canvas.getContext('2d'),
                                 this.screenWidth, this.screenHeight);
            if (this.interval != null) { clearInterval(this.interval); }
            this.interval = setInterval(watereff.run, this.timeStep);
        }
    },

    changePicture: function(url) { this.backgroundURL = url; this.init(); },

    run: function() {
        var ctx = document.getElementById('water').getContext('2d');
        watereff.pond.update();
        watereff.pond.draw(ctx);
    }
};

window.onload = function() { watereff.init(); };
調參心得
想讓水面像蜂蜜一樣黏稠,就把 damping 往 0.95 以下調;想讓漣漪久久不散,調到 0.995 以上。衝擊量 200 是相當克制的數值,加大容易讓畫面整片翻滾。
效能方面要留意:這個版本每帧都在呼叫 getImageData 的結果做純 JS 迴圈運算,500×400 的解析度在桌機上沒問題,但放大到全螢幕就會明顯掉幀。若要優化,可以考慮把運算降到較小的模擬網格(例如 250×200)再放大繪製,或改用 WebGL 把波動方程搬到著色器裡跑。
程式裡用到一個 Vector2D 輔助函式(提供在 vector2d.js 中)來做座標運算;若不想引入這個檔案,只用純數學的 {x, y} 物件加減法也完全可以自己實作。