動手做一個 Vuex 簡易計數器
編輯:關於JavaScript
本文分享一個以 Vuex 實作的簡易計數器,作為理解 Vuex 資料流的入門練習,以下依「元件 → Vuex 目錄 → 入口」的順序拆解。
一、元件層:src/components
Hello.vue:負責顯示計數
 <template>
<div class="hello">
 <h1>Now count is {{counterValue}}</h1>
 <br>
</div>
</template>
<script>
import { getCount } from '../vuex/getters'
export default {
 vuex: {
 getters: {
 counterValue: getCount
 }
 },
 data () {
 return { }
 }
}
</script>
<style scoped>
h1 { color: #42b983; }
</style>
Increate.vue:負責觸發動作
 <template>
<div>
 <button @click='increment' class="btn btn-success">click me + 3</button>
 <button @click='reduce' class="btn btn-warning">click me - 1</button>
</div>
</template>
<script>
import { incrementCounter, reduceCounter } from '../vuex/action'
export default {
 vuex: {
 actions: {
 increment: incrementCounter,
 reduce: reduceCounter
 }
 },
 data: function () {
 return { }
 },
 computed: {},
 ready: function () {},
 attached: function () {},
 methods: {},
 components: {}
}
</script>
<style lang="css">
</style>
可以看出分工很清楚:顯示的元件只透過 getters 讀值,操作按鈕的元件只透過 actions 觸發變化,兩者之間完全不直接往來。
二、Vuex 層:src/vuex
store.js:唯一資料來源
 import Vue from 'vue'
import Vuex from 'Vuex'
Vue.use(Vuex)
const state = { count: 0 }
const mutations = {
 INCREMENT (state, n) { state.count = state.count + n },
 REDUCE (state) { state.count-- }
}
export default new Vuex.Store({ state, mutations })
action.js:派發 mutation 的入口
 export const incrementCounter = ({dispatch}) => dispatch('INCREMENT', 3)
export const reduceCounter = ({dispatch}) => dispatch('REDUCE')
getters.js:對元件暴露的讀取介面
 export function getCount (state) {
 return state.count
}
這裡可以清楚看到一條閉環:元件呼叫 action,action 派發 mutation,mutation 改動 state,state 的變化再經由 getter 反映回元件視圖。
三、組裝:src/App.vue
 <template>
<div id="app">
 <img class="logo" src="./assets/logo.png">
 <hello></hello>
 <increate></increate>
</div>
</template>
<script>
import Hello from './components/Hello'
import Increate from './components/Increate'
import store from './vuex/store'
export default {
 store,
 components: { Hello, Increate }
}
</script>
<style>
html { height: 100%; }
body { display: flex; align-items: center; justify-content: center; height: 100%; }
#app { color: #2c3e50; margin-top: -100px; max-width: 600px;
 font-family: Source Sans Pro, Helvetica, sans-serif; text-align: center; }
#app a { color: #42b983; text-decoration: none; }
.logo { width: 100px; height: 100px }
</style>
根元件的工作只有一件:把 store 掛進來,再把兩個子元件組裝起來。
四、入口檔:src/main.js
 // 入口文件
import Vue from 'vue'
import App from './App'
import VueRouter from 'vue-router'
import VueResource from 'vue-resource'
/* eslint-disable no-new */
new Vue({ el: 'body', components: { App } })
Vue.use(VueRouter)
Vue.use(VueResource)
var router = new VueRouter({
 hashbang: false, // 設為 true 時,所有路徑都會被格式化為 #! 開頭
 history: true // 預設 false,利用 history.pushState()、history.replaceState() 管理瀏覽歷史記錄
})
// require('./routers')(router)
router.start(App, '#app')
執行結果
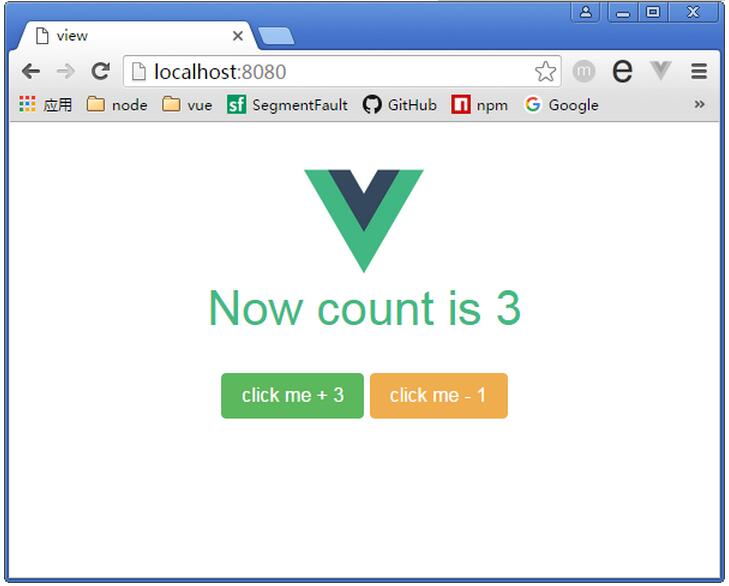
點一下綠色按鈕,計數一次加 3;點黃色按鈕則減 1。整個過程元件完全不碰 state,只透過 action 表達意圖,這正是 Vuex 想推廣的思維方式——雖然對這麼小的功能來說顯得有點重,但當狀態開始被多個元件共享時,價值就會浮現。
- 上一篇文章: 用 Vue 打造可新增、刪除、查詢與修改的成績單範例
- 下一篇文章: 以 require.js 搭配 Vue 開發微信圖片上傳元件
相關文章
-
深入探索 Vuex 2.0:用 Vuejs 2.0 + Vuex 2.0 打造記事本應用 用 Ajax 做一個自動更新的網站計數器(PHP) CSS 計數器 counter():讓編號不再受限於 ol JavaScript 閉包函式輕鬆入門 jQuery 中批次處理多個 Deferred 的做法 用 jQuery animate 做數字翻滾動畫,拿來當計數器剛剛好 批次處理多個 Deferred:仿照 $.when() 的計數寫法 用 JavaScript 連接 Access 資料庫的實測筆記 JS 閉包實例教程匯總:從作用域到經典應用 用 JavaScript 做一個記錄個別訪客來訪次數的計數器