用 Canvas 與 JavaScript 做出起伏的水波背景
編輯:關於JavaScript
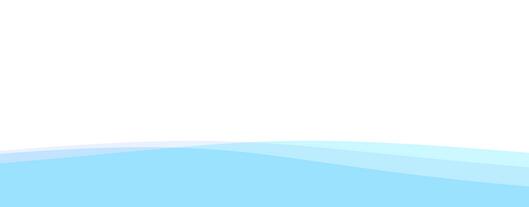
想幫頁面加一點動態氛圍,水波背景是個不錯的選擇。這份實作用 Canvas 畫出三層不同顏色的正弦曲線,逐格推進相位,看起來就像水面起伏。
效果預覽:
實作程式碼:
 <!DOCTYPE html>
<html>
<head>
<title>水波背景</title>
<meta charset="gb2312" />
<style>
html, body {width:100%; height:100%; padding:0; margin:0;}
</style>
</head>
<body>
<canvas id="canvas" style="position:absolute;top:0px;left:0px;z-index:1;"></canvas>
<script type="text/javascript">
var canvas = document.getElementById('canvas');
var ctx = canvas.getContext('2d');
canvas.width = canvas.parentNode.offsetWidth;
canvas.height = canvas.parentNode.offsetHeight;

//如果浏覽器支持requestAnimFrame則使用requestAnimFrame否則使用setTimeout
window.requestAnimFrame = (function(){
    return window.requestAnimationFrame ||
           window.webkitRequestAnimationFrame ||
           window.mozRequestAnimationFrame ||
           function( callback ){
               window.setTimeout(callback, 1000 / 60);
           };
})();

// 波浪大小
var boHeight = canvas.height / 10;
var posHeight = canvas.height / 1.2;

//初始角度為0
var step = 0;

//定義三條不同波浪的顏色
var lines = [
    "rgba(0,222,255, 0.2)",
    "rgba(157,192,249, 0.2)",
    "rgba(0,168,255, 0.2)"
];

function loop(){
    ctx.clearRect(0, 0, canvas.width, canvas.height);
    step++;

    //畫3個不同顏色的矩形
    for(var j = lines.length - 1; j >= 0; j--) {
        ctx.fillStyle = lines[j];
        //每個矩形的角度都不同,每個之間相差45度
        var angle = (step + j * 50) * Math.PI / 180;
        var deltaHeight = Math.sin(angle) * boHeight;
        var deltaHeightRight = Math.cos(angle) * boHeight;

        ctx.beginPath();
        ctx.moveTo(0, posHeight + deltaHeight);
        ctx.bezierCurveTo(
            canvas.width / 2, posHeight + deltaHeight - boHeight,
            canvas.width / 2, posHeight + deltaHeightRight - boHeight,
            canvas.width, posHeight + deltaHeightRight
        );
        ctx.lineTo(canvas.width, canvas.height);
        ctx.lineTo(0, canvas.height);
        ctx.lineTo(0, posHeight + deltaHeight);
        ctx.closePath();
        ctx.fill();
    }
    requestAnimFrame(loop);
}
loop();
</script>
</body>
</html>
幾個原理上的重點。
左右高度用不同函式計算。左端用 sin、右端用 cos,兩者相差 90 度相位,於是左邊下沉時右邊趨近中位,畫面不會整齊地上下平移,看起來才像水。若兩端都用 sin,波紋會像一塊板子在上下浮動。
bezierCurveTo 負責把兩端連成一條弧線。兩個控制點都設在 canvas.width / 2,並往上抬 boHeight, curve 因此在中段隆起,形成自然的波峰。
path 最後要閉合到畫布底部。lineTo(canvas.width, canvas.height) 與 lineTo(0, canvas.height) 把曲線下方填滿,重疊的三層加上 0.2 的 alpha 之後,顏色會自然疊出深淺。
requestAnimFrame 是效能關鍵。它會對齊瀏覽器的重繪週期,在頁面隱藏時自動暫停,比 setTimeout 省電且不會掉格。程式碼中的版本已有多個前綴的向下相容,現在一律寫 window.requestAnimationFrame 即可。
要放上正式頁面,建議再補兩件事。其一,加上 resize 監聽重算 canvas 尺寸,否則視窗縮放後會變形:
window.addEventListener('resize', function(){
    canvas.width = canvas.parentNode.offsetWidth;
    canvas.height = canvas.parentNode.offsetHeight;
    boHeight = canvas.height / 10;
    posHeight = canvas.height / 1.2;
});
其二,尊重使用者的動態內容偏好。若使用者已在系統層級要求減少動態效果,就該停止動畫並只畫一張靜態的水面:
var reduceMotion = window.matchMedia('(prefers-reduced-motion: reduce)').matches;
if(!reduceMotion){
    loop();
} else {
    step = 0;
    loop();   // 畫一幀即可,不再持續 requestAnimFrame
}
最後,canvas 是 z-index: 1 的絕對定位元素,若上面要放內容,記得替內容層設定更高的 z-index,否則文字會被水波蓋住。
- 上一篇文章: 用 JavaScript 檢查登入帳號與密碼是否為空
- 下一篇文章: JavaScript 表單非空驗證:帳號與密碼欄位實作