不依賴 jQuery:用原生 JavaScript 打造簡易自製滾動條
編輯:關於JavaScript
當一個頁面上出現多層嵌套的滾動條時,視覺上會相當凌亂。此時我們通常會替換成自製的滾動條,順便套上好看的樣式,讓整體畫面更統一。
自製滾動條過去多半直接套用 jQuery 插件,幾行程式碼就搞定。但隨著 MVVM 的普及,很多專案已經不引入 jQuery 了,這正是本文的起點:只用原生 API 搭配 MVVM 框架(這裡用 avalon),完成一個堪用的簡易滾動條。
需求
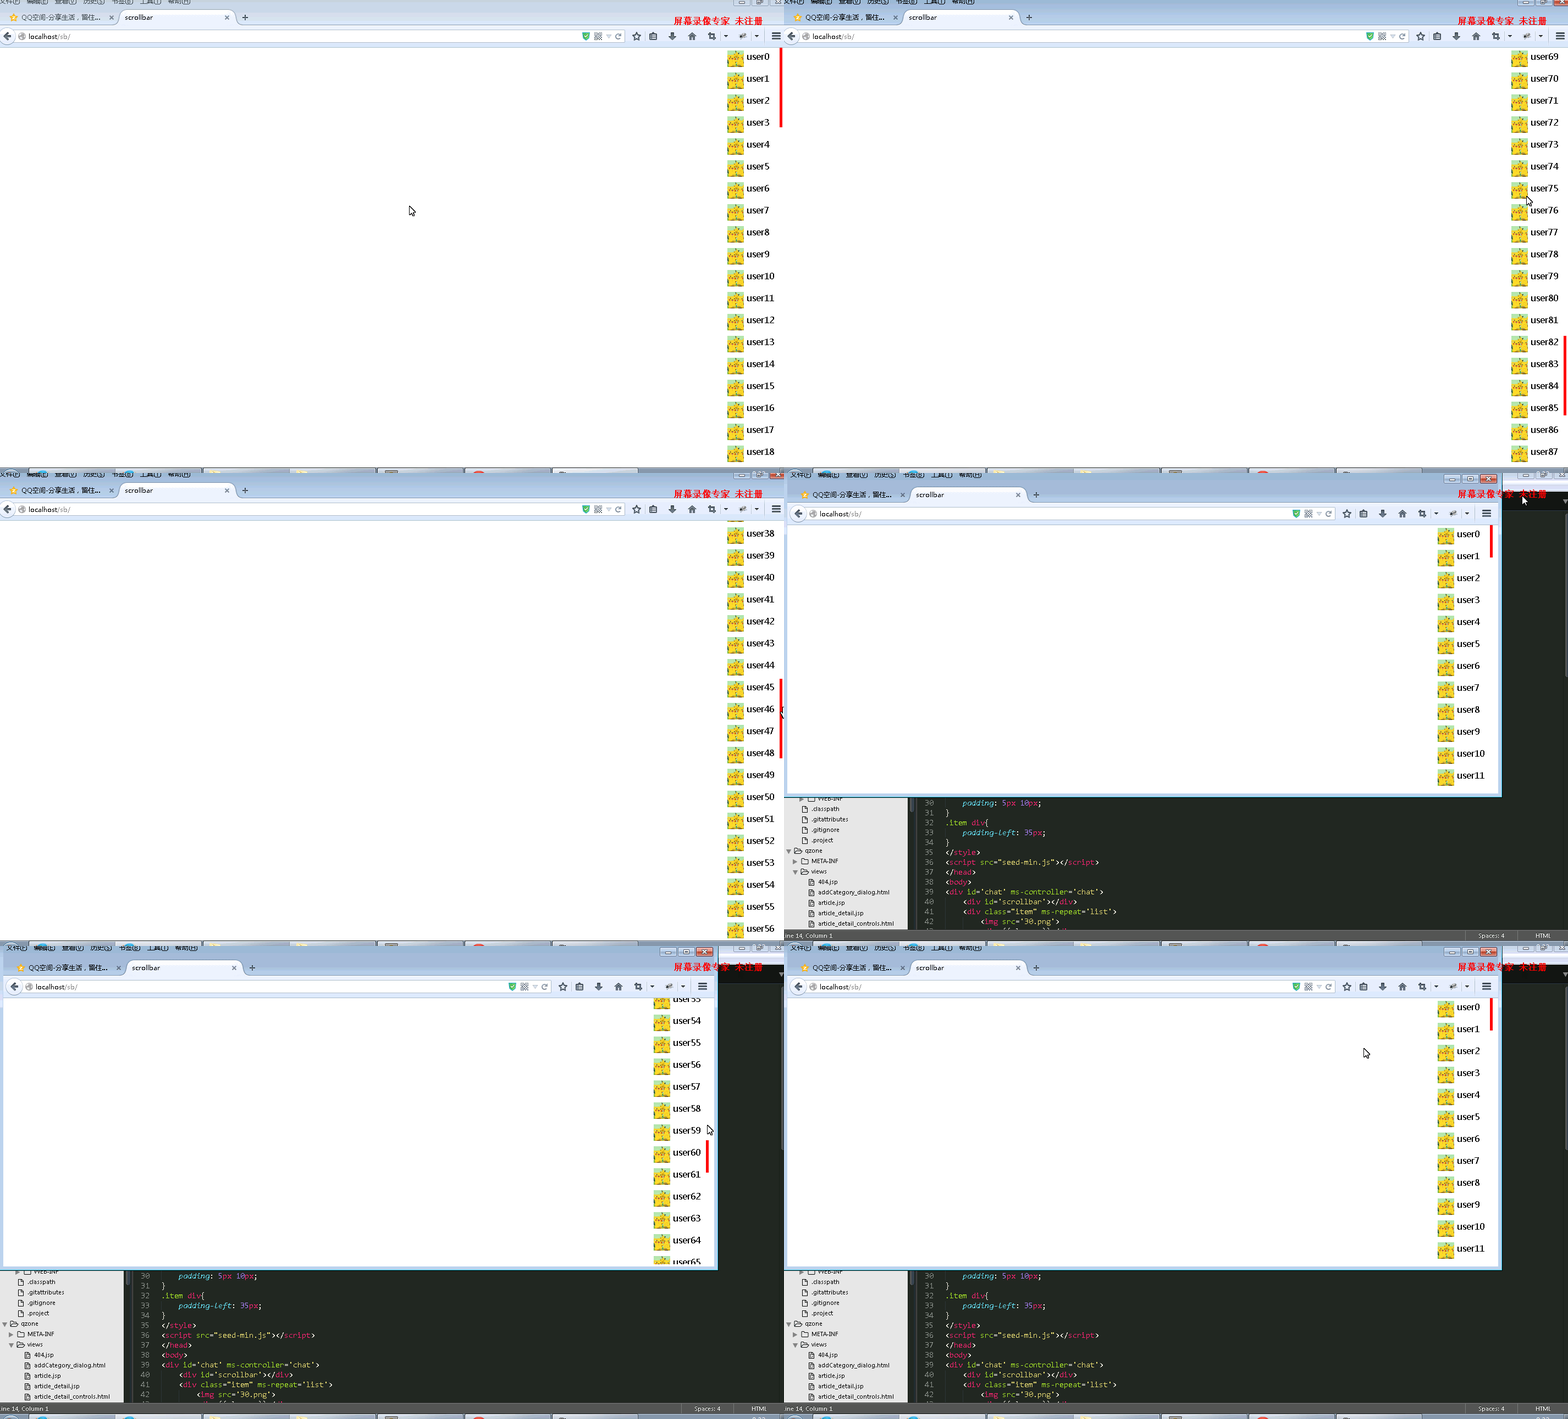
1. 滑鼠滾輪可以驅動滾動條,畫面隨之捲動。
2. 滑鼠可以拖曳滾動條,畫面隨之捲動。
3. 視窗 resize 時,滾動條依新的尺寸重新計算,仍能正常運作。
效果如下:
拖曳元件
很明顯,這個元件的核心是拖曳。既然不想重頭寫,就改寫既有 UI 框架的 drag 元件——這裡選擇 easy js ui 的版本,因為它註解多、程式碼簡潔。做法是把裡面對應的方法換成 avalon 的 API,並刪掉 prototype 上的方法及冗餘程式。
define('drag', ['avalon-min'], function (avalon) {
  function getBoundary(container, target) {
    var borderTopWidth = 0, borderRightWidth = 0, borderBottomWidth = 0, borderLeftWidth = 0,
      cOffset = avalon(container).offset(),
      cOffsetTop = cOffset.top,
      cOffsetLeft = cOffset.left,
      tOffset = avalon(target).offset();

    borderTopWidth    = parseFloat(avalon.css(container, 'borderTopWidth'));
    borderRightWidth  = parseFloat(avalon.css(container, 'borderRightWidth'));
    borderBottomWidth = parseFloat(avalon.css(container, 'borderBottomWidth'));
    borderLeftWidth   = parseFloat(avalon.css(container, 'borderLeftWidth'));

    cOffsetTop  = cOffsetTop - tOffset.top  + parseFloat(avalon(target).css('top'));
    cOffsetLeft = cOffsetLeft - tOffset.left + parseFloat(avalon(target).css('left'));

    return {
      top   : cOffsetTop + borderTopWidth,
      right : cOffsetLeft + avalon(container).outerWidth()  - avalon(target).outerWidth()  - borderRightWidth,
      left  : cOffsetLeft + borderLeftWidth,
      bottom: cOffsetTop  + avalon(container).outerHeight() - avalon(target).outerHeight() - borderBottomWidth
    };
  }

  var drag = function (target, options) {
    var defaults = { axis: null, container: null, handle: null, ondragmove: null };
    var o = avalon.mix(defaults, options),
      doc = target.ownerDocument,
      win = doc.defaultView || doc.parentWindow,
      originHandle = target,
      isIE = !-[1, ],
      handle = isIE ? target : doc,
      container = o.container ? o.container : null,
      count = 0,
      drag = this,
      axis = o.axis,
      isMove = false,
      boundary, zIndex, originalX, originalY,
      clearSelect = 'getSelection' in win
        ? function () { win.getSelection().removeAllRanges(); }
        : function () { try { doc.selection.empty(); } catch (e) { } },
      down = function (e) {
        o.isDown = true;
        var newTarget = target, left, top, offset;
        o.width  = avalon(target).outerWidth();
        o.height = avalon(target).outerHeight();
        o.handle = handle;
        left   = avalon(newTarget).css('left');
        top    = avalon(newTarget).css('top');
        offset = avalon(newTarget).offset();
        drag.left = left = parseInt(left);
        drag.top  = top  = parseInt(top);
        drag.offsetLeft = offset.left;
        drag.offsetTop  = offset.top;
        originalX = e.pageX - left;
        originalY = e.pageY - top;
        if ((!boundary && container)) {
          boundary = getBoundary(container, newTarget);
        }
        if (axis) {
          if (axis === 'x') { originalY = false; }
          else if (axis === 'y') { originalX = false; }
        }
        if (isIE) { handle.setCapture(); }
        avalon.bind(handle, 'mousemove', move);
        avalon.bind(handle, 'mouseup', up);
        if (isIE) { avalon.bind(handle, 'losecapture', up); }
        e.stopPropagation();
        e.preventDefault();
      },
      move = function (e) {
        if (!o.isDown) { return; }
        count++;
        if (count % 2 === 0) { return; }
        var currentX = e.pageX, currentY = e.pageY,
          style = target.style, x, y, left, right, top, bottom;
        clearSelect();
        isMove = true;
        if (originalX) {
          x = currentX - originalX;
          if (boundary) {
            left = boundary.left; right = boundary.right;
            x = x < left ? left : (x > right ? right : x);
          }
          drag.left = x;
          drag.offsetLeft = currentX - e.offsetX;
          style.left = x + 'px';
        }
        if (originalY) {
          y = currentY - originalY;
          if (boundary) {
            top = boundary.top; bottom = boundary.bottom;
            y = y < top ? top : (y > bottom ? bottom : y);
          }
          drag.top = y;
          drag.offsetTop = currentY - e.offsetY;
          style.top = y + 'px';
        }
        o.ondragmove.call(this, drag);
        e.stopPropagation();
      },
      up = function (e) {
        o.isDown = false;
        if (isIE) { avalon.unbind(handle, 'losecapture'); }
        avalon.unbind(handle, 'mousemove');
        avalon.unbind(handle, 'mouseup');
        if (isIE) { handle.releaseCapture(); }
        e.stopPropagation();
      };

    avalon(originHandle).css('cursor', 'pointer');
    avalon.bind(originHandle, 'mousedown', down);

    drag.refresh = function () {
      boundary = getBoundary(container, target);
    };
  };
  return drag;
});
這裡做了兩處擴充。第一,對外公開 refresh 方法,讓 resize 時可以更新可拖曳的範圍:
drag.refresh = function () {
  boundary = getBoundary(container, target);
};
第二,在拖曳的 move 過程中埋一個鉤子,允許外部註冊監聽函數,拖動時觸發並把 drag 物件傳出去:
o.ondragmove.call(this, drag);
滾動條本體
define('scrollbar', ['avalon-min', 'drag'], function (avalon, drag) {
  function scrollbar(wrap, scrollbar, height_per_scroll) {
    // 參數:容器、滾動條、每次滾輪移動的距離
    this.scroll_height = 0;   // 滾動條高度
    this.dragger = null;      // drag 元件實例
    wrap.scrollTop = 0;

    // 容器位置要扣掉瀏覽器最外層預設滾動條的垂直位置
    var self = this,
      wrap_top = avalon(wrap).offset().top - avalon(document).scrollTop();

    function ondragmove(drag) {
      // drag 拖動時更新容器視圖
      wrap.scrollTop = (parseFloat(scrollbar.style.top) - wrap_top) *
        (wrap.scrollHeight - wrap.clientHeight) / (wrap.clientHeight - self.scroll_height);
    }

    function setScrollPosition(o) {
      // 更新滾動條位置
      scrollbar.style.top = o.scrollTop * wrap.clientHeight / wrap.scrollHeight + wrap_top + 'px';
    }

    function init_events() {
      avalon.bind(wrap, 'mousewheel', function (e) {
        if (e.wheelDelta < 0) { wrap.scrollTop += height_per_scroll; }
        else { wrap.scrollTop -= height_per_scroll; }
        setScrollPosition(wrap);
        e.preventDefault();
      });

      self.dragger = new drag(scrollbar, {
        container: wrap, axis: 'y', ondragmove: ondragmove
      });

      window.onresize = function () {
        self.refresh_views();
        self.dragger.refresh();
      };
    }

    this.refresh_views = function () {
      // 更新元件所有部分的視圖,並公開供外部呼叫
      // 這裡把容器高度設為「視窗可視高度 - 容器的垂直位置」,未考慮 border/padding/margin,可依場景調整
      wrap.style.height = document.documentElement.clientHeight - wrap_top + 'px';
      self.scroll_height = wrap.clientHeight * wrap.clientHeight / wrap.scrollHeight;

      // 若容器高度等於滾動條高度,隱藏滾動條
      if (self.scroll_height == wrap.clientHeight) {
        scrollbar.style.display = 'none';
      } else {
        scrollbar.style.display = 'block';
      }
      scrollbar.style.height = self.scroll_height + 'px';
      setScrollPosition(wrap);
    };

    function init() {
      self.refresh_views();
      init_events();
    }
    init();
  }
  return scrollbar;
});
可以注意到,resize 時除了呼叫 refresh_views 更新滾動條高度,也呼叫了 drag 的 refresh 更新可拖曳範圍。之所以把 refresh_views 公開出來,是為了因應「外部需要手動更新視圖」的情形,例如聊天分群組的展開與摺疊。

這樣就完成了一個簡易滾動條。程式碼不長,層次也清楚,日後要修 bug 或做客製化都不困難。
- 上一篇文章: 什麼是 JavaScript 高階函數?從定義到實戰
- 下一篇文章: 圖片預先載入的七種做法:CSS、JavaScript 與 Ajax