React Router v4 是一次破壞性的重構,路由思維從「集中式配置」變成了「組件化声明」。以下把常用配置方式與容易踩的坑整理起來,也給自己留份筆記。
一、Switch、Router、Route 三者的關係
1、Route
Route 是建立 location 與 UI 之間最直接聯繫的組件。
2、Router
v4 中,Router 被拆分成了 StaticRouter、MemoryRouter、BrowserRouter、HashRouter、NativeRouter 等多種實現。MemoryRouter、BrowserRouter、HashRouter 等在本質上等同於:
import { Router } from 'react-router'

// history 部分源碼:
// exports.createBrowserHistory = _createBrowserHistory3.default;
// exports.createHashHistory = _createHashHistory3.default;
// exports.createMemoryHistory = _createMemoryHistory3.default;

import createBrowserHistory from 'history/createBrowserHistory'
// const history = createBrowserHistory()

<Router history={history}>
  <App/>
</Router>
NativeRouter 則是給 React Native 使用的版本,用於 iOS 與 Android 應用。
這裡要特別注意兩個新增屬性:strict 與 exact。
· 使用 strict 時,location 大於等於 path 才能匹配。例如 path='/one',location='/one/a' 能匹配;
· 使用 exact 時,location 約等於 path 才能匹配。例如 path='/one',location='/one' 或 '/one/' 能匹配;
· 同時使用 exact 與 strict 時,location 必須等於 path。
StaticRouter 主要用於服務端渲染,這裡先略過。
3、Switch
v4 新增的組件,用來做唯一匹配——在多個路由中只渲染最先匹配成功的那一個。
二、路由該怎麼配置
1. 基本配置(與 v3 基本一致,效果也相同)
匹配規則:path <= location,/b 與 / 都可能命中。
<BrowserRouter forceRefresh={!supportsHistory} keyLength={12}>
  <div>
    <Route path="/" component={aContainer} />
    <Route path="/b" component={bContainer} />
  </div>
</BrowserRouter>
2. 含 Switch 的配置
匹配規則:唯一匹配,/b 只命中 bContainer。
<BrowserRouter forceRefresh={!supportsHistory} keyLength={12}>
  <Switch>
    {/* 這裡用 exact,單純是擔心 location 被 path='/' 截胡 */}
    <Route exact path="/" component={aContainer} />
    <Route path="/b" component={bContainer} />
  </Switch>
</BrowserRouter>
這裡有個實務上很常踩的坑:只要 / 寫在 Switch 裡而沒加 exact,它會匹配所有路徑,後面的 Route 永遠沒機會執行。
三、三個常見問題
1. 如何設置公共的 Component
第一種方式——直接並列,用一層 div 包住:
<BrowserRouter forceRefresh={!supportsHistory} keyLength={12}>
  <div>
    <Route path="/" component={aContainer} />
    <Route path="/b" component={bContainer} />
  </div>
</BrowserRouter>
第二種方式——父子嵌套:
<BrowserRouter forceRefresh={!supportsHistory} keyLength={12}>
  <div>
    <Route path="/" component={aContainer} />
    <Route path="/b" component={Parent} />
  </div>
</BrowserRouter>
const Parent = ({ match }) => (
  <div>
    <Route path={`${match.url}/`} component={bContainer} />
    <Route path={`${match.url}/c`} component={cContainer} />
    <Route path={`${match.url}/d`} component={dContainer} />
  </div>
);
這種情況下 bContainer 就是公共組件。子路由用 match.url 拼接,可以避免把父層路徑寫死。
2. 如何設置 getComponent,實現按需載入
這部分涉及代碼分割,需要搭配 bundle-loader 或後來的 React.lazy 使用,此處不展開。
3. 有沒有更簡化的寫法
npm install --save react-router-config
第一步:配置路由表
const routes = [
  {
    component: bContainer,
    routes: [
      {
        path: '/',
        exact: true,
        component: bContainer
      },
      {
        path: '/b/b',
        component: bContainer,
        routes: [
          { path: '/b/b/b', component: bContainer }
        ]
      }
    ]
  }
]
第二步:設置路由
<BrowserRouter forceRefresh={!supportsHistory} keyLength={12}>
  <div>
    {renderRoutes(routes)}
  </div>
</BrowserRouter>
第三步:在 container 的 render 中呼叫
<div>
  1111
  {renderRoutes(this.props.route.routes)}
</div>
這種做法的優勢是可以統一配置、集中管理路由表;劣勢是需要在每個 container 中呼叫一次 renderRoutes。不過把這個步驟抽出來統一封裝後,問題也不大,而且還能順便解決前面提到的公共組件問題。
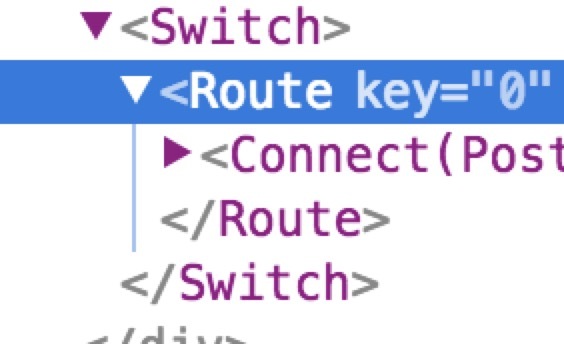
實際上 renderRoutes 就是用一層 Switch 和一堆 Route 幫你包起來而已。
小結
v4 的核心觀念轉變是:路由就是普通組件。這帶來了極大的自由度——路由可以嵌套、可以條件渲染、可以放在任何你想放的位置。但也因為失去了集中式配置的約束,專案越大越需要一套約定,此時 react-router-config 這類配置化方案,或自建統一的路由渲染函數,就會變得很有價值。
- 上一篇文章: 原生 JS + Canvas 動手做一個五子棋遊戲
- 下一篇文章: ES6 模組化 import 與 export 用法完整整理