React Native 用 ListView 實現九宮格的完整做法
編輯:JavaScript技巧
在 Android 原生開發裡,ListView 是使用頻率最高的列表控件之一。那麼在 React Native 中該怎麼實現同樣的效果,甚至用它拼出一個九宮格?我們從 ListView 的源碼和常用屬性說起。
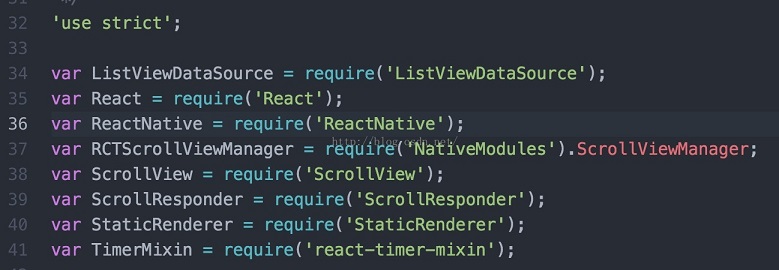
ListView 是基於 ScrollView 擴展出來的,因此天然具備 ScrollView 的一整套能力:
- dataSource:數據源,作用等同於 Android 裡傳給 BaseAdapter 的數據集合。
- renderRow:負責渲染某一行,對應 BaseAdapter 的 getItem。
- onEndReached:觸底回調,分頁加載就靠它,Android 原生裡這部分通常要自己寫。
- onEndReachedThreshold:距底部多遠開始觸發 onEndReached,單位是像素。
- refreshControl:傳入 RefreshControl 組件,為列表提供下拉刷新(此屬性繼承自 ScrollView)。
- renderHeader:渲染頭部視圖,類似 Android ListView 的 addHeaderView。
這幾個屬性基本能覆蓋常見列表需求。而只要再配合下面兩個屬性,ListView 還能客串網格布局,思路和 Android 的 RecyclerView 有點像:
- pageSize:每屏渲染的單元格數量,類似 GridView 的 numColumns。
- contentContainerStyle:作用於內容容器(繼承自 ScrollView),網格排版全靠它。
實現步驟
第一步,用 pageSize 指定每行幾列。
<ListView
  automaticallyAdjustContentInsets={false}
  contentContainerStyle={styles.grid}
  dataSource={this.state.dataSource}
  renderRow={this.renderRow.bind(this)}
  pageSize={3}
  refreshControl={
    <RefreshControl
      onRefresh={this.onRefresh.bind(this)}
      refreshing={this.state.isLoading}
      colors={['#ff0000', '#00ff00', '#0000ff']}
      enabled={true}
    />
  }
/>
第二步,給單個單元格設定寬高樣式。
itemLayout: {
  flex: 1,
  width: Util.size.width / 3,
  height: Util.size.width / 3,
  alignItems: 'center',
  justifyContent: 'center',
  borderWidth: Util.pixel,
  borderColor: '#eaeaea'
},
第三步,配置容器樣式。
grid: {
  justifyContent: 'space-around',
  flexDirection: 'row',
  flexWrap: 'wrap'
},
這裡有兩個容易踩坑的點。ListView 默認是縱向排列,所以必須通過 contentContainerStyle 顯式聲明 flexDirection: 'row';其次要靠 flexWrap: 'wrap' 才能在一行放滿後自動換行。
補充一下 flexWrap 的兩個取值:wrap 表示空間不足時換行,nowrap 表示空間不足時壓縮容器、不換行。
完整代碼
import React, { Component } from 'react';
import {
  AppRegistry, StyleSheet, Text, View, ListView, Image, TouchableOpacity, AlertIOS
} from 'react-native';

// 獲取屏幕寬度
var Dimensions = require('Dimensions');
const screenW = Dimensions.get('window').width;

// 導入 json 數據
var shareData = require('./shareData.json');

// 一些常量設置
const cols = 3;
const cellWH = 100;
const vMargin = (screenW - cellWH * cols) / (cols + 1);
const hMargin = 25;

var ListViewDemo = React.createClass({
  // 初始化狀態值
  getInitialState() {
    // 創建數據源
    var ds = new ListView.DataSource({ rowHasChanged: (r1, r2) => r1 !== r2 });
    return {
      dataSource: ds.cloneWithRows(shareData.data)
    };
  },

  render() {
    return (
      <ListView
        dataSource={this.state.dataSource}
        renderRow={this.renderRow}
        contentContainerStyle={styles.listViewStyle}
      />
    );
  },

  // 返回 cell
  renderRow(rowData) {
    return (
      <TouchableOpacity
        activeOpacity={0.8}
        onPress={() => { AlertIOS.alert('點擊了'); }}
      >
        <View style={styles.innerViewStyle}>
          <Image source={{ uri: rowData.icon }} style={styles.iconStyle} />
          <Text>{rowData.title}</Text>
        </View>
      </TouchableOpacity>
    );
  },
});

const styles = StyleSheet.create({
  listViewStyle: {
    flexDirection: 'row',   // 主軸方向改為橫向
    flexWrap: 'wrap',       // 一行放不下自動換行
    alignItems: 'center',   // 側軸對齊,必須設置,否則換行不生效
  },
  innerViewStyle: {
    width: cellWH,
    height: cellWH,
    marginLeft: vMargin,
    marginTop: hMargin,
    alignItems: 'center',   // 內容居中
  },
  iconStyle: {
    width: 80,
    height: 80,
  },
});

AppRegistry.registerComponent('ListViewDemo', () => ListViewDemo);
效果如下(數據源可自行補充):
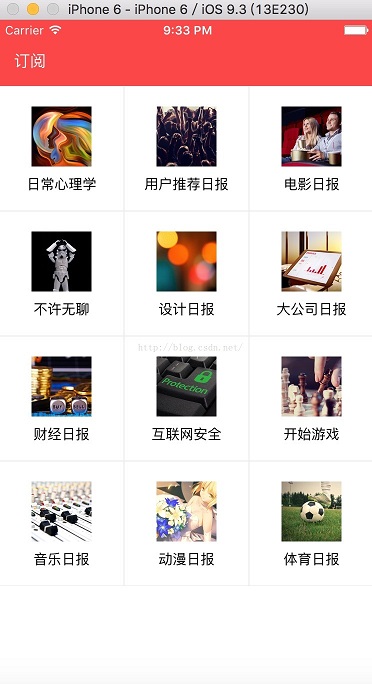
核心其實就三件事:pageSize 決定列數、單元格樣式決定尺寸、contentContainerStyle 負責橫向排列與自動換行。把這三點調對,ListView 就能勝任大部分網格場景。