原生 js 實現 tooltip 提示框的效果
編輯:JavaScript基礎知識
在 js 的世界裡,每一個小小的特效看似微不足道,卻又那麼令人嚮往與好奇。前端工程師的任務之所以顯得高大上,是因為他們一個小小的設計,往往就能激發別人的求知欲。比如我,只是隨意一瞥,便注意到了這個 tooltip 特效,頓時生出想要親手征服它的念頭。
先來看看 tooltip 的效果展示:
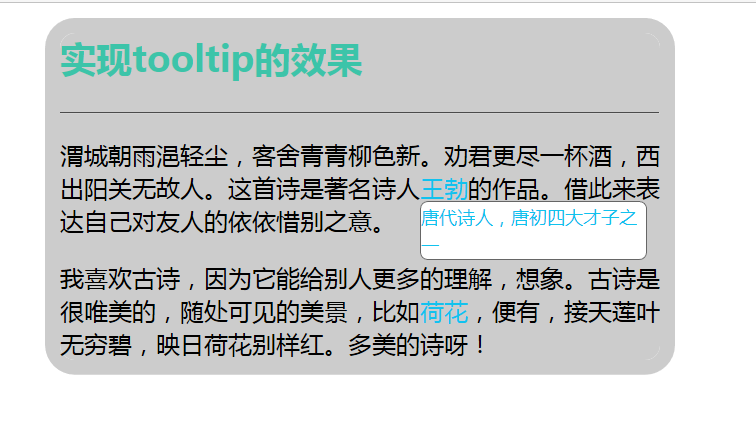
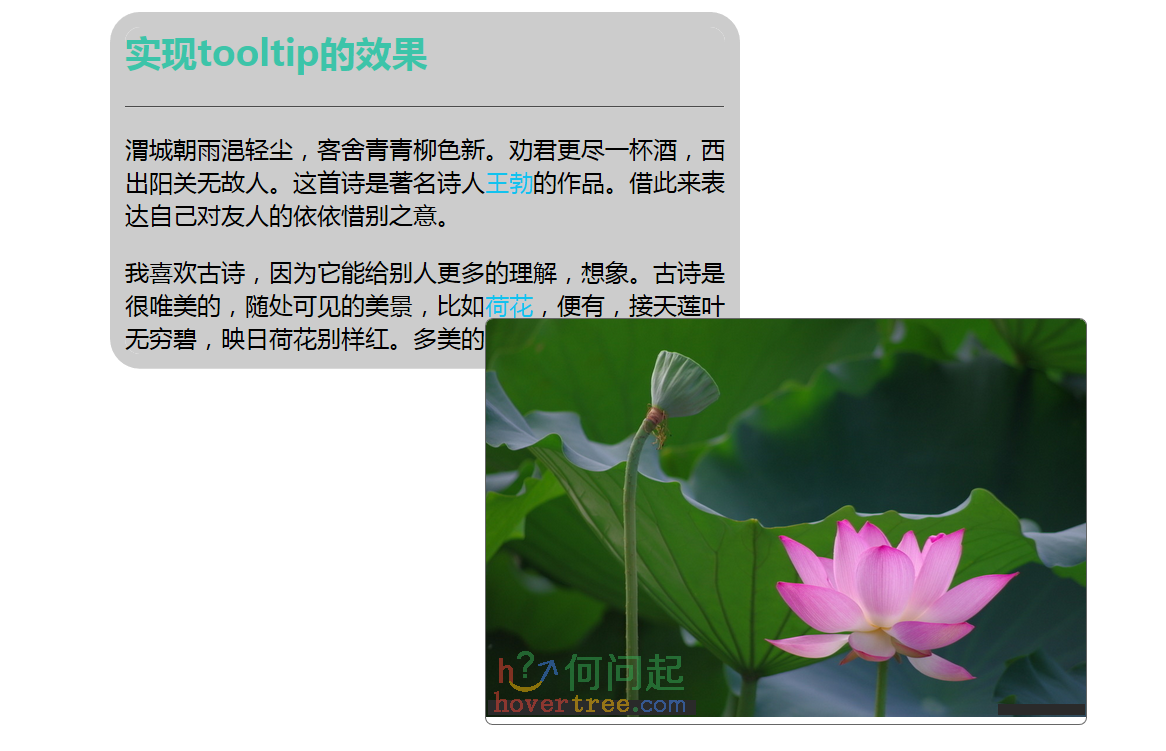
這便是 tooltip 提示框的效果——當滑鼠懸停在關鍵詞上時,會浮現一段說明文字。
以下是在 HBuilder 上的完整程式碼:
<!DOCTYPE html>
<html>
<head>
<meta charset="UTF-8">
<title>ToolTip</title>
<style type="text/css">
.body{
    width: 500px;
    height: 600px;
    font-size: 14px;
    background-color: #eee;
}
#demo{
    width: 400px;
    margin: auto;
    position: relative;
    border-radius: 10px;
    background-color: #ccc;
    box-shadow: 0 0 0 10px rgba(0, 0, 0, 0.2);
}
#demo a{ color: #11C2EE; }
#demo h2{ color: #3CC4A9; }
#demo tooltip{ color: #3CC4A9; cursor: help; }
.tooltip-box{
    display: block;
    line-height: 1.6;
    background-color: #fff;
    border: 1px solid #666;
    font-size: 12px;
    border-radius: 5px;
    overflow: auto;
}
</style>
</head>
<body>
<div id="demo">
<h2>實現tooltip的效果</h2>
<hr />
<p>
渭城朝雨浥輕塵,客捨青青柳色新。勸君更盡一杯酒,西出陽關無故人。這首詩是著名詩人<a class="tooltip" id="tooltip1">王維</a>的作品。藉此來表達自己對友人的依依惜別之意。
</p>
<p>
我喜歡古詩,因為它能給別人更多的理解、想象。古詩是很唯美的,隨處可見的美景,比如<a class="tooltip" id="tooltip2">荷花</a>,便有「接天蓮葉無窮碧,映日荷花別樣紅」。多美的詩呀!
</p>
</div>
<script>
var className = 'tooltip-box';
var isIE = navigator.userAgent.indexOf('MSIE') > -1;

function showTooltip(obj, id, html, width, height) {
    if (document.getElementById(id) == null) {
        var tooltipBox;
        tooltipBox = document.createElement('div');
        tooltipBox.className = className;
        tooltipBox.id = id;
        tooltipBox.innerHTML = html;
        obj.appendChild(tooltipBox);

        tooltipBox.style.width = width ? width + 'px' : 'auto';
        tooltipBox.style.height = height ? height + 'px' : 'auto';

        if (!width && isIE) {
            tooltipBox.style.width = tooltipBox.offsetWidth;
        }

        tooltipBox.style.position = "absolute";
        tooltipBox.style.display = "block";

        var left = obj.offsetLeft;
        var top = obj.offsetTop + 20;

        if (left + tooltipBox.offsetWidth > document.body.clientWidth) {
            var demoLeft = document.getElementById("demo").offsetLeft;
            left = document.body.clientWidth - tooltipBox.offsetWidth - demoLeft;
            if (left < 0) left = 0;
        }

        tooltipBox.style.left = left + 'px';
        tooltipBox.style.top = top + 'px';

        obj.onmouseleave = function () {
            setTimeout(function () {
                document.getElementById(id).style.display = "none";
            }, 100);
        };
    } else {
        document.getElementById(id).style.display = "block";
    }
}

var t1 = document.getElementById("tooltip1");
t1.onmouseenter = function(){
    showTooltip(this, "t1", "唐代詩人,唐初四傑之一", 150);
}

var t2 = document.getElementById("tooltip2");
t2.onmouseenter = function(){
    showTooltip(this, "t4", '<img src="img/1.jpg" width="400" /> ', 400);
}
</script>
</body>
</html>
現在來解析程式碼。HTML 與 CSS 部分比較基礎,看看就懂,重點在 js 部分。
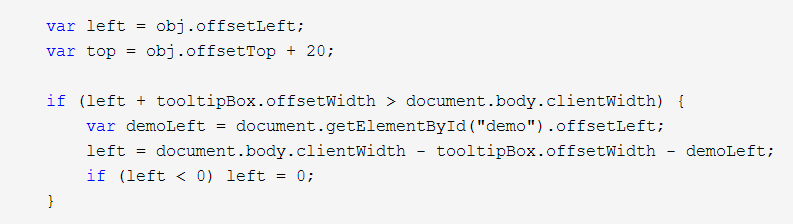
showTooltip 這個函數負責讓提示框顯示出來。這一段程式碼的作用是:當頁面變小時,判斷提示框的寬度,如果寬度太大而螢幕太窄,就隨著整個螢幕大小進行調整,避免溢出。
var top = obj.offsetTop + 20 之所以要加 20,是因為提示框需要出現在提示物件的下方,若沒有這個偏移,提示框便會將原物件覆蓋。

mouseleave 是滑鼠離開時要執行的函數——這裡實現了「延遲消失」的效果。
setTimeout(function, 延遲的時間) 的時間單位是毫秒,常用於動畫的延遲等場景;與之對應的 clearTimeout 函數則用來清除 setTimeout 的效果,用法如下:
var t1 = setTimeout(function, 3000);
clearTimeout(t1);
上面的程式碼主要講解了由一張圖片和一些說明文字組成的 tooltip 框,其他情況可依此類推。雖然這個特效比較小,卻十分巧妙有趣。
- 上一篇文章: JavaScript 函數中參數的傳遞機制
- 下一篇文章: JS 中的事件綁定、事件監聽與事件委托
熱門推薦
JavaScript 筆記(十一):正規表達式語法速查
JavaScript 框架設計實踐:動手寫一個類 jQuery 的庫
JavaScript setMilliseconds():設定本地毫秒
JavaScript 宿主對象的屬性與方法總結
JavaScript 原型拾遺:從物件建立方式談到原型鏈
offsetLeft、clientLeft、scrollLeft 一次搞懂
《JavaScript 高級程序設計》閱讀筆記(一):從起源到 ECMAScript、DOM 與 BOM
JavaScript Date 物件完整指南:建立、格式化與時間元件取值
JavaScript Math.LOG2E:以 2 為底的 E 對數