這篇技巧要動手做一個查詢溫度感測器的 XForms 表單。流程是這樣的:使用者輸入感測器 ID,表單先把它送到第一個 Web 服務換回該感測器所在的郵遞區號;接著表單自動把郵遞區號丟給第二個服務,由後者回傳該地區的環境溫度。
本文假設你已對 XForms 有基礎認識,並且在機器上裝好了 FormsPlayer 這個 XForms 客戶端。
先做出最陽春的版本
第一步只做一件事:讓使用者能輸入感測器 ID。
清單 1. 基本的 XForms 表單
<Html
 XMLns="https://www.w3.org/1999/xHtml"
 XMLns:xforms="https://www.w3.org/2002/xforms"
 xmlns:xsd="https://www.w3.org/2001/XMLSchema"
 xmlns:xsi="https://www.w3.org/1999/XMLSchema-instance"
 xmlns:ev="https://www.w3.org/2001/XML-events"
 xmlns:SOAP-ENV="https://schemas.XMLsoap.org/soap/envelope/"
>
 <head>
 <title>XForms and Web Services</title>
 </head>
 <body>
 <object id="FormsPlayer"
 classid="CLSID:4D0ABA11-C5F0-4478-991A-375C4B648F58">
 <b>FormsPlayer has not loaded. Please check your installation.</b>
 </object>
 <?import namespace="xforms" implementation="#FormsPlayer" ?>
 <xforms:model id="WeatherService">
 <xforms:instance id="sensorInstance">
 <SOAP-ENV:Envelope
 xmlns:SOAP-ENV="https://schemas.XMLsoap.org/soap/envelope/"
 xmlns:xsi="https://www.w3.org/1999/XMLSchema-instance"
 xmlns:xsd="https://www.w3.org/1999/XMLSchema">
 <SOAP-ENV:Body>
 <ns1:getZip XMLns:ns1="urn:example-sensorZip"
 SOAP-ENV:encodingStyle=
 "https://schemas.XMLsoap.org/soap/encoding/">
 <sensorId xsi:type="xsd:string"></sensorId>
 </ns1:getZip>
 </SOAP-ENV:Body>
 </SOAP-ENV:Envelope>
 </xforms:instance>
 </xforms:model>
 <xforms:input ref="instance('sensorInstance')//sensorId">
 <xforms:label>Sensor ID: </xforms:label>
 <xforms:hint>Enter the ID for the sensor whose ambient
 temperature you want to check.</xforms:hint>
 </xforms:input>
</body>
</Html>
這是一個刻意簡化的表單,只讓使用者輸入一個值:
圖 1:基本表單
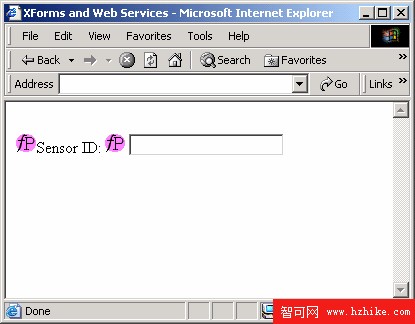
關鍵在於,sensorInstance 這個實例的內容本身就完全採用 SOAP 請求的格式。也就是說,使用者輸入的值會填進 sensorId 元素,而整份實例可以直接丟給 Web 服務並接回 SOAP 回應——不需要任何額外的轉換層。
第一次提交
接下來要讓表單真的把資料送出去。為此需要補上一個 submission 元素,以及一個觸發它的 trigger。
清單 2. 提交表單
...
 <xforms:model id="WeatherService">
 <xforms:instance id="sensorInstance">
 <SOAP-ENV:Envelope
 xmlns:SOAP-ENV="https://schemas.XMLsoap.org/soap/envelope/"
 xmlns:xsi="https://www.w3.org/1999/XMLSchema-instance"
 xmlns:xsd="https://www.w3.org/1999/XMLSchema">
 <SOAP-ENV:Body>
 <ns1:getZip XMLns:ns1="urn:example-sensorZip"
 SOAP-ENV:encodingStyle=
 "https://schemas.XMLsoap.org/soap/encoding/">
 <sensorId xsi:type="xsd:string"></sensorId>
 </ns1:getZip>
 </SOAP-ENV:Body>
 </SOAP-ENV:Envelope>
 </xforms:instance>

 <xforms:submission id="getzip"
 method="text-XML-post"
 replace="instance"
 ref="instance('sensorInstance')"
 action="https://www.nicholaschase.com/sensors/getZipService.PHP"
 />
 </xforms:model>

 <xforms:switch id="switch1">
 <xforms:case id="requestGUI">
 <xforms:input ref="instance('sensorInstance')//sensorId">
 <xforms:label>Sensor ID: </xforms:label>
 <xforms:hint>Enter the ID for the sensor whose ambient
 temperature you want to check.</xforms:hint>
 </xforms:input>

 <xforms:trigger style="display:block">
 <xforms:label>Get sensor ambient temperature</xforms:label>
 <xforms:action ev:event="DOMactivate">
 <xforms:send submission="getzip" />
 <xforms:toggle case="responseGUI" />
 </xforms:action>
 </xforms:trigger>
 </xforms:case>
 <xforms:case id="responseGUI">
 <xforms:output ref="instance('sensorInstance')//return">
 <xforms:label>Sensor zip code:</xforms:label>
 </xforms:output>
 </xforms:case>
</xforms:switch>
</body>
</Html>
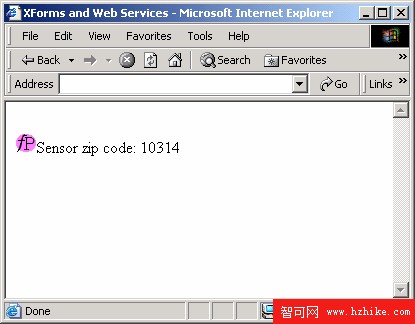
按下按鈕後會連續發生兩件事。首先,瀏覽器送出名為 getzip 的提交;這份提交由模型中的 submission 元素定義,它同時規定了要送哪些資料、送到哪裡去。此例中送的是 sensorInstance,服務回應一個 SOAP 訊息,真正的郵遞區號藏在 return 元素裡。
提交完成後,表單會從顯示原始輸入畫面的 requestGUI 切換到 responseGUI,後者負責把回傳的資料顯示出來:
圖 2:第一次回應
第二次提交
拿到郵遞區號之後,還得把它交給氣象服務。做法與前面一致:先建立一個實例,再把實例提交出去。
清單 3. 加入第二個實例
...
 <xforms:model id="WeatherService">
 <xforms:instance id="sensorInstance">
 <SOAP-ENV:Envelope
 xmlns:SOAP-ENV="https://schemas.XMLsoap.org/soap/envelope/"
 xmlns:xsi="https://www.w3.org/1999/XMLSchema-instance"
 xmlns:xsd="https://www.w3.org/1999/XMLSchema">
 <SOAP-ENV:Body>
 <ns1:getZip XMLns:ns1="urn:example-sensorZip"
 SOAP-ENV:encodingStyle=
 "https://schemas.XMLsoap.org/soap/encoding/">
 <sensorId xsi:type="xsd:string"></sensorId>
 </ns1:getZip>
 </SOAP-ENV:Body>
 </SOAP-ENV:Envelope>
 </xforms:instance>

 <xforms:instance id="weatherInstance">
 <SOAP-ENV:Envelope
 xmlns:SOAP-ENV="https://schemas.XMLsoap.org/soap/envelope/"
 xmlns:xsi="https://www.w3.org/1999/XMLSchema-instance"
 xmlns:xsd="https://www.w3.org/1999/XMLSchema">
 <SOAP-ENV:Body>
 <ns1:getTemp XMLns:ns1="urn:xmethods-Temperature"
 SOAP-ENV:encodingStyle=
 "https://schemas.XMLsoap.org/soap/encoding/">
 <zipcode xsi:type="xsd:string"></zipcode>
 </ns1:getTemp>
 </SOAP-ENV:Body>
 </SOAP-ENV:Envelope>
 </xforms:instance>
 <xforms:submission id="getzip"
 method="text-XML-post"
 replace="instance"
 ref="instance('sensorInstance')"
 action="https://www.nicholaschase.com/sensors/getZipService.PHP"
 />
 <xforms:submission id="getweather"
 method="text-XML-post"
 replace="instance"
 ref="instance('weatherInstance')"
 action="https://services.xmethods.Net:80/soap/servlet/rpcrouter"
 />
 </xforms:model>
...
整體思路與前一段完全相同:建立一個形如 Web 服務請求的實例,依 submission 元素的定義把它送出去。差別只在於,這次得想辦法把第一次回傳的郵遞區號搬進第二個實例裡。所幸 setvalue 元素正是為此而生。
清單 4. 把兩次提交接起來
...
 <xforms:submission id="getweather"
 method="text-XML-post"
 replace="instance"
 ref="instance('weatherInstance')"
 action="https://services.xmethods.Net:80/soap/servlet/rpcrouter"
 />
 </xforms:model>
<xforms:switch id="switch1">
 <xforms:case id="requestGUI">
 <xforms:input ref="instance('sensorInstance')//sensorId">
 <xforms:label>Sensor ID: </xforms:label>
 <xforms:hint>Enter the ID for the sensor whose ambient
 temperature you want to check.</xforms:hint>
 </xforms:input>
 <xforms:trigger style="display:block">
 <xforms:label>Get sensor ambient temperature</xforms:label>
 <xforms:action ev:event="DOMactivate">
 <xforms:send submission="getzip" />

 <xforms:setvalue value="instance('sensorInstance')//return"
 ref="instance('weatherInstance')//zipcode"/>
 <xforms:send submission="getweather" />
 <xforms:toggle case="responseGUI" />
 </xforms:action>
 </xforms:trigger>
 </xforms:case>
 <xforms:case id="responseGUI">
 <xforms:output ref="instance('sensorInstance')//return">
 <xforms:label>Sensor zip code:</xforms:label>
 </xforms:output>
 <br />

 <xforms:output ref="instance('weatherInstance')//return">
 <xforms:label>Ambient sensor temperature:</xforms:label>
 </xforms:output>
 </xforms:case>
</xforms:switch>
</body>
</Html>
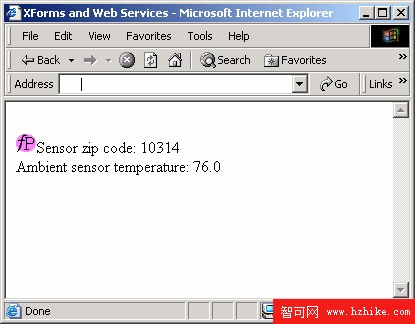
仔細看 trigger 裡的動作序列,其實只是把瀏覽器要執行的事情依序列出來:送出第一次提交後,sensorInstance 的 return 元素就裝著需要的郵遞區號;接著 setvalue 把這個值複製到 weatherInstance 的 zipcode,然後再送出第二次提交。最終畫面如下:
圖 3. 最終結果
結語
XForms 把「顯示資料」與「處理資料」這兩件事分開,因此特別適合在一次操作裡完成多重提交。整個模式可以概括成三步:為每個服務各建一個實例,每個實例都承載該服務所需的 SOAP 請求;使用者觸發事件(例如按下按鈕)時,在 action 中排列任意多個動作;最後依序提交各實例,並用 setvalue 在實例之間搬運資料。畫面永遠只有一份,複雜度全被收攏到模型裡。
- 上一篇文章: XForms 的實現方案總覽:瀏覽器、外掛與伺服器端
- 下一篇文章: 只送出實例的一部分:XForms 提交範圍的精準控制