利用CSS實現物件的垂直居中,方法五花八門,真正的難題在於如何挑對方法。以下整理了幾種實用做法,以及各自的優缺點,並示範如何打造一個居中的網站。
用CSS做垂直居中並不容易,有些方法還會在某些瀏覽器中失效。下面我們一起看看五種讓物件垂直居中的方法。
方法一
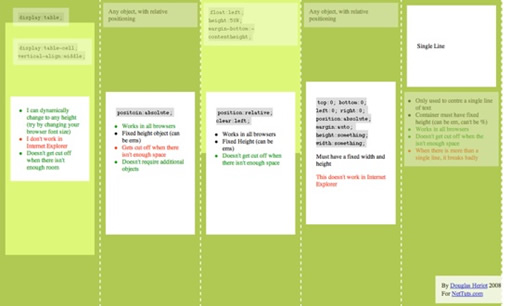
這個方法把一些div的顯示方式設為表格,如此一來就能借用表格的 vertical-align 屬性。
<div id="wrapper">
<div id="cell">
<div class="content">
Content goes here</div>
</div>
</div>
#wrapper {display:table;}
#cell {display:table-cell; vertical-align:middle;}
優點:content 可動態改變高度(無需在CSS中定義),當wrapper空間不足時,content 也不會被截斷。
缺點:Internet Explorer(連IE8 beta亦然)中無效,且需要較多嵌套標籤。
方法二
這個方法使用絕對定位的div,把 top 設為50%,再將 margin-top 設為負的content高度。這意味著物件必須在CSS中指定固定高度。因為高度固定,或許你想為content加上 overflow:auto,這樣內容過多時會出現捲軸,避免溢出。
<div class="content">
Content goes here</div>
#content {
position:absolute;
top:50%;
height:240px;
margin-top:-120px; /* negative half of the height */
}
優點:適用於所有瀏覽器,不需嵌套標籤。
缺點:空間不足時,content 會消失(類似div在body內,當用戶縮小窗口時捲軸不出現的情況)。
方法三
這種方法在content元素外插入一個div,將它設為 height:50%; margin-bottom:-contentheight;,再讓content清除浮動,即可顯示在中間。
<div id="floater">
<div id="content">
Content here</div>
</div>
#floater {float:left; height:50%; margin-bottom:-120px;}
#content {clear:both; height:240px; position:relative;}
優點:適用於所有瀏覽器;空間不足時(例如窗口縮小)content 不會被截斷,捲軸會出現。
缺點:唯一想到的是需要額外的空元素(其實也沒那麼糟)。
方法四
這個方法用一個 position:absolute、具固定寬高的div,將它設為 top:0; bottom:0;。但因為它有固定高度,其實無法上下間距皆為0,此時 margin:auto; 就會讓它居中。用 margin:auto 讓塊級元素垂直居中非常簡單。
<div id="content">
Content here</div>
#content {
position:absolute;
top:0;
bottom:0;
left:0;
right:0;
margin:auto;
height:240px;
width:70%;
}
優點:簡單。
缺點:IE(IE8 beta)中無效;空間不足時content會被截斷,且不會出現捲軸。
方法五
這個方法只能將單行文字置中,只要把 line-height 設為該物件的高度即可讓文字居中。
<div id="content">
Content here</div>
#content {height:100px; line-height:100px;}
優點:適用於所有瀏覽器,空間不足時不會被截斷。
缺點:僅對文字有效(塊狀元素無效),多行時斷詞較糟。
這個方法在小元素上非常實用,例如讓按鈕文字或單行文字居中。
該選哪個方法?
我最喜歡方法三,缺點不多。因為content會清除浮動,所以能在它上方放置其他元素,而且窗口縮放時,居中的content不會蓋住其他元素。
<div id="top">
<h1>Title</h1>
</div>
<div id="content">
Content Here</div>
#floater {float:left; height:50%; margin-bottom:-120px;}
#top {float:right; width:100%; text-align:center;}
#content {clear:both; height:240px; position:relative;}
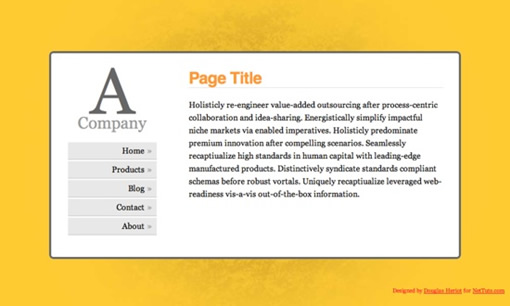
懂了原理,我們就來動手打造一個簡單又有趣的網站。
步驟一
以語意化標籤開始是很好的做法。頁面的構成如下:
#floater(把content置中)
#centered(centre盒)
#side
#logo
#nav(無序列表)
#content
#bottom(放置版權等)
以下是使用的XHTML代碼:
<div id="centered">
<div id="side">
<div id="logo">
<strong><span>A</span> Company</strong></div>
<ul id="nav">
<li><a href="#">Home</a></li>
<li><a href="#">Products</a></li>
<li><a href="#">Blog</a></li>
<li><a href="#">Contact</a></li>
<li><a href="#">About</a></li>
</ul>
</div>
<div id="content">
<h1>Page Title</h1>
...內容...
</div>
</div>
<div id="bottom">
Copyright notice goes here</div>
步驟二
接著用一些基本的CSS為頁面添加樣式,把以下代碼放進引入的 style.css:
html, body {
margin:0; padding:0;
height:100%;
}
body {
background:url('page_bg.jpg') 50% 50% no-repeat #FC3;
font-family:Georgia, Times, serif;
}
#floater {
position:relative; float:left;
height:50%; margin-bottom:-200px;
width:1px;
}
#centered {
position:relative; clear:left;
height:400px; width:80%; max-width:800px; min-width:400px;
margin:0 auto;
background:#fff;
border:4px solid #666;
}
#bottom {
position:absolute;
bottom:0; right:0;
}
#nav {
position:absolute; left:0; top:0; bottom:0; right:70%;
padding:20px; margin:10px;
}
#content {
position:absolute; left:30%; right:0; top:0; bottom:0;
overflow:auto; height:340px;
padding:20px; margin:10px;
}
在我們能讓content垂直居中之前,body 與 html 應被拉伸到100%高度。由於height包含在padding與margin之內,所以要把它們設為0,以免因微小的margin而出現捲軸。floater 的 margin-bottom 是content高度(400px)的一半,即-200px。
#centered 的寬度為80%,能讓網頁隨螢幕大小伸縮,這就是所謂的流體布局。設定 min-width 與 max-width 可避免網頁過大或過小,但IE不支援min/max-width,此時可用固定寬度替代。由於#centered是相對定位,在其內部我們可用絕對定位來安排元素;將#content設為 overflow:auto 可避免捲軸出現。IE不太喜歡 overflow:auto,除非指定固定高度(而非top/bottom定位或百分比),因此我們給了它明確高度。
步驟三
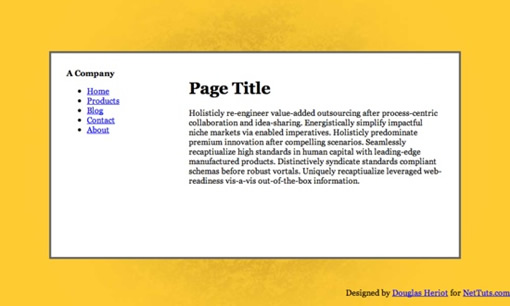
最後再添加點樣式,讓頁面更好看,從導覽目錄開始:
#nav ul {
list-style:none;
padding:0; margin:20px 0 0 0; text-indent:0;
}
#nav li {
padding:0; margin:3px;
}
#nav li a {
display:block; background-color:#e8e8e8;
padding:7px; margin:0;
text-decoration:none; color:#000;
border-bottom:1px solid #bbb;
text-align:right;
}
#nav li a::after {
content:'»'; color:#aaa; font-weight:bold;
display:inline; float:right;
margin:0 2px 0 5px;
}
#nav li a:hover, #nav li a:focus {
background:#f8f8f8;
border-bottom-color:#777;
}
#nav li a:hover::after {
margin:0 0 0 7px; color:#f93;
}
#nav li a:active {
padding:8px 7px 6px 7px;
}
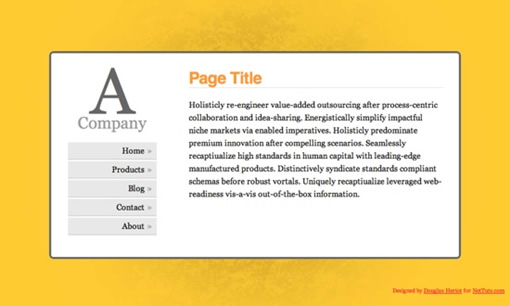
值得一提的是#centered的圓角。在CSS3中,應有 border-radius 屬性可設定圓角半徑,但當時主流瀏覽器多尚未支援,除非加上 -moz(Firefox)或 -webkit(Safari/Webkit)前綴。
相容性注意事項
如你所料,IE是唯一愛添麻煩的瀏覽器:
- #floater 必須指定寬度,否則在任何版本的IE中都會失效。
- IE 6 中目錄會被周圍過多的空間打斷。
- IE 8 會多出一些空間。
結語
水平居中很常用,其實垂直居中也很實用。日常最常派上用場的,應該是方法五這個小技巧吧。
- 上一篇文章: 初學者的CSS網頁布局入門指南
- 下一篇文章: CSS突然失效?問題出在網頁的第一行代碼