公司最近專案比較空,我就利用零碎時間把 HTML5 和 CSS3 好好研究了一輪。剛好那時公司要對舊專案做一波統一升級,主要工作是在既有版本裡加入一些頁面動畫,四人小組裡我很幸運也被選上。
第一次做動態效果就挑 CSS3,心裡其實挺雀躍的。雖然我對 CSS3 的理解還很粗淺,但憑著寫 JavaScript 和 jQuery 的底子,自認能勝任。接下來近兩個月都在跟 CSS3 動畫纏鬥,過程裡卡關不少,也厚著臉皮請教了很多同事。兩個月下来,我對 CSS 的認識確實深了一層。週末整理一下這段時間用到的知識,順手做了幾個小 demo。
本文的 canvas 部分並沒有進到專案裡,純粹是平日積累的練習筆記,寫得不到位的地方還請高手指正。
先看成品的樣子:
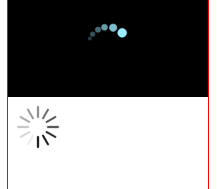
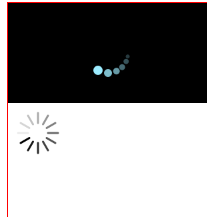
HTML 部分
頁面上放兩個 canvas,一個用函式呼叫啟動,一個用建構式啟動:
<head>
<meta charset="UTF-8">
<title>Canvas Loading 動畫</title>
<script type="text/Javascript" src="./loading.js"></script>
</head>
<body>
<div style="border:1px solid red; width:200px; height:400px; margin-left:10px; float:left;">
    <canvas id="loading1" style="width:200px; padding:0; margin:0; display:block;"></canvas>
    <canvas id="loading2" style="width:200px; padding:0; margin:0; display:block;"></canvas>
</div>
<script type="text/Javascript">
    loading1();
    new loading2({ "id": "loading2" });
</script>
</body>
JavaScript 部分
第一個版本用 setInterval 反覆重繪,靠三角函數把六個圓點均勻排在圓周上,再讓角度持續遞增製造旋轉;第二個版本則封裝成建構式,參數可自訂。
function loading1(){
    var canvas = document.getElementById("loading1"),
        ctx    = canvas.getContext("2d"),
        w = canvas.width, h = canvas.height,
        x = w / 2, y = h / 2,
        radius = 30;

    ctx.fillStyle = "#000";
    ctx.fillRect(0, 0, w, h);

    var r     = [3, 4, 4.5, 5, 6, 7];        // 六顆圓點的半徑
    var angle = [10, 25, 45, 65, 90, 120];   // 各自起始角度
    var alpha = [0.25, 0.35, 0.45, 0.65, 0.8, 1]; // 透明度,製造由淡到濃的漸層

    setInterval(function(){
        // 每一幀先把畫布清成黑底,避免殘影
        ctx.fillStyle = "#000";
        ctx.fillRect(0, 0, w, h);

        for (var i = 0; i < r.length; i++){
            if (angle[i] >= 360) angle[i] = 0;

            ctx.beginPath();
            ctx.fillStyle = "rgba(156,236,255," + alpha[i] + ")";

            // 把角度換成座標
            var x1 = x + radius * Math.cos(angle[i] * Math.PI / 180);
            var y1 = y + radius * Math.sin(angle[i] * Math.PI / 180);

            ctx.arc(x1, y1, r[i], 0, 2 * Math.PI, true);
            ctx.closePath();
            ctx.fill();

            angle[i] += 5;
        }
    }, 25);
}

function isEmpty(obj){
    for (var name in obj){ return false; }
    return true;
}

function loading2(arg){ this.init(arg); }

loading2.prototype = {
    constructor: loading2,

    init: function (arg) {
        var isConsist = !isEmpty(arg);
        this.block  = isConsist && arg.block  ? arg.block  : 12;  // 分成幾段
        this.height = isConsist && arg.height ? arg.height : 15;
        this.width  = isConsist && arg.width  ? arg.width  : 3;
        this.time   = isConsist && arg.time   ? arg.time   : 100; // 每幀間隔

        this.cvs = document.getElementById(arg.id);
        this.ctx = this.cvs.getContext("2d");
        this.cvs.width  = this.height * 6;
        this.cvs.height = this.height * 6;

        // 把原點搬到畫布中心,之後就能用 (0,0) 為圓心畫圖
        this.ctx.translate(this.cvs.width / 2, this.cvs.height / 2);

        this.view(2);
    },

    loop: function (alpha) {
        this.ctx.rotate(Math.PI * 2 / this.block);
        this.ctx.beginPath();
        this.ctx.fillStyle = "rgba(0,0,0," + alpha + ")";
        this.ctx.arc(0, this.ctx.width / 2 - this.height * 2, this.width / 2, 0, Math.PI, true);
        this.ctx.arc(0, this.ctx.width / 2 - this.height,     this.width / 2, Math.PI, 0, true);
        this.ctx.closePath();
        this.ctx.fill();
    },

    view: function (radius) {
        var that = this;
        this.ctx.rotate(Math.PI * 2 / this.block);

        for (var i = 1; i <= this.block; i++){
            this.loop(i / this.block);   // 透明度遞增,做出尾巴漸淡的質感
        }

        setTimeout(function(){
            that.ctx.clearRect(-that.cvs.width / 2, -that.cvs.height / 2, that.cvs.width, that.cvs.height);
            radius >= that.block ? radius = 1 : radius += 1;
            that.view(radius);
        }, that.time);
    }
};
整份程式裡我認為最難懂的就是 loop 裡那幾行,而它剛好也是 canvas 畫圖的核心。
用到的 Canvas API
取得 context。 canvas 呼叫 getContext("2d") 會回傳一個 context 物件,所有繪製、旋轉、變形、縮放的操作,全都是透過它完成。
尺寸。 canvas 的 width/height 預設是 300px,可以直接在元素上設定,也可以用 CSS 控制顯示尺寸。
畫矩形。
context.fillRect(x, y, width, height);
以座標 (x, y) 為左上角,填滿一個寬 width、高 height 的矩形;填之前可先用 context.fillStyle 指定填色樣式。
畫圓。
context.beginPath();   // 開始新路徑,或重置目前路徑
context.fillStyle = "#f00";  // 設定填色
context.arc(x, y, radius, startAngle, endAngle, flag);
context.closePath();
context.fill();        // 把目前路徑填滿
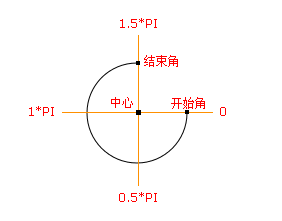
arc 的參數依次是圓心 x、圓心 y、半徑、起始弧度、結束弧度,最後的 flag 為布林值:true 逆時針、false 順時針。
旋轉。
context.rotate(angle);
rotate 用來旋轉目前的繪圖座標系,參數是弧度而非角度,所以像我在範例裡寫的 Math.PI * 2 / this.block,代表每次轉過「一圈除以段數」的角度。
平移原點。
context.translate(x, y);
把畫布的左上角重新映射到 (x, y),實務上最常用來把原點搬到正中央,之後就能用負值畫出對稱圖形。
兩個容易踩到的細節
- canvas 的弧度方向是逆時針為正,這和數學課本裡常見的順時針正方向剛好相反,寫三角函數換算時特別容易搞混。
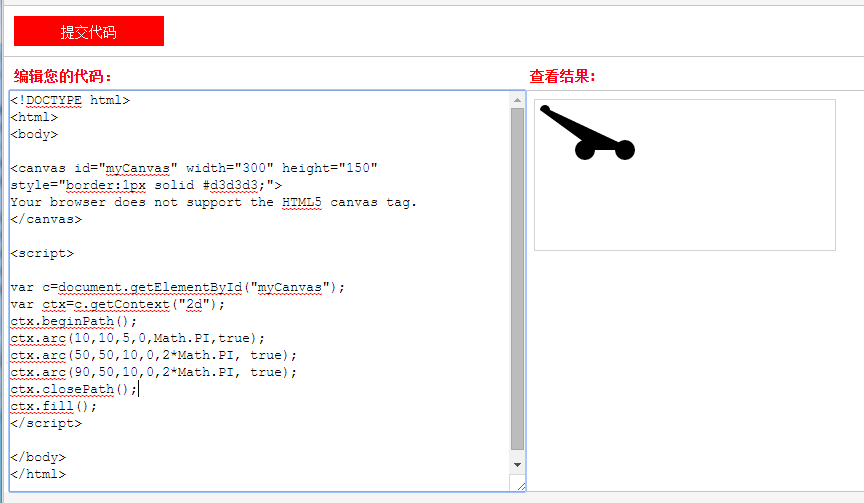
- 畫弧時,如果在同一組
beginPath()與closePath()之間連續畫多段圓弧,只要弧線沒有各自閉合,它們就會被自動連起來形成封閉區域。範例裡每一塊旋轉的扇形就是這樣拼出來的。
以上就是我在 canvas 畫 loading 動畫上的整理。若說得不清楚或有疏漏之處,歡迎大家一起討論。