彈出窗口、拖放、異步文件上傳等實用代碼大合集
編輯:關於JavaScript
好久沒寫技術文章了,今天整理一些日常工作中經常遇到的實用代碼,包括彈出窗口、拖放、異步文件上傳等,與大家一起學習交流。
一、彈出窗口
工作中經常會用到彈出窗口,有時還需要遮罩層。下面這類圓角彈出框應用廣泛,雖然用 CSS3 可以輕鬆實現,但考慮到瀏覽器兼容問題,這裡仍採用圖片方案。
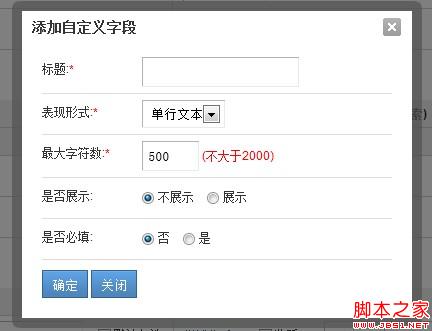
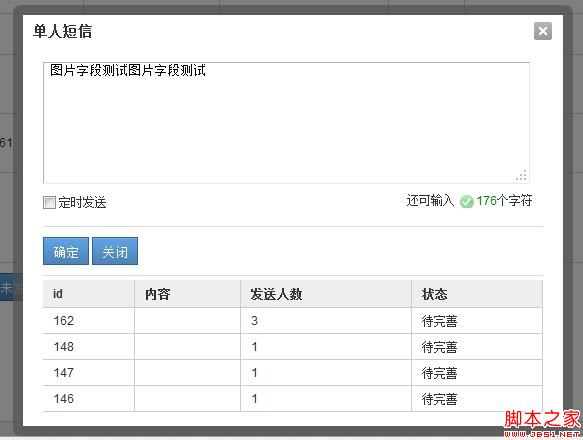
主要代碼如下:
// 彈出層居中
function popup(popupName) {
  var _scrollHeight = $(document).scrollTop(); // 當前窗口距頁面頂部高度
  _windowHeight = $(window).height();
  _windowWidth = $(window).width();
  _popupHeight = popupName.height();
  _popupWeight = popupName.width();
  _posiTop = _scrollHeight + 120;
  _posiLeft = (_windowWidth - _popupWeight) / 2;
  popupName.css({ "left": _posiLeft + "px", "top": _posiTop + "px", "display": "block" });
}

function dragFunc(dragDiv, dragBody) {
  if (dragDiv[0] && dragBody[0]) {
    var dragAble = false;
    var x1 = 0, y1 = 0, l = 0, t = 0;
    dragDiv.mousedown(function (e) {
      dragDiv.css("cursor", "move");
      dragAble = true;
      l = parseInt(dragBody.css("left"));
      t = parseInt(dragBody.css("top"));
      x1 = e.clientX - l;
      y1 = e.clientY - t;
      x1 = x1 > 0 ? x1 : 0;
      y1 = y1 > 0 ? y1 : 0;
      this.setCapture && this.setCapture();
    });
    dragDiv.mousemove(function (e) {
      if (!dragAble) return;
      var x2 = 0, y2 = 0;
      var top = $(document).scrollTop() ? $(document).scrollTop() - 15 : 0;
      var left = $(document).scrollLeft() ? $(document).scrollLeft() - 15 : 0;
      x2 = e.clientX - x1 + left;
      y2 = e.clientY - y1 + top;
      x2 = x2 > 0 ? x2 : 0;
      y2 = y2 > 0 ? y2 : 0;
      if (Math.abs(l - x2) > 10 || Math.abs(t - y2) > 10) {
        dragBody.css("left", x2 + "px");
        dragBody.css("top", y2 + "px");
      }
    });
    dragDiv.mouseup(function (event) {
      if (!dragAble) return;
      dragAble = false;
      this.releaseCapture && this.releaseCapture();
    });
  }
}
MyDialog 對象封裝了彈出框的顯示與關閉邏輯:
var MyDialog = function (cfg) {
  this.config = {
    id: (new Date()).getTime().toString(),
    el: null,
    bodyId: null,
    cover: true,
    boxHtm: '<div class="dialog"> ... </div>' // 圓角彈出框 HTML 結構
  };
  var scope = this;
  if (cfg) {
    $.each(cfg, function (key, value) { scope.config[key] = value; });
  }
  this.box = null;
  this.cover = null;
  this.tmpBody = null;
};
MyDialog.prototype.show = function () { /* 顯示遮罩與彈出框,居中,綁定關閉與拖動 */ };
MyDialog.prototype.close = function () { /* 還原內容、移除彈出框、隱藏遮罩 */ };
調用方式:
var dia = new MyDialog({
  title: title,
  bodyId: id,
  id: id + '_box'
});
dia.show();
如需回調等更複雜的功能,各位可以在基礎上自行封裝擴展。
二、拖放
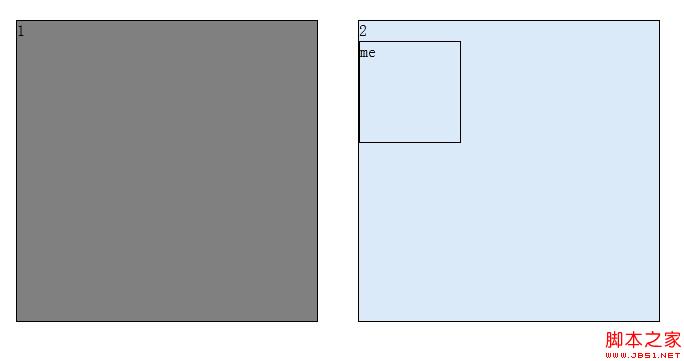
拖放效果在實際項目中也經常出現,比如下面把元素拖入不同容器:
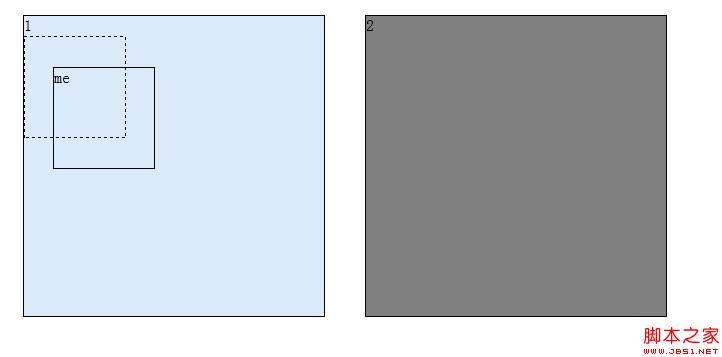
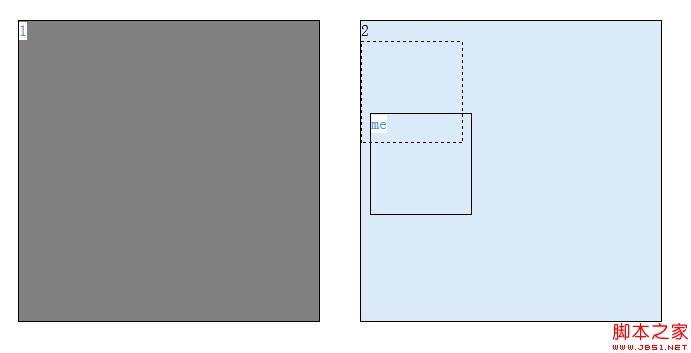
核心代碼如下:
<script type="text/javascript">
function dragFunc(dragDiv, dragBody, dropBody) {
  if (!dropBody[0]) { dropBody = $(document); }
  if (dragDiv[0] && dragBody[0]) {
    var dragAble = false;
    var x1 = 0, y1 = 0, l = 10, t = 10;
    var init_position = '', init_cursor = '', tmp_body = null;
    dragDiv.mousedown(function (e) {
      init_position = dragBody.css("position");
      init_cursor = dragBody.css("init_cursor");
      dragBody.css("position", "absolute");
      dragDiv.css("cursor", "move");
      tmp_body = $('<div class="tmp_div"></div>'); // 佔位元素
      tmp_body.css('width', dragBody.css('width'));
      tmp_body.css('height', dragBody.css('height'));
      tmp_body.insertAfter(dragBody);
      $(document).bind("selectstart", function () { return false; });
      dragAble = true;
      var offset = dragBody.offset();
      l = parseInt(offset.left);
      t = parseInt(offset.top);
      x1 = e.clientX - l;
      y1 = e.clientY - t;
      x1 = x1 > 0 ? x1 : 0;
      y1 = y1 > 0 ? y1 : 0;
      this.setCapture && this.setCapture();
    });
    dragDiv.mousemove(function (e) {
      if (!dragAble) return;
      var x2 = 0, y2 = 0;
      var top = $(document).scrollTop() ? $(document).scrollTop() - 15 : 0;
      var left = $(document).scrollLeft() ? $(document).scrollLeft() - 15 : 0;
      x2 = e.clientX - x1 + left;
      y2 = e.clientY - y1 + top;
      x2 = x2 > 0 ? x2 : 0;
      y2 = y2 > 0 ? y2 : 0;
      if (Math.abs(l - x2) > 10 || Math.abs(t - y2) > 10) {
        dragBody.css("left", x2 + "px");
        dragBody.css("top", y2 + "px");
      }
      // 拖放判斷:當元素完全進入目標容器時高亮並吸附
      var w = parseInt(dragBody.css('width'));
      var h = parseInt(dragBody.css('height'));
      $.each(dropBody, function () {
        var el = $(this);
        el.css('background-color', 'Gray');
        var offset = el.offset();
        var _l = offset.left || 0, _t = offset.top || 0;
        var _w = parseInt(el.css('width')), _h = parseInt(el.css('height'));
        if (x2 > _l && x2 + w < _l + _w && y2 > _t && y2 + h < _t + _h) {
          el.css('background-color', '#DBEAF9');
          el.append(tmp_body);
        }
      });
    });
    dragDiv.mouseup(function (event) {
      if (!dragAble) return;
      $(document).unbind("selectstart");
      dragBody.css("position", init_position);
      dragBody.css("cursor", init_cursor);
      if (tmp_body) {
        dragBody.insertAfter(tmp_body);
        var offset = tmp_body.offset();
        l = parseInt(offset.left);
        t = parseInt(offset.top);
        dragBody.css("left", l);
        dragBody.css("top", t);
        tmp_body.remove();
      }
      dragAble = false;
      this.releaseCapture && this.releaseCapture();
    });
  }
}
$(document).ready(function () {
  var d1 = $('#d1');
  var c = $('.c');
  dragFunc(d1, d1, c);
});
</script>
這裡的關鍵思路是:拖動時插入一個佔位元素 tmp_body 標記原始位置,拖動結束後讓被拖元素吸附到佔位處;同時通過實時判斷元素是否完全進入目標容器,動態改變背景色給出視覺反饋。
三、異步文件上傳
我們常說的 AJAX 異步文件上傳,其實純 JS 技術暫時還無法真正實現。這裡所說的「異步」,本質上仍是表單提交,只是把 form 的 target 指向一個隱藏的 iframe,提交完成後再通過回調獲取結果,做法略顯取巧。
<form id="formImg" name="formImg" enctype="multipart/form-data" method="post" action="">
<input type="hidden" name="MAX_FILE_SIZE" value="800000" id="max_size"/>
<input type="hidden" name="callback" value="parent.add_img_input" id="callback"/>
<a class="upbtn">
  <input type="file" name="userfile" id="userfile"
    title="支持 JPG、GIF、PNG 格式,文件小於 1M"
    onchange="javascript:up_img(17);">上傳
</a>
</form>

document.charset = 'utf-8';
var form = $('#formImg');
var frame = $('#frame_img');
if (!frame[0]) {
  frame = $('<iframe id="frame_img" name="frame_img" style="display:none;"></iframe>');
}
form.append(frame);
form.attr('target', 'frame_img');
form.attr('action', url);
form.submit();
document.charset = 'gbk';
需要注意的是,這種方式的回調會涉及跨域問題,要求 iframe 與主頁面處於同一大域名下才能正常獲取結果。若追求更好的體驗,則需要借助 Flash 或成熟的框架,這裡就不展開了。
- 上一篇文章: JavaScript 讓文本框獲得焦點並將光標定位到末尾
- 下一篇文章: JavaScript 實現返回頂部效果的兩種方法