Vue.js 入門(3):詳解元件間的溝通方式
編輯:關於JavaScript
5.2 元件通信
雖然子元件可以透過 this.$parent 摸到父元件,但應避免直接依賴父元件的資料,盡量用 props 顯式傳遞。在子元件中修改父元件狀態是很糟的做法,因為:一、會讓父子元件緊密耦合;二、只看父元件會搞不清楚狀態為何改變——它可能被任何子元件動過。理想狀態下,只有自己該改自己的狀態。
每個 Vue 實例都是一個事件觸發器:
$on():監聽事件。$emit():觸發事件(向上派送)。$dispatch():派發事件,沿父鏈冒泡。$broadcast():廣播事件,向下傳給所有後代。
5.2.1 監聽與觸發
父元件在使用子元件的位置直接用 v-on 監聽子元件觸發的事件:
<template id="child-template">
  <input v-model="msg" />
  <button v-on:click="notify">Dispatch Event</button>
</template>

<div id="events-example">
  <p>Messages: {{ messages | json }}</p>
  <child v-on:child-msg="handleIt"></child>
</div>

<script>
Vue.component('child', {
  template: '#child-template',
  data: function () { return { msg: 'hello' }; },
  methods: {
    notify: function () {
      if (this.msg.trim()) {
        this.$dispatch('child-msg', this.msg);
        this.msg = '';
      }
    }
  }
});

var parent = new Vue({
  el: '#events-example',
  data: { messages: [] },
  methods: {
    handleIt: function () { alert("a"); }
  }
});
</script>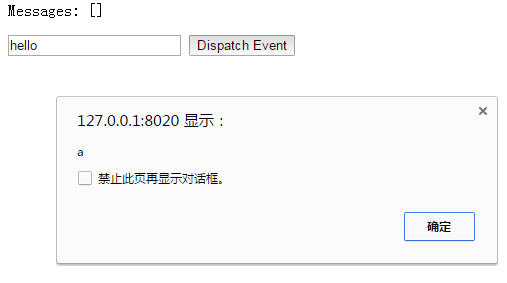
更常見的寫法是搭配 $emit,計數器範例:
<div id="counter-event-example">
  <p>{{ total }}</p>
  <button-counter v-on:increment="incrementTotal"></button-counter>
  <button-counter v-on:increment="incrementTotal"></button-counter>
</div>

<script>
Vue.component('button-counter', {
  template: '<button v-on:click="increment">{{ counter }}</button>',
  data: function () { return { counter: 0 }; },
  methods: {
    increment: function () {
      this.counter += 1;
      this.$emit('increment');   // 只發出「發生了什麼」,不管別人怎麼處理
    }
  }
});

new Vue({
  el: '#counter-event-example',
  data: { total: 0 },
  methods: {
    incrementTotal: function () { this.total += 1; }
  }
});
</script>

若想在某個元件的根元素上監聽原生事件,可以用 .native 修飾符:
<my-component v-on:click.native="doTheThing"></my-component>
5.2.2 派發事件:$dispatch()
子元件呼叫 $dispatch,事件沿父鏈冒泡,由父元件的 events 選項接收:
<div id="app">
  <p>Messages: {{ messages | json }}</p>
  <child-component></child-component>
</div>

<script>
Vue.component('child-component', {
  template: '#child-component',
  data: function () { return { msg: '' }; },
  methods: {
    notify: function () {
      if (this.msg.trim()) {
        this.$dispatch('child-msg', this.msg);
        this.msg = '';
      }
    }
  }
});

new Vue({
  el: '#app',
  data: { messages: [] },
  events: {
    'child-msg': function (msg) { this.messages.push(msg); }
  }
});
</script>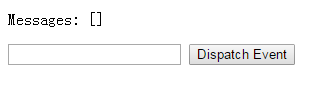
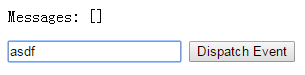
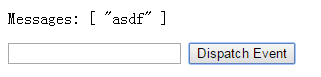
流程是:子元件綁定 click → notify 中呼叫 $dispatch 拋出 child-msg 並帶上 msg → 父元件 events 中的 child-msg 被觸發。
5.2.3 廣播事件:$broadcast()
方向相反:在父元件呼叫,向下廣播給子元件。
<div id="app">
  <input v-model="msg" />
  <button v-on:click="notify">Broadcast Event</button>
  <child-component></child-component>
</div>

<script>
Vue.component('child-component', {
  template: '#child-component',
  data: function () { return { messages: [] }; },
  events: {
    'parent-msg': function (msg) { this.messages.push(msg); }
  }
});

new Vue({
  el: '#app',
  data: { msg: '' },
  methods: {
    notify: function () {
      if (this.msg.trim()) { this.$broadcast('parent-msg', this.msg); }
    }
  }
});
</script>
5.2.4 父子元件互相訪問
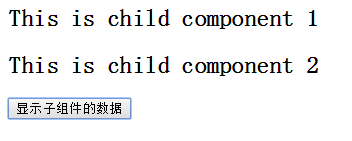
父元件取子元件用 $children 或 $refs;子元件取父元件用 $parent;取根實例用 $root。
Vue.component('parent-component', {
  template: '#parent-component',
  components: {
    'child-component1': {
      template: '#child-component1',
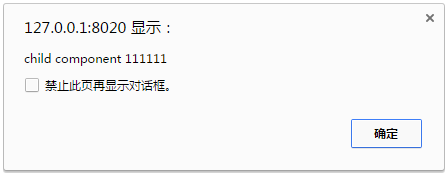
      data: function () { return { msg: 'child component 111111' }; }
    },
    'child-component2': {
      template: '#child-component2',
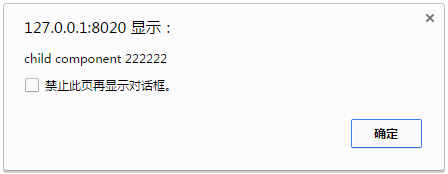
      data: function () { return { msg: 'child component 222222' }; }
    }
  },
  methods: {
    showChildComponentData: function () {
      // $children 沒有索引語意,只能按順序取
      for (var i = 0; i < this.$children.length; i++) {
        alert(this.$children[i].msg);
      }
    }
  }
});
更推薦 v-ref,因為它給子元件取了名字,不受 DOM 順序影響:
<child-component1 v-ref:cc1></child-component1>
<child-component2 v-ref:cc2></child-component2>
showChildComponentData: function () {
  alert(this.$refs.cc1.msg);
  alert(this.$refs.cc2.msg);
}
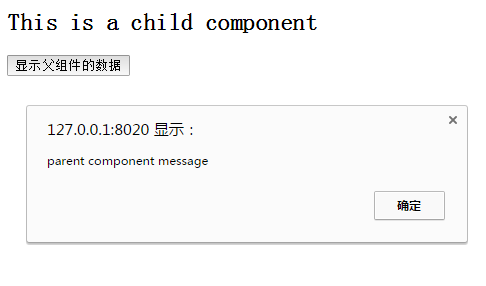
子元件取父元件資料:
showParentComponentData: function () {
  alert(this.$parent.msg);
}
如開篇所述,不建议在子元件裡改父元件狀態。
5.2.5 非父子元件通信
沒有親子關係時,簡單場景可以用一個空 Vue 實例當中央事件總線:
var bus = new Vue();

// 元件 A 觸發
bus.$emit('id-selected', 1);

// 元件 B 在自己的建立鉤子中監聽
bus.$on('id-selected', function (id) {
  // ...
});
記得在元件銷毀時用 bus.$off() 移除監聽,否則重複建立元件會累積多份回呼。若情境更複雜,就該考慮引入專門的狀態管理模式(如 Vuex)。