Canvas 畫布中擦除指定方塊區域的 clearRect 用法
編輯:關於JavaScript
Canvas 不只是「往上畫」,也能「往下擦」。clearRect(x, y, width, height) 會把指定矩形範圍內的像素清成透明,這是做動畫、做橡皮擦、做局部重繪時的基礎工具。本文用一個半透明方塊被逐步挖空的例子來示範。
執行結果如下:
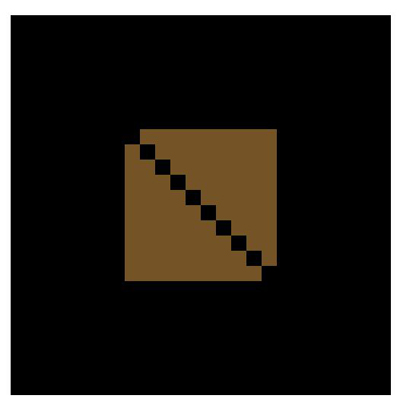
圖中那些黑色小方塊,就是被擦掉後透出的畫布底色。
index.html
先畫一個 200×200、透明度 0.5 的隨機色方塊,接著用迴圈沿著對角線連續清掉 10 個 20×20 的小格,於是會出現一列斜斜的鋸齒缺口。
<!DOCTYPE html> <html> <head> <meta http-equiv="Content-type" content="text/html;charset=UTF-8" /> <title>canvas中刪除一塊區域</title> <style type="text/css"> #canvas { background:black; margin-top:100px; margin-left:200px; } </style> </head> <body> <canvas id="canvas" width="500px" height="500px" ></canvas> </body> <script type="text/javascript" src="canvas.js"></script> <script type="text/javascript"> cache = {}; var offsetX = 50, offsetY = 20; cache.context = dyl.createContext('canvas'); dyl.rect(dyl.createColor(), 150, 150, 200, 200, 0.5); for(var i=0; i<10; i++) { dyl.clearRect(150 + i*20, 150 + i*20, 20, 20); } </script> </html>
canvas.js
工具函式與前幾篇相同,這裡重點看 clearRect 的封装:它只是把 context 的 clearRect 轉一手,並加上 context 存在性檢查。
(function() { var dyl = {cache: {}}; dyl.setContext = function(context) { dyl.cache._context = context; return context; }; dyl.getDom = function(id) { return document.getElementById(id); }; dyl._getContext = function() { return dyl.cache._context; }; dyl.save = function() { var context = dyl._getContext(); context ? context.save() : void(0); }; dyl.restore = function() { var context = dyl._getContext(); context ? context.restore() : void(0); }; dyl.createContext = function(canvasID) { var canvas = this.getDom(canvasID); if(!canvas) { return null; } return dyl.setContext(canvas.getContext("2d")); }; dyl.createColor = function() { var color = "rgb("; color += Math.round(Math.random()*255); color += ","; color += Math.round(Math.random()*255); color += ","; color += Math.round(Math.random()*255); color += ")"; return color; }; dyl.addImg = function(img, x, y) { var context = dyl._getContext(); if(!img || !context) { return; } if(typeof img === "string") { var oImg = new Image(); oImg.src = img; oImg.onload = function() { context.drawImage(oImg, x, y); } return; } context.drawImage(img, x, y); }; dyl.rect = function(color, x, y, width, height, alpha) { var context = dyl._getContext(); if(!context) { return; } context.save(); context.fillStyle = color; context.globalAlpha = alpha ? alpha : 1; context.fillRect(x, y, width, height); context.restore(); }; dyl.circle = function(color, x, y, r, alpha) { var context = dyl._getContext(); context.save(); context.fillStyle = color; context.beginPath(); context.globalAlpha = alpha ? alpha : 1; context.arc(x, y, r, 0, 2*Math.PI); context.fill(); context.stroke(); }; dyl.clearRect = function(x, y, width, height) { var context = dyl._getContext(); if(!context) { return; } context.clearRect(x, y, width, height); }; dyl.scale = function(x, y) { var context = dyl._getContext(); if(!context) { return; } x = x ? x : 1; y = y ? y : 1; context.scale(x, y); }; if(!window.dyl) { window.dyl = dyl; } })();
要特別分清 clearRect 與 fillRect 的差別:前者清成透明(會透出 canvas 這個元素本身的背景,本例中是 CSS 設定的黑色),後者是用指定顏色覆蓋。因此如果以 canvas 是否透明要輸出成 PNG,clearRect 挖出來的地方會是真正的透明。這在做「按鈕按下後方塊消失」或「刮刮樂」效果時特別有用。