背景
在移動應用開發中,繪製二維圖形與動畫幾乎是必然需求。但 Android 與 iOS 各自有一套繪圖 API,若能用一套更通用的技術方案,就更便於實現雙平台代碼相容。
art 是一個以跨瀏覽器相容為目標的 Node 風格 CommonJS 模組。在此基礎上,Facebook 開發了 React-art,把 art 封裝成可被 react.js 使用的形式,等同於在前端提供了一套 SVG 能力。不過考量到 JSX 語法本身已支援直接插入 SVG 標籤,加上 HTML canvas 的存在,react-art 在前端並非不可替代。
但在移動端,由於跨平台需求加上既有 Web 端技術積累,react-art 就成了一個現成的繪圖方案。React Native 分別在 0.10.0 與 0.18.0 版本加入了 iOS 與 Android 平台對 react-art 的支援。
示例代碼
React.js 與 React Native 的差别只在 ART 的取得方式,除此之外同一份程式碼就能同時跑在 Web 與移動端。react-art 官方範例 Vector-Widget 額外實現了旋轉,以及滑鼠點擊事件觸發的旋轉加速回應。Web 端可以看到點擊加速效果,移動端則無效,原因是 React Native 並未處理 Group 上的 onMouseDown 與 onMouseUp 屬性。本文著重於靜態 SVG 的實現,動畫部分暫且略過。
ART 是什麼
ART 在 React Native 中是個很重要的庫,讓炫酷的繪圖與動畫成為可能。需要注意的是:Android 預設已包含 ART 庫,iOS 則需要手動添加依賴。
iOS 添加依賴庫
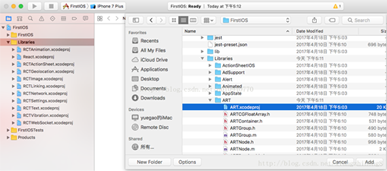
1、用 Xcode 打開 React Native 的 iOS 專案,選中 Libraries 目錄 → 右鍵選擇「Add Files to 專案名稱」→ 找到並添加 node_modules/react-native/Libraries/ART/ART.xcodeproj。
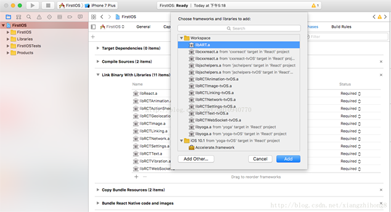
2、選中專案根目錄 → 點擊「Build Phases」→ 點擊「Link Binary With Libraries」→ 點擊左下方「+」→ 選中 libART.a 添加。
基礎組件
ART 共暴露 7 個組件,本文介紹常用的四個:
- Surface — 一個矩形可渲染區域,是其他元素的容器
- Group — 可容納多個形狀、文字與其他 Group 的分組容器
- Shape — 形狀定義,可填充
- Text — 文字形狀定義
常用屬性
Surface
width:渲染區域的寬height:渲染區域的高
Shape
d:定義繪製路徑stroke:描邊顏色strokeWidth:描邊寬度strokeDash:定義虛線fill:填充顏色
Text
font:字體樣式,定義字體、大小、是否加粗,如bold 35px Heiti SC
Path
moveTo(x, y):移動到座標 (x, y)lineTo(x, y):連線到 (x, y)arc():繪製弧線close():封閉路徑
繪製直線
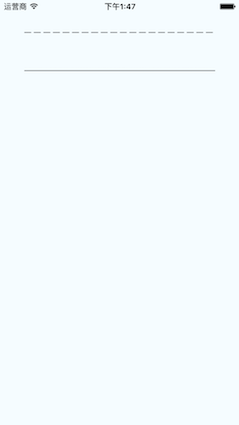
import React from 'react'
import { View, ART } from 'react-native'

export default class Line extends React.Component {
  render() {
    const path = ART.Path();
    path.moveTo(1, 1);    // 將起始點移動到 (1,1),默認 (0,0)
    path.lineTo(300, 1);  // 連線到目標點 (300,1)

    return (
      <View style={this.props.style}>
        <ART.Surface width={300} height={2}>
          <ART.Shape d={path} stroke="#000000" strokeWidth={1} />
        </ART.Surface>
      </View>
    )
  }
}
繪製虛線
關鍵是理解 strokeDash 的參數規則:
· [10, 5]:繪製 10px 實線,再繪製 5px 空白,如此循環;
· [10, 5, 20, 5]:10px 實線 → 5px 空白 → 20px 實線 → 5px 空白。
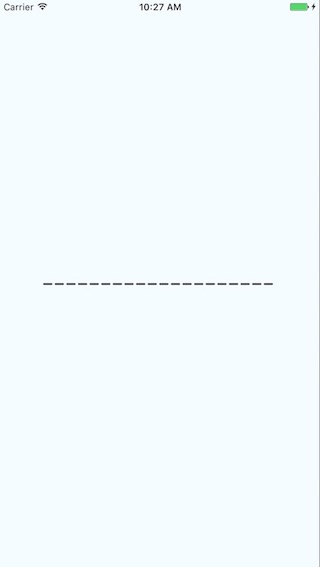
import React from 'react'
import { View, ART } from 'react-native'

const { Surface, Shape, Path } = ART;

export default class DashLine extends React.Component {
  render() {
    const path = Path()
      .moveTo(1, 1)
      .lineTo(300, 1);

    return (
      <View style={this.props.style}>
        <Surface width={300} height={2}>
          <Shape d={path} stroke="#000000" strokeWidth={2} strokeDash={[10, 5]} />
        </Surface>
      </View>
    )
  }
}
繪製矩形
先用 lineTo 畫出三條邊,再用 close() 補上第四條,最後用 fill 填色。
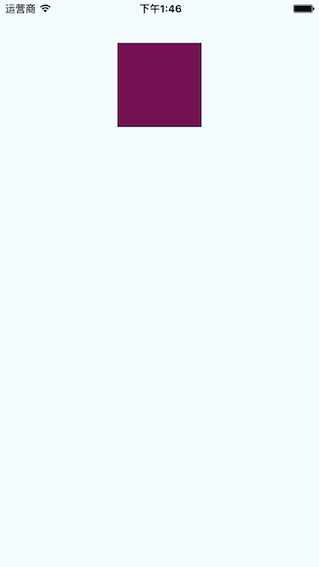
import React from 'react'
import { View, ART } from 'react-native'

const { Surface, Shape, Path } = ART;

export default class Rect extends React.Component {
  render() {
    const path = new Path()
      .moveTo(1, 1)
      .lineTo(1, 99)
      .lineTo(99, 99)
      .lineTo(99, 1)
      .close();

    return (
      <View style={this.props.style}>
        <Surface width={100} height={100}>
          <Shape d={path} stroke="#000000" fill="#892265" strokeWidth={1} />
        </Surface>
      </View>
    )
  }
}
繪圓
關鍵是 arc(x, y, radius) 的用法:傳入的 x、y 是終點相對於起點的相對距離。
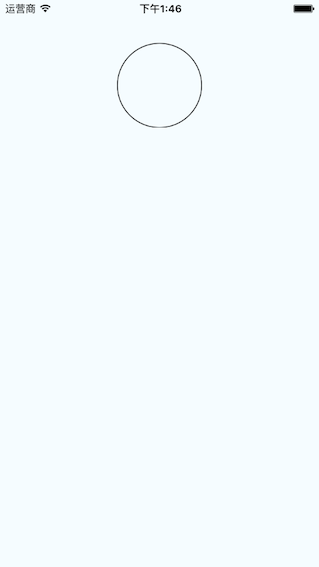
import React from 'react'
import { View, ART } from 'react-native'

const { Surface, Shape, Path } = ART;

export default class Circle extends React.Component {
  render() {
    const path = new Path()
      .moveTo(50, 1)
      .arc(0, 99, 25)
      .arc(0, -99, 25)
      .close();

    return (
      <View style={this.props.style}>
        <Surface width={100} height={100}>
          <Shape d={path} stroke="#000000" strokeWidth={1} />
        </Surface>
      </View>
    )
  }
}
繪製文字
屬性名為 font,規則是「粗細 字號 字體」。
注意:字體應該要支援 path 屬性,這是已知的 bug 而非功能不生效。Android 透過修改源碼可以解决,iOS 部分未查閱源碼。
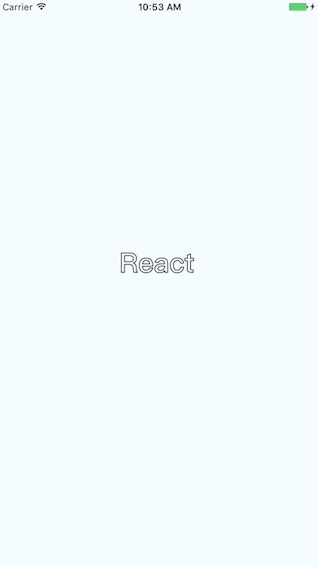
import React, { Component } from 'react';
import { AppRegistry, StyleSheet, ART, View } from 'react-native';

const { Surface, Text, Path } = ART;

export default class ArtTextView extends Component {
  render() {
    return (
      <View style={styles.container}>
        <Surface width={100} height={100}>
          <Text
            strokeWidth={1}
            stroke="#000"
            font="bold 35px Heiti SC"
            path={new Path().moveTo(40, 40).lineTo(99, 10)}
          >React</Text>
        </Surface>
      </View>
    );
  }
}

const styles = StyleSheet.create({
  container: {
    flex: 1,
    justifyContent: 'center',
    alignItems: 'center',
    backgroundColor: '#F5FCFF',
  },
});
繪製扇形
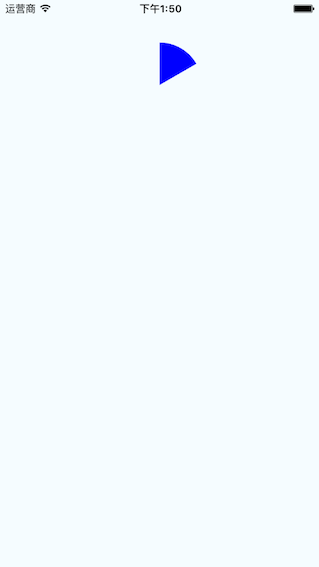
這裡同樣需要使用 arc 來繪製路徑。以下是一個可複用的 Wedge 組件:
import React, { Component, PropTypes } from 'react';
import { ART } from 'react-native';

const { Shape, Path } = ART;

/**
 * Wedge 是一個用於繪製圓形、扇形與弧線的 React 組件。
 * 與其他 ReactART 組件相同,必須使用在 <Surface> 之內。
 */
export default class Wedge extends Component {
  static propTypes = {
    outerRadius: PropTypes.number.isRequired,
    startAngle: PropTypes.number.isRequired,
    endAngle: PropTypes.number.isRequired,
    originX: PropTypes.number.isRequired,
    originY: PropTypes.number.isRequired,
    innerRadius: PropTypes.number,
  };

  constructor(props) {
    super(props);
    this.circleRadians = Math.PI * 2;
    this.radiansPerDegree = Math.PI / 180;
    this._degreesToRadians = this._degreesToRadians.bind(this);
  }

  /**
   * 將角度轉為弧度
   */
  _degreesToRadians(degrees) {
    if (degrees !== 0 && degrees % 360 === 0) {
      // 360, 720 等整數圈
      return this.circleRadians;
    }
    return degrees * this.radiansPerDegree % this.circleRadians;
  }

  /**
   * 建立完整圓形的 Path
   * @param {number} or 外半徑
   * @param {number} ir 內半徑,大於零時形成環形
   */
  _createCirclePath(or, ir) {
    const path = new Path();
    path.moveTo(0, or)
      .arc(or * 2, 0, or)
      .arc(-or * 2, 0, or);

    if (ir) {
      path.moveTo(or - ir, 0)
        .counterArc(ir * 2, 0, ir)
        .counterArc(-ir * 2, 0, ir);
    }
    path.close();
    return path;
  }

  /**
   * 建立扇形或弧線的 Path
   * @param {number} startAngle 起始角度,相對 12 點方向
   * @param {number} endAngle 結束角度,相對 12 點方向
   * @param {number} or 外半徑(px)
   * @param {number} ir 內半徑(px),大於零時為弧線
   */
  _createArcPath(originX, originY, startAngle, endAngle, or, ir) {
    const path = new Path();

    const sa = this._degreesToRadians(startAngle);
    const ea = this._degreesToRadians(endAngle);

    // 圓心角(弧度)
    const ca = sa > ea ? this.circleRadians - sa + ea : ea - sa;

    // 預先算好的正弦、餘弦值
    const ss = Math.sin(sa);
    const es = Math.sin(ea);
    const sc = Math.cos(sa);
    const ec = Math.cos(ea);

    // 差值
    const ds = es - ss;
    const dc = ec - sc;
    const dr = ir - or;

    // 若角度超過 pi(180 度),需告知繪製方法
    const large = ca > Math.PI;

    // 圓上某角度的座標公式(圓心在 0,0):
    //   x = radius * Math.sin(radians)
    //   y = radius * Math.cos(radians)
    // 起點使用外半徑做偏移,因為原點在左上角,
    // 等同於在第四象限(x 為正、y 為負)作畫。
    // path.arc / path.counterArc 的參數為:
    //   (endX, endY, radiusX, radiusY, largeAngle)
    path.moveTo(or + or * ss, or - or * sc)
      .arc(or * ds, or * -dc, or, or, large)   // 外弧
      .line(dr * es, dr * -ec);                // 扇形寬度

    if (ir) {
      path.counterArc(ir * -ds, ir * dc, ir, ir, large); // 內弧
    }
    return path;
  }

  render() {
    // 角度以「度」傳入
    const startAngle = this.props.startAngle;
    const endAngle = this.props.endAngle;

    // 半徑以 px 傳入
    const innerRadius = this.props.innerRadius || 0;
    const outerRadius = this.props.outerRadius;
    const { originX, originY } = this.props;

    // 排序半徑,確保大小關係正確
    const ir = Math.min(innerRadius, outerRadius);
    const or = Math.max(innerRadius, outerRadius);

    let path;
    if (endAngle >= startAngle + 360) {
      path = this._createCirclePath(or, ir);
    } else {
      path = this._createArcPath(originX, originY, startAngle, endAngle, or, ir);
    }

    return <Shape {...this.props} d={path} />;
  }
}
使用方式:
import React from 'react'
import { View, ART } from 'react-native'

const { Surface } = ART;
import Wedge from './Wedge'

export default class Fan extends React.Component {
  render() {
    return (
      <View style={this.props.style}>
        <Surface width={100} height={100}>
          <Wedge
            outerRadius={50}
            startAngle={0}
            endAngle={60}
            originX={50}
            originY={50}
            fill="blue"
          />
        </Surface>
      </View>
    )
  }
}
綜合示例:點擊爆炸的心臟動畫
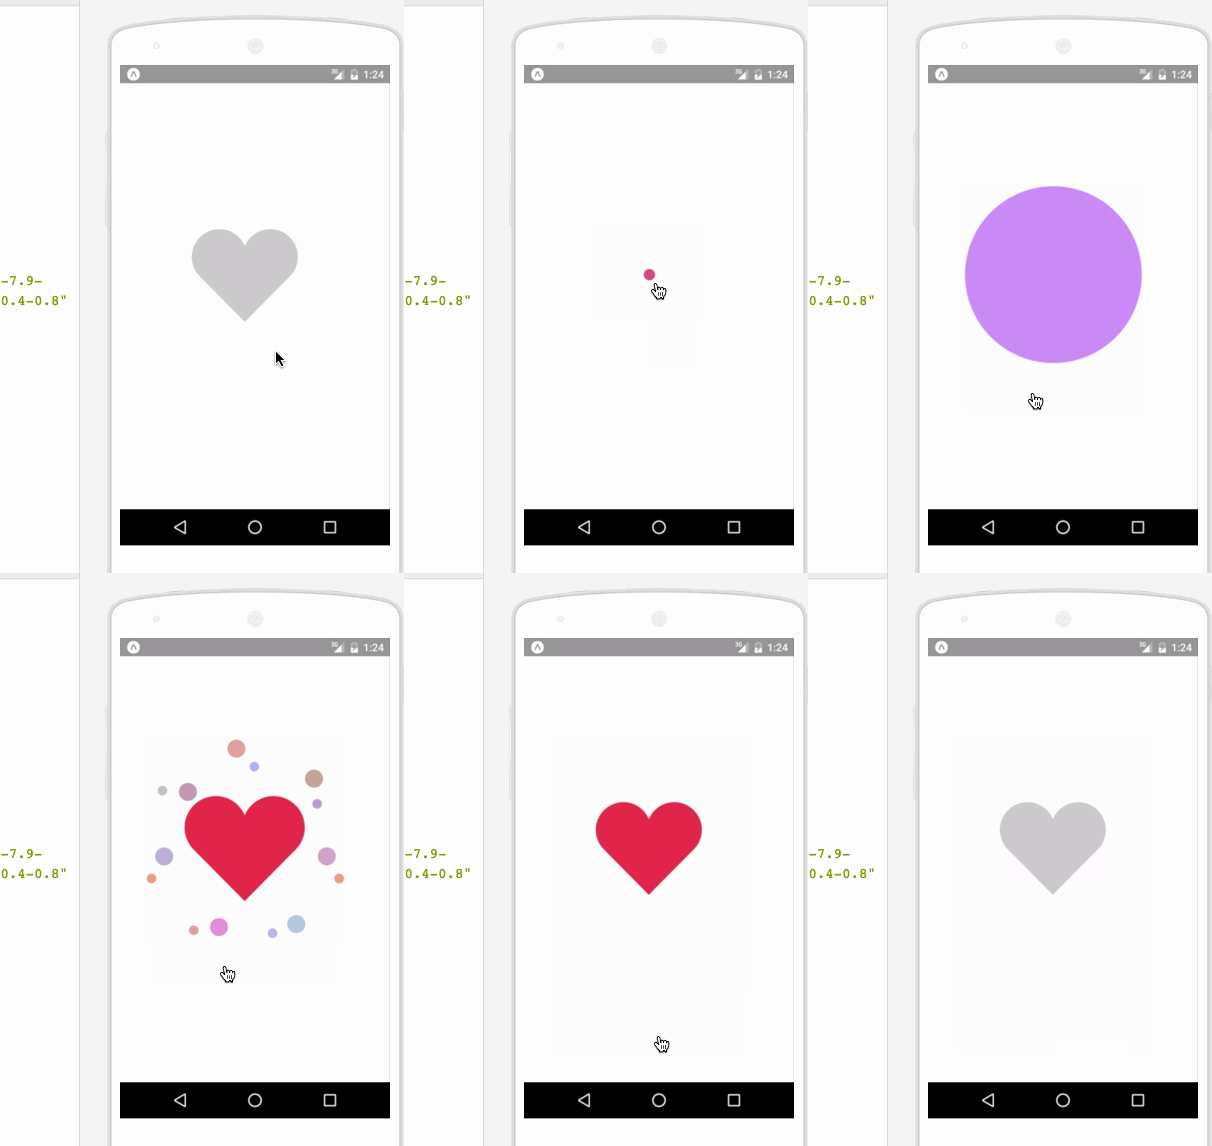
把 Path、Group、Animated 與 Wedge 組合起來,就能做出相當複雜的動畫效果:
import React, { Component } from 'react';
import {
  ART as Art,
  StyleSheet,
  View,
  Dimensions,
  TouchableWithoutFeedback,
  Animated
} from 'react-native';

var HEART_SVG = "M130.4-0.8c25.4 0 46 20.6 46 46.1 0 13.1-5.5 24.9-14.2 33.3L88 153.6 12.5 77.3c-7.9-8.3-12.8-19.6-12.8-31.9 0-25.5 20.6-46.1 46-46.2 19.1 0 35.5 11.7 42.4 28.4C94.9 11 111.3-0.8 130.4-0.8";
var HEART_COLOR = 'rgb(226,38,77,1)';
var GRAY_HEART_COLOR = "rgb(204,204,204,1)";

var FILL_COLORS = [
  'rgba(221,70,136,1)',
  'rgba(212,106,191,1)',
  'rgba(204,142,245,1)',
  'rgba(204,142,245,1)',
  'rgba(204,142,245,1)',
  'rgba(0,0,0,0)'
];

var PARTICLE_COLORS = [
  'rgb(158, 202, 250)',
  'rgb(161, 235, 206)',
  'rgb(208, 148, 246)',
  'rgb(244, 141, 166)',
  'rgb(234, 171, 104)',
  'rgb(170, 163, 186)'
];

getXYParticle = (total, i, radius) => {
  var angle = ((2 * Math.PI) / total) * i;
  var x = Math.round((radius * 2) * Math.cos(angle - (Math.PI / 2)));
  var y = Math.round((radius * 2) * Math.sin(angle - (Math.PI / 2)));
  return { x: x, y: y };
}

getRandomInt = (min, max) => {
  return Math.floor(Math.random() * (max - min)) + min;
}

shuffleArray = (array) => {
  for (var i = array.length - 1; i > 0; i--) {
    var j = Math.floor(Math.random() * (i + 1));
    var temp = array[i];
    array[i] = array[j];
    array[j] = temp;
  }
  return array;
}

var { Surface, Group, Shape, Path } = Art;

// 用 Animated.createAnimatedComponent 把 Shape 變成可動畫的組件
var AnimatedShape = Animated.createAnimatedComponent(Shape);

var { width: deviceWidth, height: deviceHeight } = Dimensions.get('window');

export default class ArtAnimView extends Component {
  constructor(props) {
    super(props);
    this.state = {
      animation: new Animated.Value(0)
    };
  }

  explode = () => {
    Animated.timing(this.state.animation, {
      duration: 1500,
      toValue: 28
    }).start(() => {
      this.state.animation.setValue(0);
      this.forceUpdate();
    });
  }

  getSmallExplosions = (radius, offset) => {
    return [0, 1, 2, 3, 4, 5, 6].map((v, i, t) => {
      var scaleOut = this.state.animation.interpolate({
        inputRange: [0, 5.99, 6, 13.99, 14, 21],
        outputRange: [0, 0, 1, 1, 1, 0],
        extrapolate: 'clamp'
      });
      var moveUp = this.state.animation.interpolate({
        inputRange: [0, 5.99, 14],
        outputRange: [0, 0, -15],
        extrapolate: 'clamp'
      });
      var moveDown = this.state.animation.interpolate({
        inputRange: [0, 5.99, 14],
        outputRange: [0, 0, 15],
        extrapolate: 'clamp'
      });
      var color_top_particle = this.state.animation.interpolate({
        inputRange: [6, 8, 10, 12, 17, 21],
        outputRange: shuffleArray(PARTICLE_COLORS)
      });
      var color_bottom_particle = this.state.animation.interpolate({
        inputRange: [6, 8, 10, 12, 17, 21],
        outputRange: shuffleArray(PARTICLE_COLORS)
      });
      var position = getXYParticle(7, i, radius);

      return (
        <Group
          x={position.x + offset.x}
          y={position.y + offset.y}
          rotation={getRandomInt(0, 40) * i}
        >
          <AnimatedCircle x={moveUp} y={moveUp} radius={15} scale={scaleOut} fill={color_top_particle} />
          <AnimatedCircle x={moveDown} y={moveDown} radius={8} scale={scaleOut} fill={color_bottom_particle} />
        </Group>
      )
    }, this)
  }

  render() {
    var heart_scale = this.state.animation.interpolate({
      inputRange: [0, .01, 6, 10, 12, 18, 28],
      outputRange: [1, 0, .1, 1, 1.2, 1, 1],
      extrapolate: 'clamp'
    });
    var heart_fill = this.state.animation.interpolate({
      inputRange: [0, 2],
      outputRange: [GRAY_HEART_COLOR, HEART_COLOR],
      extrapolate: 'clamp'
    });
    var heart_x = heart_scale.interpolate({
      inputRange: [0, 1],
      outputRange: [90, 0],
    });
    var heart_y = heart_scale.interpolate({
      inputRange: [0, 1],
      outputRange: [75, 0],
    });
    var circle_scale = this.state.animation.interpolate({
      inputRange: [0, 1, 4],
      outputRange: [0, .3, 1],
      extrapolate: 'clamp'
    });
    var circle_stroke_width = this.state.animation.interpolate({
      inputRange: [0, 5.99, 6, 7, 10],
      outputRange: [0, 0, 15, 8, 0],
      extrapolate: 'clamp'
    });
    var circle_fill_colors = this.state.animation.interpolate({
      inputRange: [1, 2, 3, 4, 4.99, 5],
      outputRange: FILL_COLORS,
      extrapolate: 'clamp'
    });
    var circle_opacity = this.state.animation.interpolate({
      inputRange: [1, 9.99, 10],
      outputRange: [1, 1, 0],
      extrapolate: 'clamp'
    });

    return (
      <View style={styles.container}>
        <TouchableWithoutFeedback onPress={this.explode} style={styles.container}>
          <View style={{ transform: [{ scale: .8 }] }}>
            <Surface width={deviceWidth} height={deviceHeight}>
              <Group x={75} y={200}>
                <AnimatedShape
                  d={HEART_SVG}
                  x={heart_x}
                  y={heart_y}
                  scale={heart_scale}
                  fill={heart_fill}
                />
                <AnimatedCircle
                  x={89}
                  y={75}
                  radius={150}
                  scale={circle_scale}
                  strokeWidth={circle_stroke_width}
                  stroke={FILL_COLORS[2]}
                  fill={circle_fill_colors}
                  opacity={circle_opacity}
                />
                {this.getSmallExplosions(75, { x: 89, y: 75 })}
              </Group>
            </Surface>
          </View>
        </TouchableWithoutFeedback>
      </View>
    );
  }
};

class AnimatedCircle extends Component {
  render() {
    var radius = this.props.radius;
    var path = Path()
      .moveTo(0, -radius)
      .arc(0, radius * 2, radius)
      .arc(0, radius * -2, radius)
      .close();

    return React.createElement(AnimatedShape);
  }
}

var styles = StyleSheet.create({
  container: {
    flex: 1,
  }
});
整體來說,ART 的繪圖模型可以概括為:Path 描述形狀 → Shape 上色描邊 → Group 做座標與變換 → Surface 提供渲染畫布,再搭配 Animated 就能做出複雜的動態效果。