「新增一筆資料、刪除某一列」是所有後台表單的共同需求。用 jQuery 來做,核心其實只有兩個動作:用字串拼出一整列 <tr> 塞進表格,以及找到目標列把它移除。
成品預覽
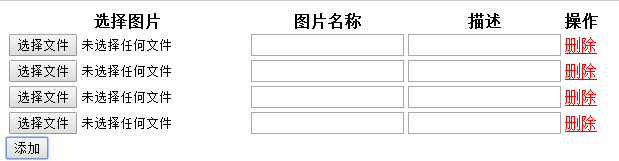
下面這個範例不做任何美化,只專注在功能:點「添加」多一列輸入欄,點該列的「刪除」就移除那一列。

點擊添加後:
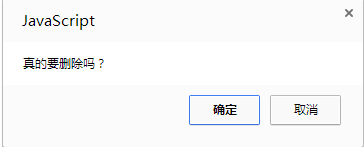
點擊刪除後,該列消失:
完整程式碼
<html>
<head>
<meta http-equiv="Content-Type" content="text/html; charset=utf-8" />
<!-- 這裡引用 CDN 上的 jQuery,也可以換成本地檔案 -->
<script src="https://apps.bdimg.com/libs/jquery/1.6.4/jquery.js" type="text/javascript"></script>
</head>
<body>
<table id="allDatas">
  <tr>
    <th>選擇圖片</th>
    <th>圖片名稱</th>
    <th>描述</th>
    <th>操作</th>
  </tr>
  <tr>
    <td><input type="file" name="imageFile1"/></td>
    <td><input name="imageName"></input></td>
    <td><input name="note" /></td>
    <td><a href="javascript:;" onclick="deleteCurrentRow(this);"><font color='red'>刪除</font></a></td>
  </tr>
</table>

<button onclick="javascript:addCurrentRow();">添加</button>

<script>
// 新增一列:把拼好的 tr 字串插到最後一列之後
function addCurrentRow() {
    var trcomp =
      "<tr>" +
      "<td><input type='file' name='imageFile'/></td>" +
      "<td><input name='imageName'></input></td>" +
      "<td><input name='note' /></td>" +
      "<td><a href='javascript:;' onclick='deleteCurrentRow(this);'>" +
      "<font color='red'>刪除</font></a></td>" +
      "</tr>";
    $("#allDatas tr:last-child").after(trcomp);
}

// 刪除目前列:先確認,再沿著 DOM 往上找到 tr 並移除
function deleteCurrentRow(obj) {
    var isDelete = confirm("真的要刪除嗎?");
    if (isDelete) {
        var tr = obj.parentNode.parentNode;   // a → td → tr
        var tbody = tr.parentNode;
        tbody.removeChild(tr);
    }
}
</script>
</body>
</html>
關鍵邏輯說明
新增用 after() 而不是 append()。$("#allDatas tr:last-child").after(...) 的意思是「抓最後一列,然後在它後面插入」,結果等同加在表格尾端。若改用 $("#allDatas").append(...) 也可以,但要注意有些瀏覽器會自動補上 <tbody>,直接 append 到 table 反而容易出錯。
刪除靠的是 DOM 的父子關係。傳進來的 this 是 <a>,它的 parentNode 是 <td>,再上一層才是 <tr>,所以要寫兩次 parentNode。這個「層級數」會隨你的結構改變,改版時最容易在這裡出問題。
寫得更健壯一點的版本
上面的寫法能跑,但有幾個地方值得改良。用 jQuery 的 closest() 取代一層層 parentNode,結構再怎麼嵌套都不怕:
function addCurrentRow() {
    var $tr = $('<tr>' +
        "<td><input type='file' name='imageFile'/></td>" +
        "<td><input name='imageName'></td>" +
        "<td><input name='note' /></td>" +
        "<td><a href='javascript:;' class='del-row'>刪除</a></td>" +
      '</tr>');
    $("#allDatas").append($tr);
}

// 用事件委派,動態新增的列也自動生效,不必重新綁定
$("#allDatas").on("click", ".del-row", function () {
    if (!confirm("真的要刪除嗎?")) return;
    $(this).closest("tr").remove();     // 不管嵌套多深都能找到目標列
});
為什麼要用事件委派?因為 $(".del-row").click(...) 只會綁到當下存在的元素,之後動態新增的列不會有行為。改用 on() 委派到父層,新舊列都吃得到。
實務上還要記得的事
欄位 name 要用陣列寫法。多列同名的輸入欄位,後端會很難區分。建議改成 name="imageName[]",或用索引 name="imageName_0" 搭配重新編號。
刪除後的索引最好重排。如果你用索引當作識別,刪掉中間某列後要記得重新編號,否則後端收到的索引會不連續。
表單欄位記得加驗證。動態產生的欄位同樣要檢查必填,別讓使用者送出半空的資料列。
掌握「拼字串插入」與「closest 定位後移除」這兩個動作,再加上事件委派,動態表格的基本需求就都能應付了。