XPath 軸(Axis)語法詳解(下):self、following 與 attribute
編輯:XML詳解
本文延續上一篇,示範 self、following/following-sibling、preceding/preceding-sibling、attribute 與 parent 這幾個軸的實際行為。所有範例都搭配 XSLT 執行,方便直接觀察差異。
6. self 軸
songs.xslt 的內容如下:
<?XML version="1.0" encoding="gb2312"?>
<xsl:stylesheet version="1.0" XMLns:xsl="https://www.w3.org/1999/XSL/Transform">
 <xsl:template match="/">
 <Html>
 <head><title>練習使用child軸</title></head>
 <body>
 <xsl:apply-templates select="歌曲列表"/>
 </body>
 </Html>
 </xsl:template>
 <xsl:template match="歌曲列表">
 <xsl:apply-templates select="child::*"/>
 </xsl:template>
 <xsl:template match="text()">
 文本節點開始:<xsl:value-of select="self::text()"/>:文本節點結束<br/>
 </xsl:template>
 <xsl:template match="*">
 元素節點開始:<xsl:value-of select="self::*"/>:元素節點結束<br/>
 </xsl:template>
</xsl:stylesheet>
可以明顯看出,self 軸指的就是「節點本身」。實務上,以上寫法都可以用 . 來取代。
7. following 軸與 following-sibling 軸
songs.XML 的內容如下:
<?XML version="1.0" encoding="gb2312"?>
<?XML-stylesheet type="text/xsl" href="songs.xslt"?>
<歌曲列表>
 這個歌曲列表有兩首歌
 <名稱>周懂專輯</名稱>
 <!--第一首歌曲 -->
 <歌曲 日期="2003-11-12">
 月亮代表我的心
 <名稱>夏天裡的一把雨</名稱>
 <作曲家>張三</作曲家>
 <長度>4:20</長度>
 <藝術家>小天王</藝術家>
 月亮代表你的心
 </歌曲>
 <!--第二首歌曲 -->
 <歌曲 日期="2005-12-30">
 月亮代表他的心
 <名稱>冬天裡的一把雪</名稱>
 <作曲家 sex="T">王五</作曲家>
 <作曲家>李四</作曲家>
 <藝術家>周董</藝術家>
 月亮代表她的心
 </歌曲>
</歌曲列表>
對應的 songs.xslt 如下:
<?XML version="1.0" encoding="gb2312"?>
<xsl:stylesheet version="1.0" XMLns:xsl="https://www.w3.org/1999/XSL/Transform">
 <xsl:template match="/">
 <Html>
 <head><title>練習使用child軸</title></head>
 <body>
 <xsl:apply-templates select="歌曲列表"/>
 </body>
 </Html>
 </xsl:template>
 <xsl:template match="歌曲列表">
 <xsl:apply-templates select="歌曲"/>
 </xsl:template>
 <xsl:template match="歌曲">
 <xsl:apply-templates select="child::名稱/following::*"/>
 </xsl:template>
 <xsl:template match="*">
 <h3>元素節點<xsl:value-of select="."/></h3>
 </xsl:template>
 <xsl:template match="text()">
 <h3>文本節點<xsl:value-of select="."/></h3>
 </xsl:template>
</xsl:stylesheet>
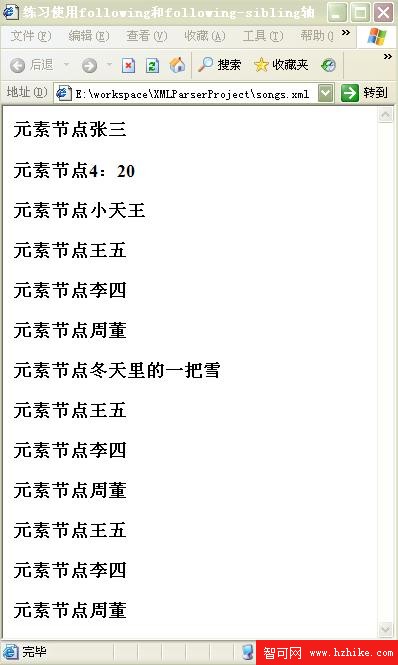
執行結果如下圖:
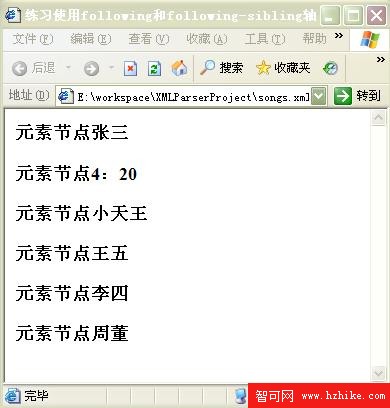
把 following::* 改成 following-sibling::*,結果變成:
兩者的差異在於:
following::*代表上下文節點之後的所有元素節點。following-sibling::*代表上下文節點之後、且與它共有同一個父節點的那些節點。
注意:以上兩例中,上下文節點都是「名稱」節點。
8. preceding 軸與 preceding-sibling 軸
這兩個軸與 following 系列完全對稱,只是方向相反,這裡就不重複舉例,留給各位自行驗證。
9. attribute 軸
songs.XML 沿用上面的內容,songs.xslt 如下:
<?XML version="1.0" encoding="gb2312"?>
<xsl:stylesheet version="1.0" XMLns:xsl="https://www.w3.org/1999/XSL/Transform">
<xsl:template match="/">
<Html>
<head><title>練習使用attribute軸</title></head>
<body>
<xsl:apply-templates select="歌曲列表"/>
</body>
</Html>
</xsl:template>
<xsl:template match="歌曲列表">
<xsl:apply-templates select="歌曲"/>
</xsl:template>
<xsl:template match="歌曲">
<xsl:apply-templates select="attribute::日期"/>
</xsl:template>
<xsl:template match="attribute::日期">
<xsl:value-of select="."/><br/>
</xsl:template>
</xsl:stylesheet>執行結果如下:
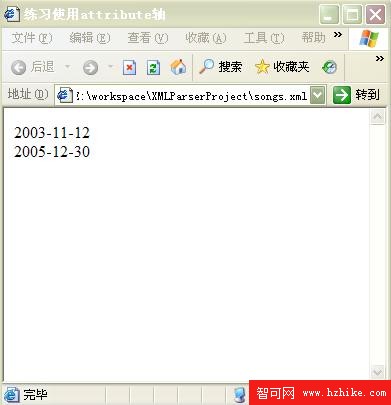
用法說明:
attribute::日期代表上下文節點的「日期」屬性。attribute::*代表上下文節點的所有屬性。- 實務上可以簡寫成
@日期與@*。
10. parent 軸
這個軸比較單純,代表上下文節點的父節點。以下 xslt 片段示範如何取得父節點:
<?XML version="1.0" encoding="gb2312"?>
<xsl:stylesheet version="1.0" XMLns:xsl="https://www.w3.org/1999/XSL/Transform">
<xsl:template match="/">
<Html>
<head><title>練習使用parent軸</title></head>
<body>
<xsl:apply-templates select="歌曲列表"/>
</body>
</Html>
</xsl:template>
<xsl:template match="歌曲列表">
<xsl:apply-templates select="歌曲"/>
</xsl:template>
<xsl:template match="歌曲">
<xsl:apply-templates select="名稱"/>
</xsl:template>
<xsl:template match="名稱">
<xsl:value-of select="parent::歌曲"/><br/>
</xsl:template>
</xsl:stylesheet>結果如下圖:
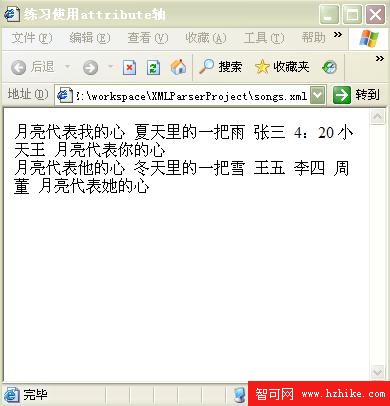
parent::歌曲 代表上下文節點的父節點(歌曲節點)。另外,若上下文節點本身是元素節點,用 parent::* 也能表達父節點;但最通用的寫法仍是 parent::node(),簡寫為 ..。
讀完上下兩篇,你應該已經能針對 XML 的任意位置寫出精準的定位路徑——這正是 XSLT 樣板比對與 XPath 查詢真正的力量所在。