想真正熟悉 HTML5 的語義元素,最好的方式就是拿一份經典的 HTML 文件來動手改造,把 HTML5 的「新鮮養分」灌進去。本文就帶你從頭到尾改造一個只包含單篇文章的簡單頁面。
改造前的原始頁面
我們的起點是 ApocalypsePage_Original.html,這是一個格式相當規範的頁面,所有樣式都來自外部樣式表:
<!DOCTYPE html>
<html lang="zh-CN">
<head>
  <meta charset="utf-8">
  <title>Apocalypse Now</title>
  <link rel="stylesheet" href="ApocalypsePage_Original.CSS">
</head>
<body>
  <div class="Header">
    <h1>How the World Could End</h1>
    <p class="Teaser">ScenariOS that spell the end of life as we know</p>
    <p class="Byline">by Ray N. Carnation</p>
  </div><!-- end Header -->
  <div class="Content">
    <p>...正文內容...</p>
  </div><!-- end Content -->
  <div class="Footer">
    <p class="Disclaimer">...</p>
  </div><!-- end Footer -->
</body>
</html>
在不套用任何額外樣式的情況下,效果如下:
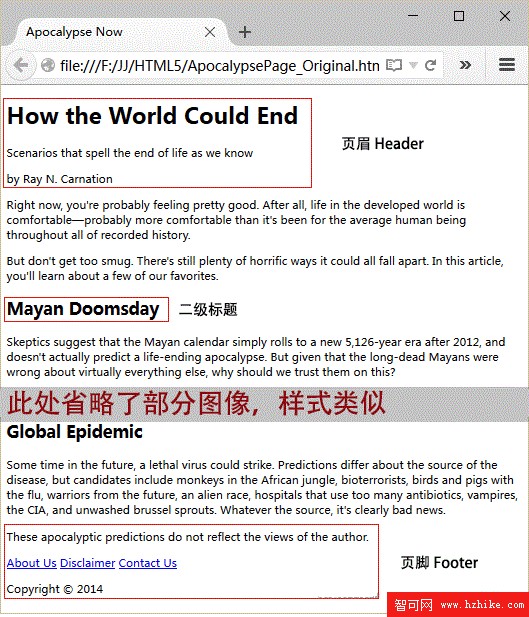
這裡透過三個 <div> 把頁面分成頁眉、內容與頁腳三部分。
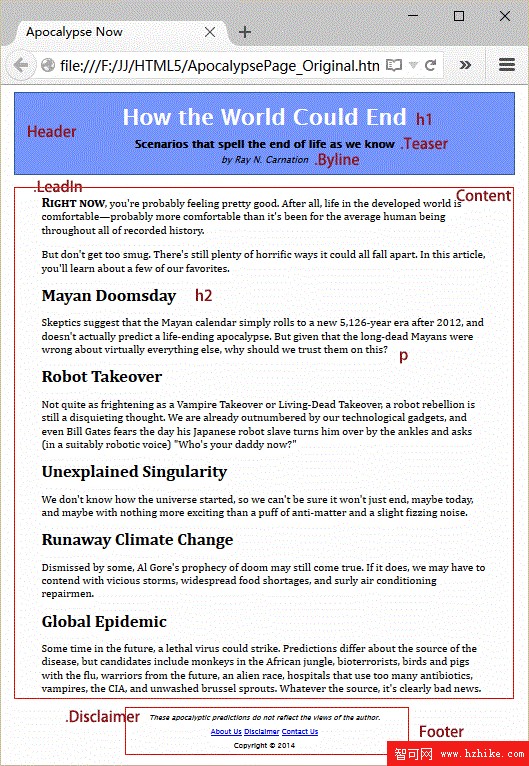
這個例子的樣式表相當簡潔:整頁最大寬度設為 800 像素,避免文字在寬螢幕上拉得太長;頁眉放在一個帶藍色邊框的盒子裡;內容區兩側加上內邊距;頁腳則置中於頁面底部。核心樣式大致如下:
body {
  font-family: "Lucida sans Unicode", "Lucida Grande", Geneva, sans-serif;
  max-width: 800px;
}
.Header {
  background-color: #7695FE;
  border: thin #336699 solid;
  padding: 10px;
  margin: 10px;
  text-align: center;
}
.Content {
  font-size: medium;
  padding-top: 20px;  padding-right: 50px;
  padding-bottom: 5px;  padding-left: 50px;
  line-height: 120%;
}
套用樣式表後,頁面瞬間有了精神:
用 HTML5 語義元素重建結構
<div> 至今仍是 Web 設計的必備元素,它是一個直觀、多用途的容器,可以為頁面中任何區塊套用樣式。但它的問題在於:<div> 本身並不傳達任何與內容相關的意義。
要改善這種情況,可以把 <div> 替換成更具描述性的語義元素。在 ApocalypsePage_Revised.html 中,原本 class 為 Header 與 Footer 的兩個 <div>,已經被替換成 <header> 與 <footer>:
<header> <h1>How the World Could End</h1> <p class="Teaser">ScenariOS that spell the end of life as we know</p> <p class="Byline">by Ray N. Carnation</p> </header> ... <footer> <p class="Disclaimer">These apocalyptic predictions do not reflect the views of the author.</p> ... <p>Copyright © 2014</p> </footer>
對應的 CSS 也必須同步調整,把 .Header 與 .Footer 選擇器改為 header 與 footer,其餘樣式維持不變。
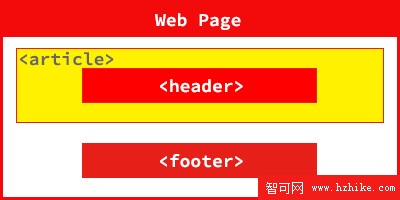
接著還有個元素值得派上用場,那就是 <article>,它代表一段完整、自成一體的內容。<article> 通常涵蓋報導或文章的標題、署名與正文,因此加上它之後的結構如下:
<article>
  <header>
    <h1>How the World Could End</h1>
    <p class="Teaser">ScenariOS that spell the end of life as we know</p>
    <p class="Byline">by Ray N. Carnation</p>
  </header>
  <div class="Content">
    <p>...正文內容...</p>
  </div><!-- end Content -->
</article>
重新設計後,頁面結構煥然一新:
用 <figure> 加入插圖
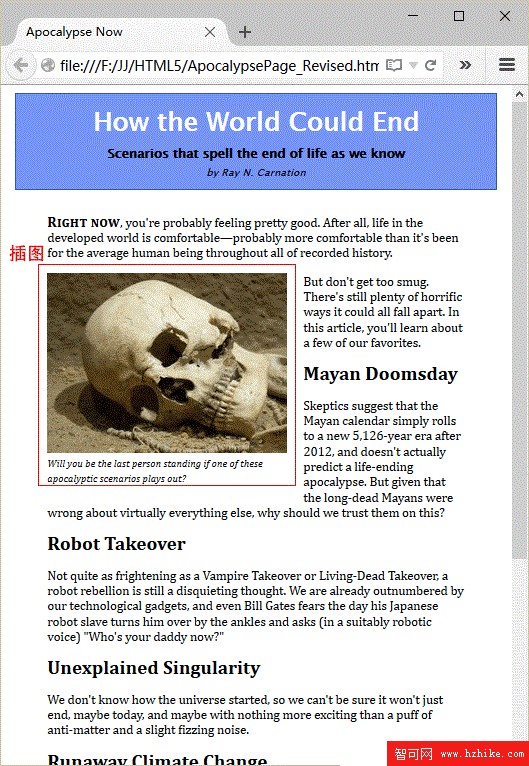
很多頁面都會放圖片,但「插圖」(figure)與「圖片」的概念並不完全相同。插圖雖然獨立於正文,卻會在文本中被提及。一般來說,插圖應該是浮動的,還會搭配一段浮動的圖題。
以下是在第一段與第二段正文之間插入插圖的標記寫法:
<div class="Content">
  <p><span class="LeadIn">Right now</span>, you're ...</p>
  <div class="FloatFigure">
    <img src="human_skull.jpg" alt="Human skull">
    <p>Will you be the last person standing if one of these apocalyptic scenariOS plays out?</p>
  </div>
  <p>But don't get too smug. There's...</p>
</div>
對應的樣式規則如下:
.FloatFigure {
  float: left;
  margin: 0px 20px 0px 0px;
}
.FloatFigure p {
  max-width: 300px;
  font-size: small;
  font-style: italic;
  margin-bottom: 5px;
}
下圖展示了效果:插圖正好在第一段文字之後,浮動於後續內容的左側;我們刻意限制了圖題的寬度,讓它顯示得充實而優雅。
HTML5 提供了 <figure> 元素,圖題可以放進其中的 <figcaption>,改造後的代碼更語義化:
<figure class="FloatFigure">
  <img src="human_skull.jpg" alt="Human skull">
  <figcaption>Will you be the last person standing if one of these apocalyptic scenariOS plays out?</figcaption>
</figure>
樣式表中的選擇器只需把 p 改成 figcaption 即可:
.FloatFigure figcaption {
  max-width: 300px;
  font-size: small;
  font-style: italic;
  margin-bottom: 5px;
}
最後還有個小細節:由於圖題已經完整說明了圖片內容,<img> 上的 alt 屬性其實可以刪除。
用 <aside> 加入附註
新的 <aside> 元素用來承載「與周圍文字沒有緊密關聯」的內容。你可以用它介紹另一個相關話題、對正文的某個觀點做補充說明,甚至拿來放廣告或相關連結。
下面的例子把它用作醒目引文(pull quote)。用 <div> 當然也能做出同樣的效果,但 <aside> 讓標記更有意義:
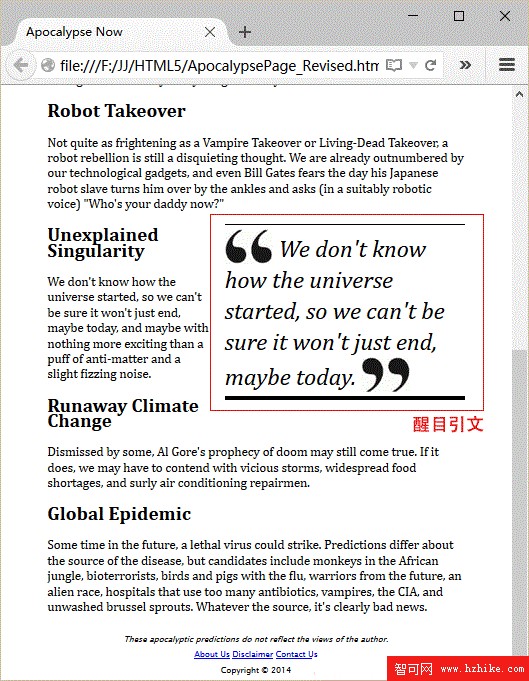
<p>... (in a suitably robotic voice) "Who's your daddy now?"</p>

<aside class="PullQuote">
  <img src="quotes_start.png" alt="Quote">
  We don't know how the universe started, so we can't be sure it won't just end, maybe today.
  <img src="quotes_end.png" alt="End quote">
</aside>

<h2>Unexplained Singularity</h2>
對應的樣式如下:
.PullQuote {
  float: right;
  max-width: 300px;
  border-top: thin black solid;
  border-bottom: thick black solid;
  font-size: 30px;
  line-height: 130%;
  font-style: italic;
  padding-top: 5px;
  padding-bottom: 5px;
  margin-left: 15px;
  margin-bottom: 10px;
}
.PullQuote img {
  vertical-align: bottom;
}
就這樣,一個原本平淡無奇的頁面,透過 HTML5 的語義元素變得結構分明、易於理解,也更貼近未來的標準。
- 上一篇文章: HTML5 入門完全指南:從最精簡的文件到完整的頁面骨架
- 下一篇文章: HTML5 audio 標簽完全解析:跨瀏覽器音訊播放實戰