好久沒寫博客,再不更新都要長蘑菇了。這次分享一個很實用的小組合:用兩個前端插件搭出完整的頭像上傳體驗。
業務需求
- 上傳後可裁剪,且落到伺服器時必須是正方形。
- 美化原生
<input type="file">,預設樣式實在難以入眼。 - 頭像需做質量壓縮與尺寸裁剪,減輕瀏覽器與儲存壓力。
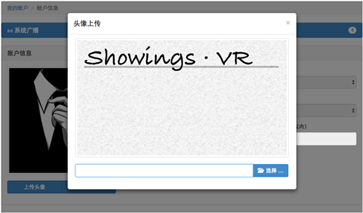
用到的技術與插件
- Jcrop:前端裁剪圖片
- bootstrap-fileinput:優化上傳控件外觀
- ArtTemplate:JS 版模板引擎,非常好用
- bootstrap-sco.modal.js:Bootstrap 模態插件
- SpringMVC:用
MultipartFile接收檔案,效率更高 - Image / ImageIO:Java 內建圖片處理能力
原理:Jcrop 並沒有真的裁圖

這是最容易被誤解的一點:Jcrop 在瀏覽器端只做「收集裁剪資訊」,真正的裁剪與壓縮仍然發生在伺服器。圖片上那 8 個控制點讓使用者框選區域,選好之後插件回傳四個值——選框左上角原點座標 x/y,以及裁剪框的 width/height。
但要注意:這四個值是相對於外層容器的顯示尺寸,而不是原圖的真實像素。舉例說,我放入的個人照實際寬度 852px,Jcrop 回報的裁剪寬度是 312px——那是縮放後的寬度。所以後端必須依縮放比例把 312px 還原成原圖對應的實際寬度,否則裁出來的位置必然偏移。
HTML:一段 ArtTemplate 模板
 <script id="portraitUpload" type="text/html">
<div style="padding: 10px 20px">
  <form role="form" enctype="multipart/form-data" method="post">
    <div class="embed-responsive embed-responsive-16by9">
      <div class="embed-responsive-item pre-scrollable">
        <img alt="" src="${pageContext.request.contextPath}/img/showings.jpg" id="cut-img" class="img-responsive img-thumbnail"/>
      </div>
    </div>
    <div class="white-divider-md"></div>
    <input type="file" name="imgFile" id="fileUpload"/>
    <div class="white-divider-md"></div>
    <div id="alert" class="alert alert-danger hidden" role="alert"></div>
    <input type="hidden" id="x" name="x"/>
    <input type="hidden" id="y" name="y"/>
    <input type="hidden" id="w" name="w"/>
    <input type="hidden" id="h" name="h"/>
  </form>
</div>
</script>
這段模板放在 </body> 上方即可。因為 MIME 型別是 text/html,瀏覽器不會把它當成頁面內容渲染,使用者看不到原始碼,但在 Chrome 除錯時可以查到。它最終會被塞進模態視窗的內容區。
幾個 class 的作用值得說明:embed-responsive-16by9 用來鎖定預覽圖的外層比例;內層加上 pre-scrollable 是關鍵一步——外層寬高被限制死,圖片本身又帶了 img-responsive,一旦圖片過高就會變形並妨礙框選,加上這個 class 後超出部分以滾動條呈現,既不影響裁剪,也避免模態視窗被拉得過長(行動端尤其明顯)。
最後四個隱藏域顧名思義,用來承載 Jcrop 產生的原點座標與裁剪寬高。
JS:頁面邏輯
 $(document).ready(function () {
   new PageInit().init();
 });

 function PageInit() {
   var api = null;
   var _this = this;

   this.init = function () {
     $("[name='upload']").on('click', this.portraitUpload);
   };

   this.portraitUpload = function () {
     var model = $.scojs_modal({
       title: '頭像上傳',
       content: template('portraitUpload'),
       onClose: refresh
     });
     model.show();

     var fileUp = new FileUpload();
     var portrait = $('#fileUpload');
     var alert = $('#alert');
     fileUp.portrait(portrait, '/file/portrait', _this.getExtraData);

     portrait.on('change', _this.readURL);
     portrait.on('fileuploaderror', function (event, data, msg) {
       alert.removeClass('hidden').html(msg);
       fileUp.fileinput('disable');
     });
     portrait.on('fileclear', function (event) {
       alert.addClass('hidden').html();
     });
     portrait.on('fileloaded', function (event, file, previewId, index, reader) {
       alert.addClass('hidden').html();
     });
     portrait.on('fileuploaded', function (event, data) {
       if (!data.response.status) {
         alert.html(data.response.message).removeClass('hidden');
       }
     });
   };

   this.readURL = function () {
     var img = $('#cut-img');
     var input = $('#fileUpload');
     if (input[0].files && input[0].files[0]) {
       var reader = new FileReader();
       reader.readAsDataURL(input[0].files[0]);
       reader.onload = function (e) {
         img.removeAttr('src');
         img.attr('src', e.target.result);
         img.Jcrop({
           setSelect: [20, 20, 200, 200],
           handleSize: 10,
           aspectRatio: 1,
           onSelect: updateCords
         }, function () {
           api = this;
         });
       };
       if (api != undefined) {
         api.destroy();
       }
     }

     function updateCords(obj) {
       $("#x").val(obj.x);
       $("#y").val(obj.y);
       $("#w").val(obj.w);
       $("#h").val(obj.h);
     }
   };

   this.getExtraData = function () {
     return {
       sw: $('.jcrop-holder').css('width'),
       sh: $('.jcrop-holder').css('height'),
       x: $('#x').val(),
       y: $('#y').val(),
       w: $('#w').val(),
       h: $('#h').val()
     };
   };
 }
幾個事件的分工
fileuploaderror:插件校驗副檔名、檔案大小不通過時,把錯誤訊息寫入頁面上的<div id="alert" class="alert alert-danger hidden">並停用控件。fileclear:使用者移除檔案,隱藏並清空提示區。fileloaded:剛選好檔案、尚未校驗時先清空上一次的錯誤訊息,避免殘留造成誤導。fileuploaded:檔案已送達後端,若回傳status為假則顯示後端給出的原因。
getExtraData 是整個方案的樞紐:除了 Jcrop 的 x/y/w/h,還額外送出 sw/sh(scaleWidth / scaleHeight),也就是 .jcrop-holder 容器的寬高,供後端換算縮放比例。雖然由於外層比例固定、實際可用的基準是寬度,但把兩個值都傳過去,日後若有以高度為準的場景也能直接複用。
bootstrap-fileinput 配置
 this.portrait = function (target, uploadUrl, data) {
   target.fileinput({
     language: 'zh',
     maxFileSize: 2048,          // 檔案最大容量
     uploadExtraData: data,      // 隨檔案一起送出的額外參數
     showPreview: false,         // 隱藏預覽,把位置讓給 Jcrop
     uploadAsync: true,          // 同步上傳
     dropZoneEnabled: false,     // 不顯示拖拽區
     uploadUrl: uploadUrl,
     allowedFileExtensions: ['jpg'],
     showUpload: true,
     showCaption: true,
     browseClass: "btn btn-primary",
     previewFileIcon: "<i class='glyphicon glyphicon-king'></i>",
     ajaxSettings: {             // 因啟用 SpringSecurity 的 CSRF 防護,需帶上 header
       beforeSend: function (xhr) {
         xhr.setRequestHeader(header, token);
       }
     }
   });
 };
關於 uploadAsync:個人偏好把檔案上傳做成同步。上傳是耗時操作,而後續邏輯(例如刷新頁面)往往需要等上傳成功才安全,同步可以避免競態帶來的怪問題。至於預覽功能,這個插件本身強大到足以獨立勝任相冊管理,但這次要和 Jcrop 搭配,只能忍痛割掉。
SpringMVC:接收並處理檔案
 @ResponseBody
 @RequestMapping(value = "/portrait", method = {RequestMethod.POST})
 public JsonResult upload(HttpServletRequest request) throws Exception {
   Integer x = Integer.parseInt(MyStringTools.checkParameter(request.getParameter("x"), "圖片截取異常:X!"));
   Integer y = Integer.parseInt(MyStringTools.checkParameter(request.getParameter("y"), "圖片截取異常:Y!"));
   Integer w = Integer.parseInt(MyStringTools.checkParameter(request.getParameter("w"), "圖片截取異常:W!"));
   Integer h = Integer.parseInt(MyStringTools.checkParameter(request.getParameter("h"), "圖片截取異常:H!"));

   String scaleWidthString = MyStringTools.checkParameter(request.getParameter("sw"), "圖片截取異常:SW!");
   int swIndex = scaleWidthString.indexOf("px");
   Integer sw = Integer.parseInt(scaleWidthString.substring(0, swIndex));

   String scaleHeightString = MyStringTools.checkParameter(request.getParameter("sh"), "圖片截取異常:SH!");
   int shIndex = scaleHeightString.indexOf("px");
   Integer sh = Integer.parseInt(scaleHeightString.substring(0, shIndex));

   SysUsers sysUsers = HttpTools.getSessionUser(request);
   int userID = sysUsers.getUserId();
   String filePath = FileTools.getPortraitPath(userID);
   CommonsMultipartResolver multipartResolver =
       new CommonsMultipartResolver(request.getSession().getServletContext());
   String path;

   if (multipartResolver.isMultipart(request)) {
     MultipartHttpServletRequest multiRequest = (MultipartHttpServletRequest) request;
     Iterator iterator = multiRequest.getFileNames();
     while (iterator.hasNext()) {
       MultipartFile multipartFile = multiRequest.getFile(iterator.next().toString());
       if (multipartFile != null) {
         String[] allowSuffix = {".jpg",".JPG"};
         if (!FileTools.checkSuffix(multipartFile.getOriginalFilename(), allowSuffix)) {
           throw new BusinessException("文件後綴名不符合要求!");
         }
         path = filePath + FileTools.getPortraitFileName(multipartFile.getOriginalFilename());
         multipartFile.transferTo(new File(path));
         if (FileTools.imgCut(path, x, y, w, h, sw, sh)) {
           CompressTools compressTools = new CompressTools();
           if (compressTools.simpleCompress(new File(path))) {
             return JsonResult.success(FileTools.filePathToSRC(path, FileTools.IMG));
           } else {
             return JsonResult.error("圖片壓縮失敗!請重新上傳!");
           }
         } else {
           return JsonResult.error("圖片截取失敗!請重新上傳!");
         }
       }
     }
   }
   return JsonResult.error("圖片獲取失敗!請重新上傳!");
 }
Image 縮放裁剪
 /**
  * 截圖工具,根據截取的比例進行縮放裁剪
  * @param path 圖片路徑
  * @param zoomX 縮放後的 X 坐標
  * @param zoomY 縮放後的 Y 坐標
  * @param zoomW 縮放後的截取寬度
  * @param zoomH 縮放後的截取高度
  * @param scaleWidth 縮放後圖片的寬度
  * @param scaleHeight 縮放後圖片的高度
  * @return 是否成功
  */
 public static boolean imgCut(String path, int zoomX, int zoomY, int zoomW, int zoomH,
                              int scaleWidth, int scaleHeight) throws Exception {
   Image img;
   ImageFilter cropFilter;
   BufferedImage bi = ImageIO.read(new File(path));
   int fileWidth = bi.getWidth();
   int fileHeight = bi.getHeight();

   double scale = (double) fileWidth / (double) scaleWidth;
   double realX = zoomX * scale;
   double realY = zoomY * scale;
   double realW = zoomW * scale;
   double realH = zoomH * scale;

   if (fileWidth >= realW && fileHeight >= realH) {
     Image image = bi.getScaledInstance(fileWidth, fileHeight, Image.SCALE_DEFAULT);
     cropFilter = new CropImageFilter((int) realX, (int) realY, (int) realW, (int) realH);
     img = Toolkit.getDefaultToolkit().createImage(
         new FilteredImageSource(image.getSource(), cropFilter));
     BufferedImage bufferedImage = new BufferedImage((int) realW, (int) realH, BufferedImage.TYPE_INT_RGB);
     Graphics g = bufferedImage.getGraphics();
     g.drawImage(img, 0, 0, null);
     g.dispose();
     return ImageIO.write(bufferedImage, "JPEG", new File(path));
   } else {
     return true;
   }
 }
這裡有一個很容易被忽略的細節:比例必須用 double 計算,且寬高要先轉型再相除。若用整數除法,結果會被截斷,精度損失會隨著圖片縮放倍率被放大,最終裁剪位置可能偏離到面目全非。
圖片壓縮
我把壓縮邏輯獨立成一個通用類 CompressTools,支援等比與非等比縮放,並提供直接覆蓋原檔的便捷方法:
 public class CompressTools {
   private File file;              // 文件對象
   private String inputDir;        // 輸入圖路徑
   private String outputDir;       // 輸出圖路徑
   private String inputFileName;   // 輸入圖文件名
   private String outputFileName;  // 輸出圖文件名
   private int outputWidth = 100;  // 默認輸出圖片寬
   private int outputHeight = 100; // 默認輸出圖片高
   private boolean proportion = true; // 是否等比縮放(默認為等比)
   private static Logger logger = LoggerFactory.getLogger(CompressTools.class);

   public CompressTools() {}
   public CompressTools(boolean proportion) { this.proportion = proportion; }

   public CompressTools setInputInfo(String inputDir, String inputFileName) {
     this.inputDir = inputDir;
     this.inputFileName = inputFileName;
     return this;
   }

   public CompressTools setOutputInfo(String outputDir, String outputFileName,
                                      int outputHeight, int outputWidth, boolean proportion) {
     this.outputDir = outputDir;
     this.outputFileName = outputFileName;
     this.outputWidth = outputWidth;
     this.outputHeight = outputHeight;
     this.proportion = proportion;
     return this;
   }

   public boolean compress() throws Exception {
     file = new File(inputDir);
     if (!file.exists()) {
       throw new BusinessException("文件不存在!");
     }
     Image img = ImageIO.read(file);
     if (img.getWidth(null) == -1) {
       return false;
     }
     int newWidth;
     int newHeight;
     if (this.proportion) {
       // 為等比縮放計算輸出的圖片寬度及高度
       double rate1 = ((double) img.getWidth(null)) / (double) outputWidth + 0.1;
       double rate2 = ((double) img.getHeight(null)) / (double) outputHeight + 0.1;
       double rate = rate1 > rate2 ? rate1 : rate2;
       newWidth = (int) (((double) img.getWidth(null)) / rate);
       newHeight = (int) (((double) img.getHeight(null)) / rate);
     } else {
       newWidth = outputWidth;
       newHeight = outputHeight;
     }
     long start = System.currentTimeMillis();
     BufferedImage tag = new BufferedImage(newWidth, newHeight, BufferedImage.TYPE_INT_RGB);
     // Image.SCALE_SMOOTH:平滑度優先於速度,質量更好但較慢
     tag.getGraphics().drawImage(
         img.getScaledInstance(newWidth, newHeight, Image.SCALE_SMOOTH), 0, 0, null);
     FileOutputStream out = new FileOutputStream(outputDir);
     JPEGImageEncoder encoder = JPEGCodec.createJPEGEncoder(out);
     encoder.encode(tag);
     out.close();
     long time = System.currentTimeMillis() - start;
     logger.info("[輸出路徑]:" + outputDir + "\t[圖片名稱]:" + outputFileName
         + "\t[壓縮前大小]:" + getPicSize() + "\t[耗時]:" + time + "毫秒");
     return true;
   }

   /** 簡單壓縮:壓縮後直接覆蓋源文件 */
   public boolean simpleCompress(File images) throws Exception {
     setInputInfo(images.getPath(), images.getName());
     setOutputInfo(images.getPath(), images.getName(), 300, 300, true);
     return compress();
   }

   private String getPicSize() {
     return file.length() / 1024 + "KB";
   }
 }
附帶的 FileTools 工具類
裡面方法是常規操作:取副檔名、建立頭像目錄、把實體路徑轉成可訪問的相對路徑等,貼出來免得看的人一頭霧水。
 public class FileTools {
   public static final int IMG = 1;

   /** 獲取項目根目錄 */
   public static String getWebRootPath() {
     return System.getProperty("web.root");
   }

   /** 獲取頭像目錄,若不存在則直接創建 */
   public static String getPortraitPath(int userID) {
     String realPath = getWebRootPath() + "img/portrait/" + userID + "/";
     File file = new File(realPath);
     if (!file.exists() || !file.isDirectory()) {
       if (!file.mkdirs()) {
         throw new BusinessException("創建頭像文件夾失敗!");
       }
     }
     return realPath;
   }

   /** 重命名頭像文件 */
   public static String getPortraitFileName(String fileName) {
     return "portrait" + getSuffix(fileName);
   }

   /** 判斷文件後綴是否符合要求 */
   public static boolean checkSuffix(String fileName, String[] allowSuffix) {
     String fileExtension = getSuffix(fileName);
     boolean flag = false;
     for (String extension : allowSuffix) {
       if (fileExtension.equals(extension)) {
         flag = true;
       }
     }
     return flag;
   }

   public static String getSuffix(String fileName) {
     return fileName.substring(fileName.lastIndexOf(".")).toLowerCase();
   }

   /** 將文件地址轉成鏈接地址 */
   public static String filePathToSRC(String filePath, int fileType) {
     String href = "";
     if (null != filePath && !filePath.equals("")) {
       switch (fileType) {
         case IMG:
           if (filePath.contains("/img/")) {
             href = filePath.substring(filePath.indexOf("/img/"));
           }
           return href;
       }
     }
     return href;
   }

   /** 截圖工具,根據截取的比例進行縮放裁剪(同 imgCut,此處省略實現) */
   public static boolean imgCut(String path, int zoomX, int zoomY, int zoomW, int zoomH,
                                int scaleWidth, int scaleHeight) throws Exception {
     // 實現同上文 imgCut
     return true;
   }
 }
最後提醒一個坑:getWebRootPath() 想拿到動態路徑,必須在 web.xml 中聲明 webAppRootKey:
 <context-param>
  <param-name>webAppRootKey</param-name>
  <param-value>web.root</param-value>
</context-param>
否則 System.getProperty("web.root") 永遠是 null。這個配置放在 Spring 配置之後即可,作用就是把專案的本地根路徑寫進系統參數。
以上就是整個組合的完整思路:前端負責選取與回報座標,後端負責按比例還原、裁剪與壓縮。分工清晰,任何一層都能替換。
- 上一篇文章: 面向對象實現拖拽,並用原型鏈完成繼承擴展
- 下一篇文章: 原生 JS 實現列表排序:sort 加 appendChild 的巧妙組合