幾乎每個系統模塊都會遇到資料交換的需求。匯入能讓使用者省下大量逐筆輸入的功夫,匯出則方便對外提供或二次加工。本文在既有 Bootstrap 框架上,把這兩個流程以及 Office 文件、圖片的預覽處理一起做個更新整理。
1、資料匯入
界面自動生成時,我都會一併把查詢、匯入、匯出這些標準功能帶出來,畫面如下:
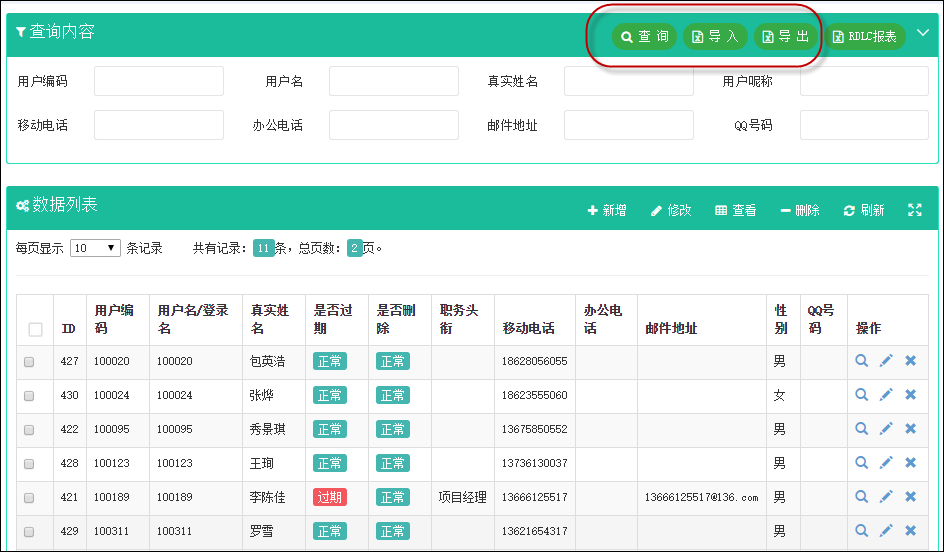
匯入界面我習慣做成一個 Modal 層,統一放在 index.cshtml 裡,讓整個頁面的處理更集中:
<!--導入數據操作層--> <div id="import" class="modal fade bs-modal-lg" tabindex="-1" role="dialog" aria-labelledby="myModalLabel" aria-hidden="true"> <div class="modal-dialog modal-lg"> <div class="modal-content"> <div class="modal-header bg-primary"> <button type="button" class="close" data-dismiss="modal" aria-hidden="true"></button> <h4 class="modal-title">文件導入</h4> </div> <div class="modal-body"> <div style="text-align:right;padding:5px"> <a href="~/Content/Template/User-模板.xls" onclick="javascript:Preview();"> <img alt="測試用戶信息-模板" src="~/Content/images/ico_excel.png" /> <span style="font-size:larger;font-weight:200;color:red">User-模板.xls</span> </a> </div> <hr/> <form id="ffImport" method="post"> <div title="Excel導入操作" style="padding: 5px" data-options="iconCls:'icon-key'"> <input class="easyui-validatebox" type="hidden" id="AttachGUID" name="AttachGUID" /> <input id="file_upload" name="file_upload" type="file" multiple="multiple"> <a href="javascript:;" class="btn btn-primary" id="btnUpload" onclick="javascript: $('#file_upload').uploadify('upload', '*')">上傳</a> <a href="javascript:;" class="btn btn-default" id="btnCancelUpload" onclick="javascript: $('#file_upload').uploadify('cancel', '*')">取消</a> <div id="fileQueue" class="fileQueue"></div> <br /> <hr style="width:98%" /> <div id="div_files"></div> <br /> </div> </form> <!--數據顯示表格--> <table id="gridImport" class="table table-striped table-bordered table-hover" cellpadding="0" cellspacing="0" border="0" class="display" width="100%"> <thead id="gridImport_head"> <tr> <th class="table-checkbox" style="width:40px"><input class="group-checkable" type="checkbox" onclick="selectAll(this)"></th> <th>用戶編碼</th> <th>用戶名/登錄名</th> <th>真實姓名</th> <th>職務頭銜</th> <th>移動電話</th> <th>辦公電話</th> <th>郵件地址</th> <th>性別</th> <th>QQ號碼</th> <th>備注</th> </tr> </thead> <tbody id="gridImport_body"></tbody> </table> </div> <div class="modal-footer"> <button type="button" class="btn btn-default" data-dismiss="modal">關閉</button> <button type="button" class="btn btn-primary" onclick="SaveImport()">保存</button> </div> </div> </div> </div>
這些程式碼多半是自動產生的,包含全部欄位,實際使用時再按業務需要裁剪。要開啟界面只需把這個層叫出來:
//顯示導入界面 function ShowImport() { $("#import").modal("show"); }
檔案上傳我用的是 Uploadify,當然換成先前介紹過的 File Input 也可以達到同樣效果。Uploadify 的初始化程式碼如下:
$(function () { //添加界面的附件管理 $('#file_upload').uploadify({ 'swf': '/Content/JQueryTools/uploadify/uploadify.swf', //FLash文件路徑 'buttonText': '浏 覽', //按鈕文本 'uploader': '/FileUpload/Upload', //處理上傳的頁面 'queueID': 'fileQueue', //隊列的ID 'queueSizeLimit': 1, //隊列最多可上傳文件數量,默認為999 'auto': false, //選擇文件後是否自動上傳,默認為true 'multi': false, //是否為多選,默認為true 'removeCompleted': true, //是否完成後移除序列,默認為true 'fileSizeLimit': '10MB', //單個文件大小,0為無限制,可接受KB,MB,GB等單位的字符串值 'fileTypeDesc': 'Excel Files', //文件描述 'fileTypeExts': '*.xls', //上傳的文件後綴過濾器 'onQueueComplete': function (event, data) { //所有隊列完成後事件 //業務處理代碼 //提示用戶Excel格式是否正常,如果正常加載數據 }, 'onUploadStart': function (file) { InitUpFile();//上傳文件前 ,重置GUID,每次不同 $("#file_upload").uploadify("settings", 'formData', { 'folder': '數據導入文件', 'guid': $("#AttachGUID").val() }); //動態傳參數 }, 'onUploadError': function (event, queueId, fileObj, errorObj) { //alert(errorObj.type + ":" + errorObj.info); } }); });
關鍵在 onQueueComplete 裡的業務處理:此時檔案已經在伺服器上了,接著要驗證格式,通過驗證才把內容載入表格供使用者勾選。
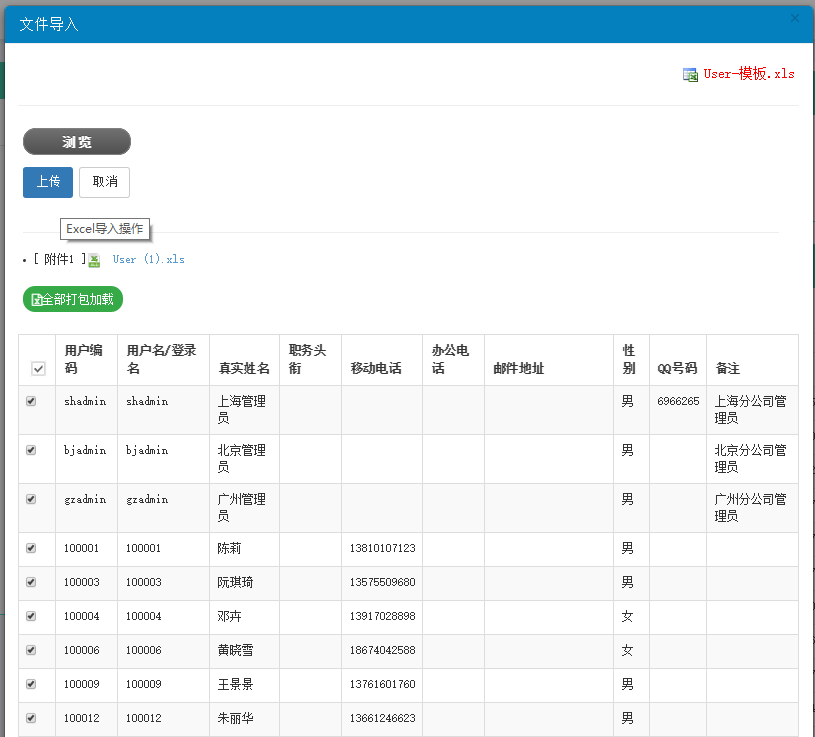
格式檢查用一個後端方法處理:
//提示用戶Excel格式是否正常,如果正常加載數據 $.ajax({ url: '/User/CheckExcelColumns?guid=' + guid, type: 'get', dataType: 'json', success: function (data) { if (data.Success) { InitGrid(); //重新刷新表格數據 showToast("文件已上傳,數據加載完畢!"); } else { showToast("上傳的Excel文件檢查不通過。請根據頁面右上角的Excel模板格式進行數據錄入。", "error"); } } });
只有欄位格式正確的檔案才會被讀取並顯示。把內容綁到表格上的程式碼如下:
//根據條件查詢並綁定結果 function InitGrid() { var guid = $("#AttachGUID").val(); var url = "/User/GetExcelData?guid=" + guid; $.getJSON(url, function (data) { $("#gridImport_body").html(""); $.each(data.rows, function (i, item) { var tr = "<tr>"; tr += "<td><input class='checkboxes' type=\"checkbox\" name=\"checkbox\" ></td>"; tr += "<td>" + item.HandNo + "</td>"; tr += "<td>" + item.Name + "</td>"; tr += "<td>" + item.FullName + "</td>"; tr += "<td>" + item.Title + "</td>"; tr += "<td>" + item.MobilePhone + "</td>"; tr += "<td>" + item.OfficePhone + "</td>"; tr += "<td>" + item.Email + "</td>"; tr += "<td>" + item.Gender + "</td>"; tr += "<td>" + item.QQ + "</td>"; tr += "<td>" + item.Note + "</td>"; tr += "</tr>"; $("#gridImport_body").append(tr); }); }); }
如果還需要指定匯入到哪個部門,可以再跳一個對話框讓使用者選擇,最後才提交:
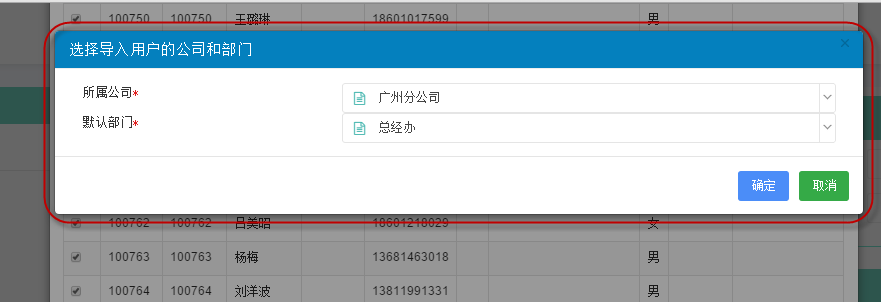
//保存導入的數據 function SaveImport() { //賦值給對象 $("#Company_ID3").select2("val", @Session["Company_ID"]).trigger('change'); $("#Dept_ID3").select2("val", @Session["Dept_ID"]).trigger('change'); $("#selectDept").modal("show"); }
確認後用 Ajax 把資料送到後端:
$.ajax({ url: '/User/SaveExcelData', type: 'post', dataType: 'json', contentType: 'application/json;charset=utf-8', traditional: true, success: function (data) { if (data.Success) { //保存成功 1.關閉彈出層,2.清空記錄顯示 3.刷新主列表 showToast("保存成功"); $("#import").modal("hide"); $(bodyTag).html(""); Refresh(); } else { showToast("保存失敗:" + data.ErrorMessage, "error"); } }, data: postData });
2、資料匯出
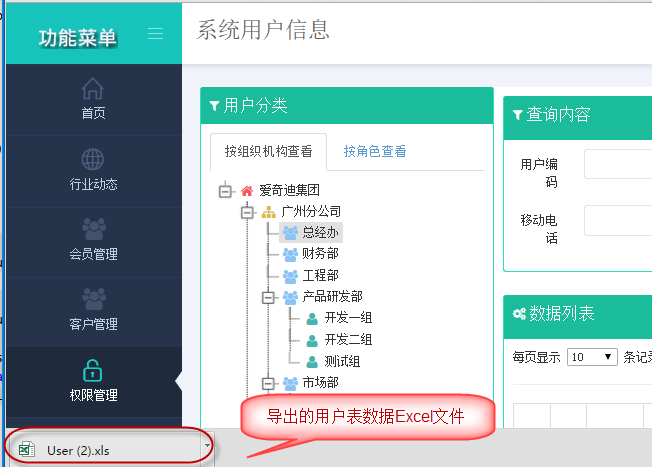
匯出相對單純:後端把資料寫進 Excel,再回傳檔案路徑讓前端下載。
//導出Excel數據 function ShowExport() { var url = "/User/Export"; var condition = $("#ffSearch").serialize();//獲取條件 executeExport(url, condition);//執行導出 }
//執行導出操作,輸出文件 function executeExport(url, condition) { $.ajax({ type: "POST", url: url, data: condition, success: function (filePath) { var downUrl = '/FileUpload/DownloadFile?file=' + filePath; window.location = downUrl; } }); }
3、附件預覽
使用者上傳的檔案往往需要能直接預覽,包含 Office 文件與圖片;實在不行,至少提供下載本機開啟。
Office 預覽有兩條路:一是走微軟的線上檢視服務,二是在本機轉成 HTML 再顯示。兩者可以並存,用一個設定項切換:
/// <summary> /// 根據附件ID,獲取對應查看的視圖URL。 /// 一般規則如果是圖片文件,返回視圖URL地址'/FileUpload/ViewAttach'; /// 如果是Office文件(word、PPT、Excel)等,可以通過微軟的在線查看地址進行查看:'https://view.officeapps.live.com/op/view.aspx?src=', /// 也可以進行本地生成HTML文件查看。如果是其他文件,可以直接下載地址。 /// </summary> /// <param name="id">附件的ID</param> /// <returns></returns> public ActionResult GetAttachViewUrl(string id) { string viewUrl = ""; FileUploadInfo info = BLLFactory<FileUpload>.Instance.FindByID(id); if (info != null) { string ext = info.FileExtend.Trim('.').ToLower(); string filePath = GetFilePath(info); bool officeInternetView = false;//是否使用互聯網在線預覽 string hostName = HttpUtility.UrlPathEncode("https://www.iqidi.com/");//可以配置一下,如果有必要 if (ext == "xls" || ext == "xlsx" || ext == "doc" || ext == "docx" || ext == "ppt" || ext == "pptx") { if (officeInternetView) { //返回一個微軟在線浏覽Office的地址,需要加上互聯網域名或者公網IP地址 viewUrl = string.Format("https://view.officeapps.live.com/op/view.aspx?src={0}{1}", hostName, filePath); } else { #region 動態第一次生成文件 //檢查本地Office文件是否存在,如不存在,先生成文件,然後返回路徑供查看 string webPath = string.Format("/GenerateFiles/Office/{0}.htm", info.ID); string generateFilePath = Server.MapPath(webPath); if (!FileUtil.FileIsExist(generateFilePath)) { string templateFile = BLLFactory<FileUpload>.Instance.GetFilePath(info); templateFile = Path.Combine(System.AppDomain.CurrentDomain.BaseDirectory, templateFile.Replace("\\", "/")); if (ext == "doc" || ext == "docx") { Aspose.Words.Document doc = new Aspose.Words.Document(templateFile); doc.Save(generateFilePath, Aspose.Words.SaveFormat.Html); } else if (ext == "xls" || ext == "xlsx") { Workbook workbook = new Workbook(templateFile); workbook.Save(generateFilePath, SaveFormat.Html); } else if (ext == "ppt" || ext == "pptx") { templateFile = templateFile.Replace("/", "\\"); PresentationEx pres = new PresentationEx(templateFile); pres.Save(generateFilePath, Aspose.Slides.Export.SaveFormat.Html); } } #endregion viewUrl = webPath; } } else { viewUrl = filePath; } } return Content(viewUrl); }
透過這個方法,前端就能知道 Office 預覽該往哪個 URL 取內容。頁面端只要判斷檔案類型再決定怎麼呈現:
if(type =="image") { var imgContent = '<img src="'+ viewUrl + '" />'; $("#divViewFile").html(imgContent); $("#file").modal("show"); } else { $.ajax({ type: 'GET', url: viewUrl, //async: false, //同步 //dataType: 'json', success: function (json) { $("#divViewFile").html(json); $("#file").modal("show"); }, error: function (xhr, status, error) { showError("操作失敗" + xhr.responseText); //xhr.responseText } }); }
最後由全域對話框把內容呈現出來:
$("#file").modal("show");
效果如下:
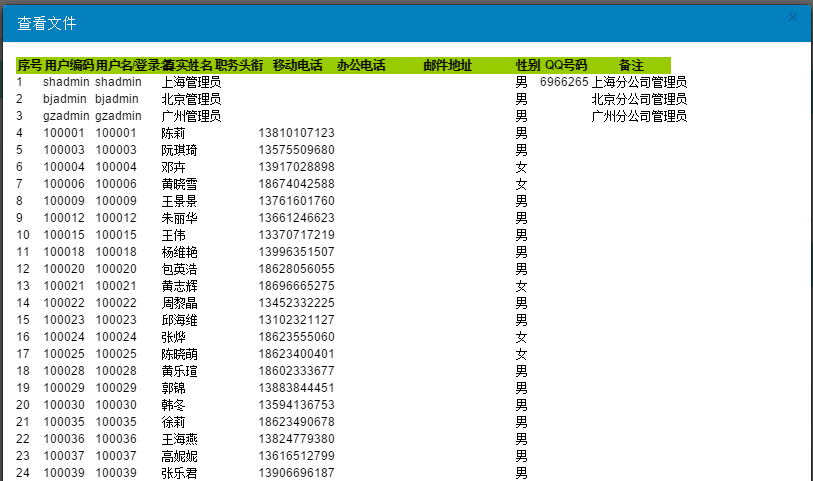
Word 文件的預覽:
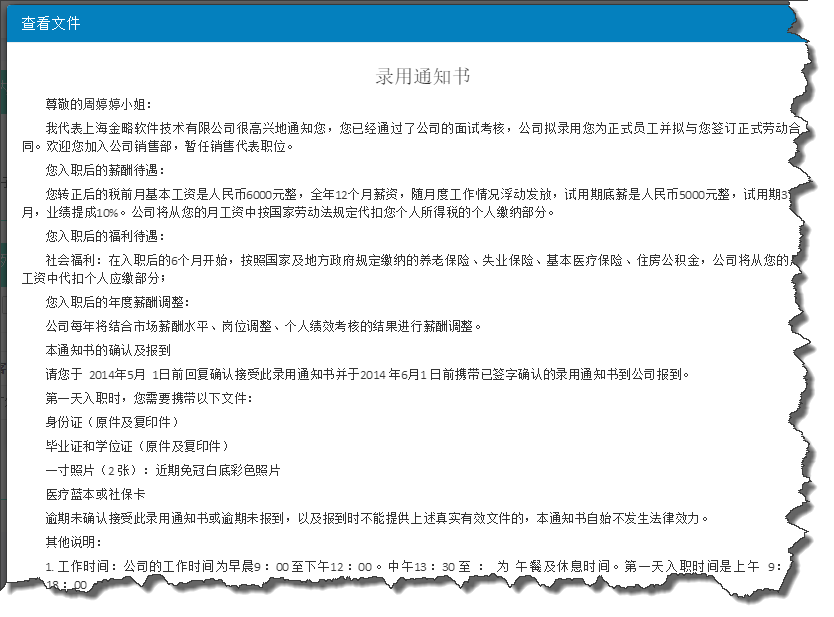
圖片文件的檢視:
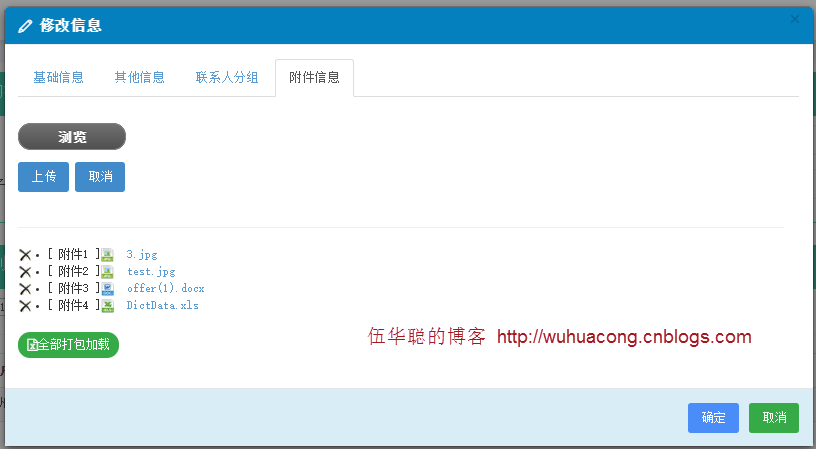
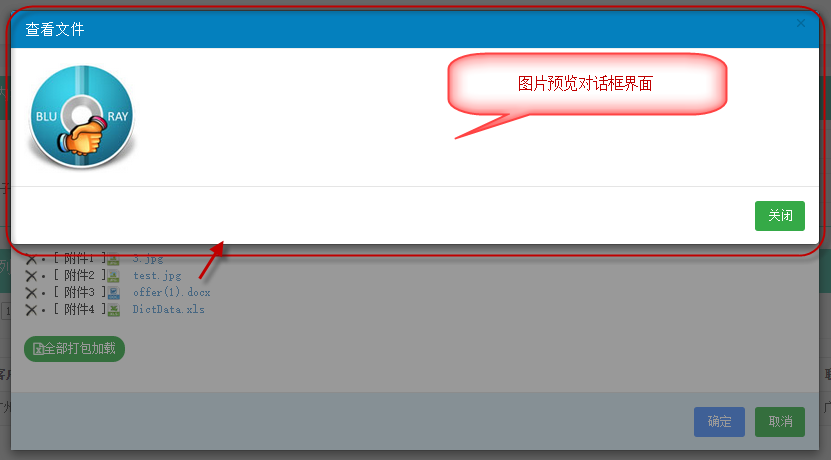
以上就是資料匯入、匯出與附件預覽這三個模塊的實作經驗整理,希望對大家有幫助。
- 上一篇文章: Metronic 開發框架經驗【八】框架整體功能與畫面總覽
- 下一篇文章: Metronic 開發框架經驗【六】對話框與提示框的處理及優化